-4-
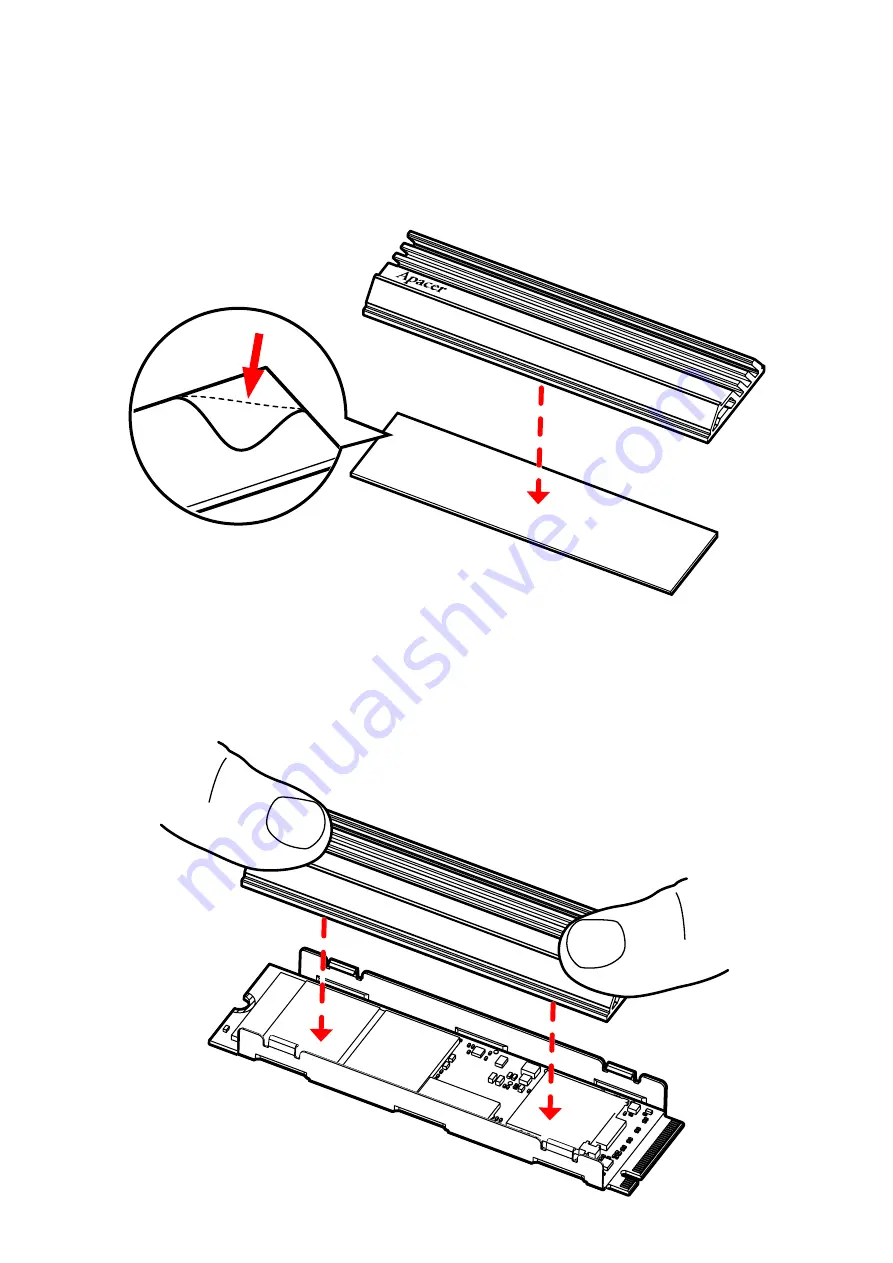
Step 3 :
Step 4 :
Attaching the thermal adhesive tape to the heatsink, and tearing off the
release paper for placing the heatsink later.
Place the heatsink on the bracket and align it with one side. Put two fingers
on both ends and press down with appropriate force. Press the heatsink
into the latch of the bracket.
Summary of Contents for AS2280Q4U
Page 1: ... 1 Quick Guide AS2280Q4U PCIe Gen4 x4 M 2 NVMe SSD English 繁體中文 簡體中文 ...
Page 8: ... 8 步驟 1 步驟 2 延著支架內的軌道水平插入 m 2 SSD 將 m 2 SSD 放入支架後 請檢查是否有保留左右兩側連接器和半月螺絲 孔的空間 裝配程序 ...
Page 10: ... 10 步驟 5 檢查散熱器是否鎖定在支架中並完成組裝 步驟 1 準備一個平頭螺絲刀 將平頭螺絲刀插入支架的一個鎖扣中 拆卸程序 裝配完成 ...
Page 13: ... 13 步骤 1 步骤 2 延着支架内的轨道水平插入 m 2 SSD 将 m 2 SSD 放入支架后 请检查是否有保留左右两侧连接器和半月螺丝 孔的空间 装配程序 ...
Page 15: ... 15 步骤 5 检查散热器是否锁定在支架中并完成组装 步骤 1 准备一个平头螺丝刀 将平头螺丝刀插入支架的一个锁扣中 拆卸程序 装配完成 ...


