background image


25

4-5. CF 

卡模組安裝


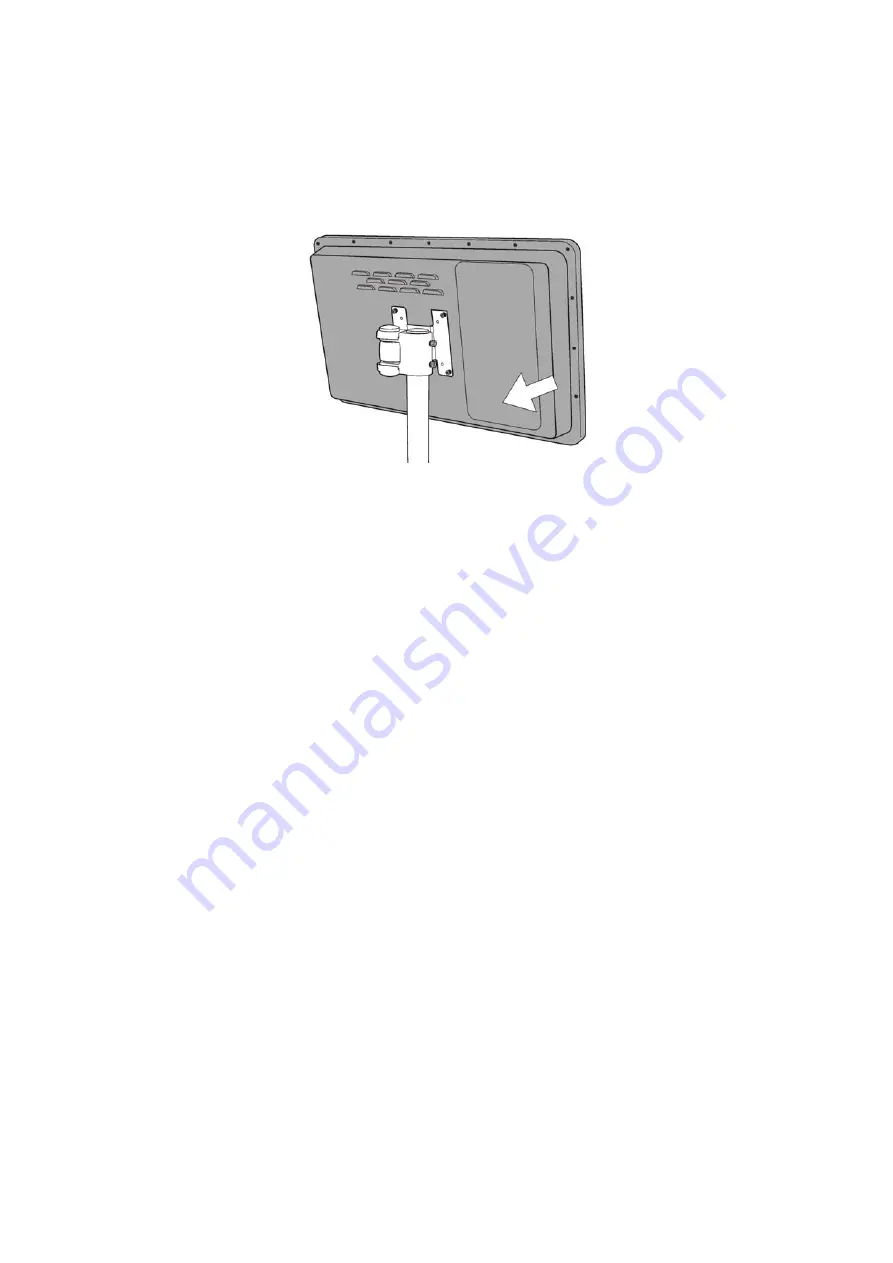
1. Turn over the system to access the HDD door. 

2. Unfasten the screw (x1) to remove the HDD door. 

1. 

將機器翻轉至背面,準備開啟硬碟門蓋。


2. 

鬆開

1

顆螺絲移除硬碟門蓋。


Summary of Contents for WARM TOUCH WT19M-RH

Page 1: ...1 WARM TOUCH WT19M RH WT19M RHI 技術手冊 ...

Page 2: ...分にする時は ゴミ箱に捨てないで下さい 汚 染を最小限に抑え 地球環境の最大限の保護のために 製品をリサイクルして下さい 廃電気 電子機器 WEEE の回収とリサイクルについての情報は 弊社ホームページwww aopen com の Green Products 環境に優しい製品 をご覧下さい 廢棄及回收處理 為了保護h境 請勿將本產品 作一般廢棄物處理 為減少h境污染 維護地球資源 本產品報廢 時 請回收本產品 Instruktion til bortskaffelse Danish Af hensyn til vores miljø bedes De ikke bortskaffe denne elektroniske enhed i en almindelig affaldsspand For at mindske forurening og sikre beskyttelse af...

Page 3: ...s Electriques et Electroniques DEEE ou WEEE vous êtes invité à visiter notre site à www aopen com sous Green Products Entsorgungsanleitung German Zum besseren Schutze unseres Planeten schmeissen Sie elektrische Geräte bitte nicht in öffentliche Mülleimer Zur Verringerung der Verschmutzung und zur Sicherstellung grösstmöglichen Schutzes der Umwelt recyceln Sie bitte das Produkt Für mehr Information...

Page 4: ...r nossa página na Internet em www aopen com sobre Green Products Instrucciones para depositar los productos electrónicos Spanish Para proteger mejor el medio ambiente por favor no deposite los productos electrónicos en los contenedores de basura tradicionales Para reducir la contaminación y proteger el medio ambiente se recomienda que los recicle Para más información acerca de dónde depositar y có...

Page 5: ...y any means electronically mechanically optically without the prior written permission of this company Disclaimer AOpen makes no warranties or representations either expressed or implied with respect to the content herein and specifically disclaims any warranties merchantability of fitness for any particular purpose AOpen and AOpen logos used herein are registered trademarks of AOpen Inc All other...

Page 6: ...ed by qualified service personnel 8 If one of the following situations arises get the equipment checked by a service personnel a Liquid has penetrated into the equipment b The equipment has been exposed to moisture c The equipment has not work well or you can not get it work according to user s manual d The equipment has dropped and damaged e If the equipment has obvious sign of breakage 9 Ambient...

Page 7: ... a circuit different from that to which the receiver is connected Consult the dealer or an experienced radio television technician for help Notice Shielded cables All connections to other computing devices must be made using shielded cables to maintain compliance with FCC regulations Notice Peripheral devices Only peripherals input output devices terminals printers etc certified to comply with Cla...

Page 8: ...系統組裝 14 3 1 硬碟置換 3 2 記憶體置換 3 3 CPU 置換 3 4 電源變壓器置換 4 安裝週邊系統 17 4 1 外部模組安裝 4 2 牆面掛架組裝 4 3 互動式媒體資訊站支架組裝 4 4 無線網路安裝 4 5 CF 卡模組安裝 4 6 收銀機 RJ 11 軟體配置 4 7 Gravity Vector Seneor s GPIO 針腳軟件配置 5 規格 31 6 跳線設定 33 6 1 對於 Huron River 主機板 7 VGA 螢幕模式定 RS232 or EDID 37 附錄 A 驅動程式安裝 39 附錄 B 簡易故障排除 40 ...

Page 9: ...anual are for the purpose of illustrative conveniences and are possessed by their respective firms We regret not informing about any changes in usage standards and other related information AOpen Company reserves the right of altering or modifying the content of this manual In case of any mistakes or incorrect descriptions which include those on the products AOpen makes no guarantee or commitments...

Page 10: ...10 1 包裝清單 1 1 標準配備 a d b e c a 系統 b 工具與驅動程式 c 電源變壓器 90W d 電源線 e RJ50 轉 DB9 傳輸線 x1 P N 50 WT201 0110 注意 您所購買的產品可能與手冊所示略有不同 所有規格將以實際出貨為準 ...

Page 11: ...50 WT201 0110 Desktop Stand P N 90 WT134 0010 Floor Stand P N 90 WT134 0010 桌上型 LCD 螢幕 腳座 配置 可供選擇 此型號裝置輪子 可方便移動 LCD 螢幕可調整高度從 1100mm 至 1700mm high 主機板尺寸 1700 H x 600 W x 600 D mm 具有 75mm x 75mm 100mm x 100mm 掛架界面 最重承載 10kgs 材質 鋁 選購第二項立架套件 ...

Page 12: ...12 Note 本產品僅限橫放使用 轉成直式或其他角度時請洽經消 商 2 系統視圖 2 1 前視圖 ...

Page 13: ...13 1 觸控式螢幕 2 IR 接收器 and LED 說明 2 2 後視圖 3 麥克風接口 4 硬碟門蓋 5 掛架螺絲孔 6 通風孔 ...

Page 14: ...14 2 3 輸入 輸出埠視圖 注意 請先移電源接口 線 在安裝設備或接線 以免誤觸而開機 造成設備損 壞或觸電危險 1 RJ45 RS232 x 4 個 2 收銀機接口 3 螢幕 RS232 4 PRT 5 VGA 輸出 6 網路 7 USB 連接埠 x 6 個 9 Antenna Hole x3 1 2 3 4 5 6 7 9 ...

Page 15: ...15 2 4 尺寸 面板尺寸 系統尺寸 WT19M RH 495 6 W x 292 2 H x 16 35 D typ 532x332x60mm WxHxD ...

Page 16: ...16 3 系統組裝 3 1 硬碟置換 1 請轉至系統背面 2 在系統背面拆卸一顆螺絲打開硬碟背蓋 Õ ...

Page 17: ...17 3 拆除硬碟的 SATA 傳輸接口 3 2 記憶體置換 開啟背蓋 請先打開背蓋 然後置換記憶體模組 您可以參考主機板圖示來找到記憶體的位置 1 移除硬碟 見圖 3 1 並且從背蓋拆卸螺絲 19 顆 檢視主機板 ...

Page 18: ...18 ...

Page 19: ...19 拆卸記憶體模組 2 用兩支手指頭拉開記憶體模組側邊的卡榫 3 將記憶體從插槽中取出 安裝記憶體模組 4 將記憶體置入插槽並且壓下 直到卡榫回復至定位 3 3 CPU 置換 1 將 CPU 散熱器螺絲依序取下 2 取下 CPU 散熱器 ...

Page 20: ...20 3 逆時針方向旋鬆螺絲 4 取下 CPU 安裝為反置程序 5 裝上 CPU 散熱器 6 將 CPU 散熱器螺絲依序鎖回 反置程序 3 4 電源變壓器置換 1 將電源線從輸入 輸出面板上拔除 4 週邊安裝 4 1 外部模組安裝 1 將系統轉到背面 2 將週邊設備連接至正確位置並鎖緊螺絲 3 將週邊設備的傳輸線連接至輸入 輸出面板的 USB 和 COM RJ45 連接埠 注意 ...

Page 21: ...21 請將 COM3 或 COM4 電源設定為 5V 參考第 6 章跳線設定 4 2 牆壁掛架組裝 1 先在牆面上固定支架 2 將系統端的支架用 4 顆螺絲鎖緊在系統背後 3 將機器抬起背面對齊壁架 準確將系統掛上 ...

Page 22: ...22 4 3 互動式媒體資訊站支架組裝 ...

Page 23: ...23 ...

Page 24: ...24 Tickness 68 3mm 4 4 無線網路安裝 連接至外部天線 ...

Page 25: ...25 4 5 CF 卡模組安裝 1 Turn over the system to access the HDD door 2 Unfasten the screw x1 to remove the HDD door 1 將機器翻轉至背面 準備開啟硬碟門蓋 2 鬆開 1 顆螺絲移除硬碟門蓋 ...

Page 26: ...26 3 在硬碟槽上將 CF 卡裝上 SATA 橋接板 鎖上 3 顆螺絲 4 置換 CF 卡時只要將 CF 卡從橋接板中取出即可 5 反向操作一遍至第一步驟蓋上硬碟門蓋 ...

Page 27: ...12V 24V 5 DOUT bit1 6 GND 收銀機控制器登入 收銀機控制器使用一組輸入 輸出位址來控制收銀機 屬性 讀 寫 尺寸 8 位元 BIT BIT7 BIT6 BIT5 BIT4 BIT3 BIT2 BIT1 BIT0 Attribute Reserved Read Reserved Write Reserved Reserved Cash Drawer DOUT bit1 pin output control Cash Drawer DOUT bit0 pin output control Reserved Cash Drawer DIN bit0 pin input status Reserved ...

Page 28: ...865F Pin 56 as GPIO04 How to program the related registers out 0x4e 0x87 Enable register read write by softeare out 0x4e 0x87 out 0x4e 0x07 out 0x4f 0x06 Set LDN out 0x4e 0x30 Set register s Index 0x30 for example in byte_value 0x4f Get the register value from chip and byte_value 0xfe Clear the related bits Enable Disable GPIO Port for example ...

Page 29: ...4 0 1 GPIO04 COM Connector Pin 40 as input output pin CR06 Index F1h 1 0 1 GPIO01 COM Connector Pin 36 with a Lo Hi voltage output while it is output mode CR06 Index F1h 2 0 1 GPIO02 COM Connector Pin 38 with a Lo Hi voltage output while it is output mode CR06 Index F1h 4 0 1 GPIO04 COM Connector Pin 40 with a Lo Hi voltage output while it is output mode CR06 Index F2h 1 0 1 GPIO01 COM Connector P...

Page 30: ... out command or C with inportb outportb or QBasic with INP OUT If your program is in Windows you have to write a Ring 0 I O driver to access 0x4e 0x4f I O ports Or you can use the DLL writen by some one IO DLL http www geekhideout com iodll shtml WinIO DLL http www internals com How to write a C C Basic or the other program all description are on the OfficalWebSite and ZIP file please reference it...

Page 31: ... mode in byte_value 0x0504 and byte_value 0x3f or byte_value 0xc0 out 0x0504 byte_value 3 Read PCH_GPIO6 PCH_GPIO7 status to know the gravity vector in byte_value 0x050c and byte_value 0xc0 if byte_value 0x00 gravity vector and what to do 重力場指向 此處的 與 系統組裝有關 軟體請依系統實際組裝狀態撰寫 if byte_value 0x40 gravity vector and what to do if byte_value 0x80 gravity vector and what to do ...

Page 32: ... OUT If your program is in Windows you have to write a Ring 0 I O driver to access 0x4e 0x4f I O ports Or you can use the DLL writen by some one IO DLL http www geekhideout com iodll shtml WinIO DLL http www internals com How to write a C C Basic or the other program all description are on the OfficalWebSite and ZIP file please reference it ...

Page 33: ...io Realtek ALC886 Mini Card slot Option x2 Wi Fi Digital TV Tuner card 3G Module for optional Storage 320G 2 5 SATA HDD SYSTEM BIOS AMI SPI Flash ROM BIOS Touch Panel Win 7 Premium above support 10 Fingers AMR Multi Touch Chattering Time 10ms Surface Pencil Hardness 3H per ASTM D 3363 Finger Touch operationally test more than 1M times Silicon Rubber SR50HS diameter 8mm Loading 250g in same locatio...

Page 34: ...32 422 485 by Jumper RJ 11 Cash drawer 12V 19V by Jumper Printer Port x1 USB 2 0 x6 GbE LAN RJ45 2 5 1 CH Audio Jack horizontal x 3 DC 19V AC Adaptor 19V 90W VGA input connector x1 from AD board VGA output connector x1 from Motherboard for Dual Display On Board Pin Head Connector on board Fan power x 2 USB 8Pin x 1 Monitor IR Receiver and Remoter Controller Optional Dimension Weight 465x314x67 6mm...

Page 35: ...35 6 跳線設定 6 1 對於 Huronriver 主機板 6 1 1 主機板置換 ...

Page 36: ...36 6 1 2 輸入 輸出板置換 6 1 3 跳線設定 RJ50 DB9F 系列傳輸線 ...

Page 37: ...6 TX NC RS422_RX 3 8 DTR NC RS422_RX 4 9 GND GND GND 5 3 DSR NC NC 6 5 RTS NC NC 7 7 CTS NC NC 8 10 RI NC NC 9 1 NC NC Pin Signal Pin Signal 1 Data Carrier Detect 6 Data Set Ready 2 Received Data 7 Request to Send 3 Transmitted Data 8 Clear to Send 4 Data Terminal Ready 9 Ring Indicator 5 Signal Ground ...

Page 38: ... Setting BIOS Setting J1 J2 J3 J4 RS232 1 2 3 5 3 5 1 2 RS485 Driver Mode Disable 4 6 4 6 3 4 5 6 RS422 3 4 1 3 1 3 N A RS485 Driver Mode Disable 2 4 2 4 N A N A RS485 5 6 1 3 1 3 N A RS485 Driver Mode Enable 2 4 2 4 N A N A Note RS422 485 Setting ...

Page 39: ... COM1 COM2 COM3 COM4 RI or 電源設定 Default Setting RI Power Jumper J5 J6 J7 J8 Port COM1 COM2 COM3 COM4 RI 1 2 1 2 1 2 1 2 5V 3 4 3 4 3 4 3 4 12V 5 6 5 6 5 6 5 6 收銀機電源設定 RJ11 電源 J9 12V 1 2 19V 2 3 CMOS 操作模式 ...

Page 40: ...GA IN support EDID Please push Warmtouch Menu button and setting OSD menu from RS232 to ISP Monitor RS232 Mode enable support Monitor RS232 daisy chain Please push Warmtouch Menu button and setting OSD menu from ISP to RS232 RS232 Î ...

Page 41: ...Model WT19M RC Select Categories Utility Intel QM67 支援 TPM 請見產品附贈光盤內的 TPM folder find IFX_ReleaseNotes_RTM pdf 其他裝置若需驅動程式 請依產品名稱選擇對的驅動程式 Utility folder 或至 AOPEN 下載中心 http global aopen com download aspx Such as WT19M RH Touch Panel utility at Utility WT19M RH Touch Tools folder WT19M RH Webcam utility at Utility WT19M RH WebCam folder WT19M RH Roation utility at Utility WT19M RH Roation tools folde...

Page 42: ...線一分鐘 再接上電源開機 10 30 秒揚聲器沒聲響則主機板故 障 Jumper 插錯 重新依照主機板說明手冊調整 只有游標在螢幕左上角閃爍時 等了三分鐘仍未見開機畫面或只見游標在螢幕左上角閃爍時 則是主機 板故障 操作過程當機 測試是否是軟體當機可以鍵盤上之 NumLock 按鍵測試 如可切換則是軟 體當機 否則是硬體當機 檢示目前平台內之設定有無衝突 硬體當機 問題眾多 零件品質不良 電壓不穩 灰塵都有可能 相關記憶體的狀況 主機板開機時會先檢查記憶體 當檢查內容有誤時 會強迫 CPU 停止工 作 大致有幾項原因 接觸不良 拔出重插記憶體 COMS 設定有問題 記憶體品質不良 老化 速度不夠 ...

Page 43: ...RAM VGA 卡等 這期間若發現問題 主機板會透過喇 叭發出聲響以警告使用者 而 不同的 BIOS 製造商 會有不同的表示方式 底下列出三種常看到的版 本 它們的警告聲所表示的錯誤 癥結 下次當我們聽到電腦發出 ㄅㄧ 聲時 就可以大略知道問題所在 嗶聲數目 代表的意義 1 記憶體 Refresh 資料更新 有問題 2 Pa ri ty check 錯誤 3 偵測 RAM 主記憶體 前 64k 故障 4 系統 Timer 計時器 發生故障 5 CPU 有問題 6 鍵盤控制 IC 8042 故障 硬碟損毀 以開機片開機試試看 若可以順利開機 則代表電腦的硬體是正常的 此時可能發生硬碟型態設定錯 誤 中毒 或開機區資料損毀 其他常見問題 主機板被生鏽破裂電池之電解液腐蝕 不要長時間不用電腦 保持使用 環境之乾燥 並常常檢查 ...

Page 44: ...兩種狀況多是記憶體模組故障 關機後將記體拔起重插 如仍有問 題則需更換記憶體 拔起後可將插槽清理一下 現市售有小型吸塵器或用吹風機 鍵盤 開機後拔出鍵盤連接線再插上 鍵盤接頭的接觸點不牢 更換一支鍵盤 滑鼠 滑鼠墊清潔或換新 滾珠的清潔 取出滑鼠滾珠 以中性清潔劑清洗後用清水沖淨擦乾 滾軸的清潔 取出滾珠後 清除滾軸上的灰塵細屑 電源供應器 變壓器 無任何電源 檢視變壓器風燈號是否有亮 電源線有無脫落 如果沒問題則是電源供 應器損壞 電腦當機 增加新週邊超過電源供應器的負荷 電源電壓不穩 瞬間開關機 進出風口被擋住 造成熱流無法排出 累積在機器內造成熱當 排除進 出風口的阻擋異物 距離保持 20mm 約 1 吋 以上即可解除 ...

Reviews: