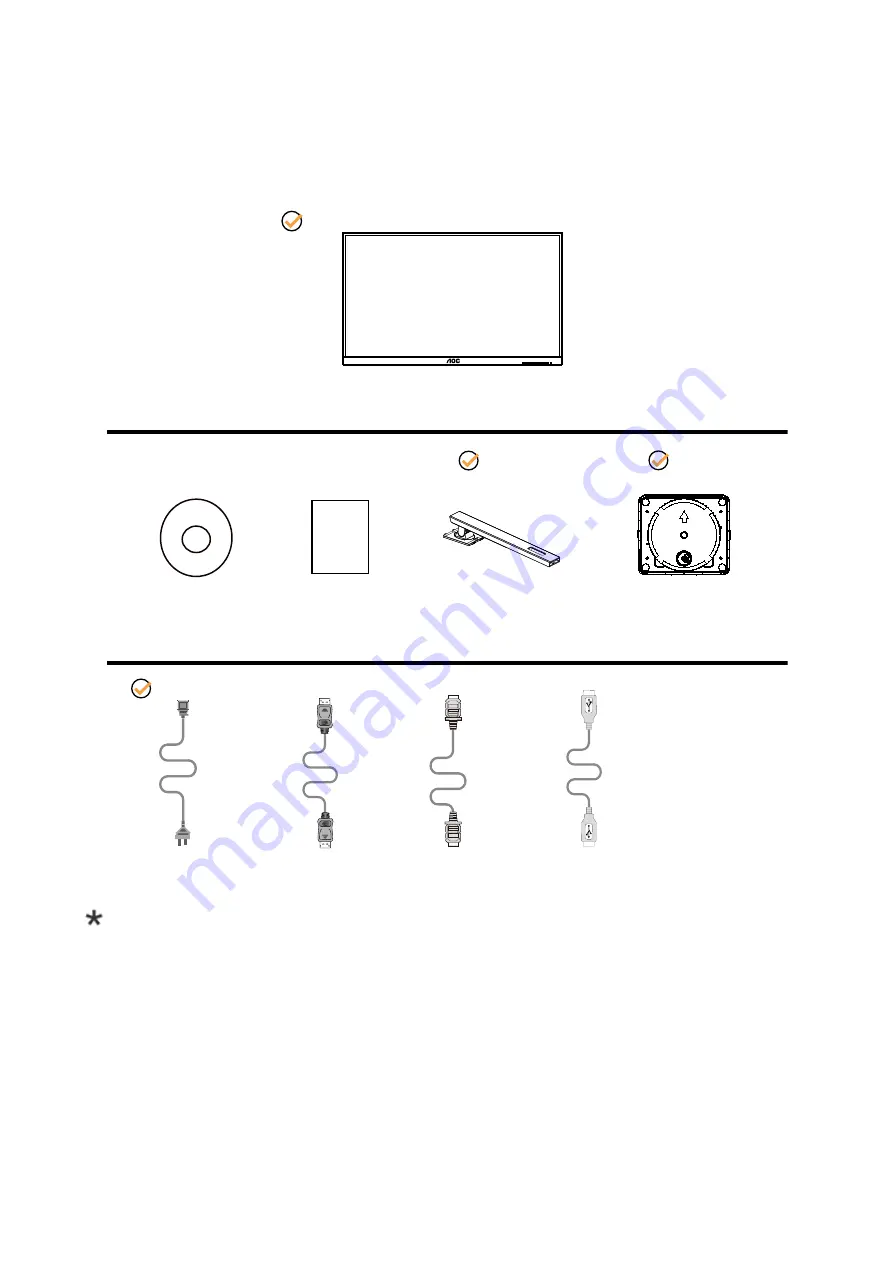
AOC U28P2U User Manual Download Page 8

6

Setup

Contents in Box

*

*

Monitor

CD Manual

Warranty Card

Stand

Base

Power Cable

HDMI


Cable

USB


Cable

DP


Cable

*

*

*

Not all signal cables will be provided for all countries and regions. Please check with the local dealer or AOC branch 

office for confirmation.

Summary of Contents for U28P2U

Page 1: ...1 www aoc com 2020 AOC All Rights Reserved TM LCD Monitor User Manual U28P2U...

Page 2: ...ting Viewing Angle 8 Connecting the Monitor 9 Adjusting 10 Hotkeys 10 OSD Setting 12 Luminance 13 Color Setup 14 Picture Boost 15 OSD Setup 16 PIP Setting 17 Game Setting 18 Extra 19 Exit 20 LED Indic...

Page 3: ...used as follows NOTE A NOTE indicates important information that helps you make better use of your computer system CAUTION A CAUTION indicates either potential damage to hardware or loss of data and...

Page 4: ...ctrician install the correct outlet or use an adapter to ground the appliance safely Do not defeat the safety purpose of the grounded plug Unplug the unit during a lightning storm or when it will not...

Page 5: ...monitor cabinet It could damage circuit parts causing a fire or electric shock Never spill liquids on the monitor Do not place the front of the product on the floor If you mount the monitor on a wall...

Page 6: ...t the stain instead of strong detergent which will cauterize the product cabinet When cleaning make sure no detergent is leaked into the product The cleaning cloth should not be too rough as it will s...

Page 7: ...act conditions during operation Do not knock or drop the monitor during operation or transportation IThe power cords shall be safety approved For Germany it shall be H03VV F 3G 0 75 mm2 or better For...

Page 8: ...onitor CD Manual Warranty Card Stand Base Power Cable HDMI Cable USB Cable DP Cable Not all signal cables will be provided for all countries and regions Please check with the local dealer or AOC branc...

Page 9: ...7 Setup Stand Base Please setup or remove the base following the steps as below Setup Remove...

Page 10: ...itor then adjust the monitor s angle to your own preference Hold the stand so you will not topple the monitor when you change the monitor s angle You are able to adjust the monitor as below 35 130 NOT...

Page 11: ...ck of the display firmly 2 Turn off your computer and unplug its power cable 3 Connect the display signal cable to the video connector on the back of your computer 4 Plug the power cord of your comput...

Page 12: ...ed press the key to open the volume adjustment bar and press the or key to adjust the headphone output volume Source switching exit When the OSD menu is off press this key to activate the signal sourc...

Page 13: ...essage of Clear Vision Demo on will be display on the screen for a duration of 5 seconds Press Menu or Exit button the message will disappear Press and hold button for 5 seconds again Clear Vision Dem...

Page 14: ...ge the settings of the selected function Press AUTO button to exit If you want to adjust any other function repeat steps 2 3 4 OSD Lock Function To lock the OSD press and hold the MENU button while th...

Page 15: ...Standard Standard Mode Text Text Mode Internet Internet Mode Game Game Mode Movie Movie Mode Sports Sports Mode Reading Reading Mode Uniformity Uniformity Mode Gamma Gamma1 Adjust to Gamma 1 Gamma2 Ad...

Page 16: ...ll Enhance on or off Disable or Enable Full Enhance Mode Nature Skin on or off Disable or Enable Nature Skin Mode Green Field on or off Disable or Enable Green Field Mode Sky blue on or off Disable or...

Page 17: ...rame Frame Size 14 100 Adjust Frame Size Brightness 0 100 Adjust Frame Brightness Contrast 0 100 Adjust Frame Contrast H position 0 100 Adjust Frame horizontal Position V position 0 100 Adjust Frame v...

Page 18: ...OSD language Timeout 5 120 Adjust the OSD Timeout DP Capability 1 1 1 2 If the DP video content supports DP1 2 please select DP1 2 for DP Capability otherwise please select DP1 1 H Position 0 100 Adj...

Page 19: ...PIP Setting OFF PIP PBP Disable or Enable PIP or PBP Main Source HDMI1 HDMI2 DP USB C Select main screen source Sub Source HDMI1 HDMI2 DP USB C Select sub screen source Size Small Middle Large Select...

Page 20: ...from 50 to 100 or 0 to increase contrast for clear picture 1 If picture is too dark to be saw the detail clearly adjusting from 50 to100 for clear picture 2 If picture is too white to be saw the deta...

Page 21: ...H Frequency 135KHz V Frequency 60Hz Extra Game Setting PIP Setting PIP Input Select Select Input Signal Source Off timer 0 24hrs Select DC off time Image Ratio Wide Select image ratio for display 4 3...

Page 22: ...20 Exit Picture Boost OSD Setup Luminance Color Setup Exit Extra Game Setting PIP Setting PIP Exit Exit the main OSD...

Page 23: ...21 LED Indicator Status LED Color Full Power Mode White Active off Mode Orange...

Page 24: ...you are not using an extension cable or switch box We recommend plugging the monitor directly to the video card output connector on the back Picture Bounces Flickers Or Wave Pattern Appears In The Pic...

Page 25: ...0x2160 60Hz Max resolution 3840x2160 60Hz Plug Play VESA DDC2B CI Power Source 100 240V 50 60Hz 1 5A Power Consumption Typical Brightness 90 Contrast 50 45W Max brightness 100 contrast 100 80W Power s...

Page 26: ...0 72Hz 48 077 72 188 SVGA 800x600 75Hz 46 875 75 MAC MODE 832x624 75Hz 49 725 74 551 XGA 1024x768 60Hz 48 363 60 004 XGA 1024x768 70Hz 56 476 70 069 XGA 1024x768 75Hz 60 023 75 029 HD 1280x960 60Hz 60...

Page 27: ...t 4 TMDS Data 1 12 TMDS Clock 5 TMDS Data 1Shield 13 CEC 6 TMDS Data 1 14 Reserved N C on device 7 TMDS Data 0 15 SCL 8 TMDS Data 0 Shield 16 SDA 20 Pin Color Display Signal Cable Pin No Signal Name P...

Page 28: ...SA DDC STANDARD It allows the monitor to inform the host system of its identity and depending on the level of DDC used communicate additional information about its display capabilities The DDC2B is a...

Reviews: