Method 2: Insert U disk into TV main board or programming fixture board USB interface , long press VOL+ key, then
power on TV ( main board ) , after about five seconds the TV ( remote control panel ) indicator fast when flashing ,
indicating that the TV is being upgraded , after the light is not blinking on and off ( this process is time-consuming
depending on the size of the main board software , the greater the file the longer the software upgrade , the upgrade takes
roughly three minutes when the board software has 270M , 500M needs four minutes ) , means upgrade is complete .
3. Notes:
a. the file name and the case cannot be wrong , otherwise it will not be upgraded .
b. When using the U disk upgrade, sometimes light will no longer flashing after a TV remote control panel lights
flickering flashes ten seconds, this is upgrade failure. Normal upgrade remote panel lights flashing to be more than two
minutes, in this case upgrade again by powering off main board.
c. after powering off, if main board cannot upgrade normally , programming again the boot file (Mboot.bin or
MbootUprade.bin).
e. If the operator of this program is not familiar with the software, under the condition the can see factory menu
recommended upgrading the operating menu to enter the factory to prevent misuse.
4, when the above third step cannot be upgraded, upgrade the boot file first; please refer to the following specific
operating instructions.
MSD6A638 Network TV main board related upgrade packages with mboot.bin and MbootUpgrade.bin equipped with
two boot files. Both boot files function are the same, but there are differences between upgrade methods, only one
upgrade one of them. If the current TV main board can work properly, copy the boot files to the U disk after formatted
FAT32, then follow the instructions below to upgrade:
Method 1 : first MbootUpgrade.bin boot files, stored in the U disk, and then insert U disk in TV main board USB port,
press and hold the VOL + button on the TV control panel and hold, then power on TV ( main board), approximately after
five seconds the TV ( remote control panel ) indicator flashes rapidly , indicating that the TV is being upgraded , after the
light is not blinking on and off (time-consuming of this process approximately 60 seconds ) , indicating that the upgrade
is complete .
Method 2 : first Mboot.bin boot files stored in the U disk, then U disk inserted in the TV main board USB interface to
power on TV, and then press the MENU button on the remote control and then followed by 8202 the number keys to enter
the factory menu, move cursor to Other Option press OK to enter , and then move the cursor to upgrade mboot option ,
press OK to upgrade ( this time-consuming of this process is about 15 seconds ) .
Notes:
1.mboot.bin and MbootUpgrade.bin files can be put together in a U- disk, but no matter what methods to upgrade, all
operating according to operation instructions, control time to upgrade, ensure that the upgrade completed before power
failure, otherwise upgrade fails.
2. Because the boot files related to the TV's screen resolution and other relevant parameters, so before the software
upgrade boot files of each board must be upgrade first.
3. If the above two methods cannot upgrade, using programming board online upgrade following the instructions:
5, Programming board driver installation.
Use programming board online upgrade, programming board driver program has to be installed to PC, see the following
operation instructions.
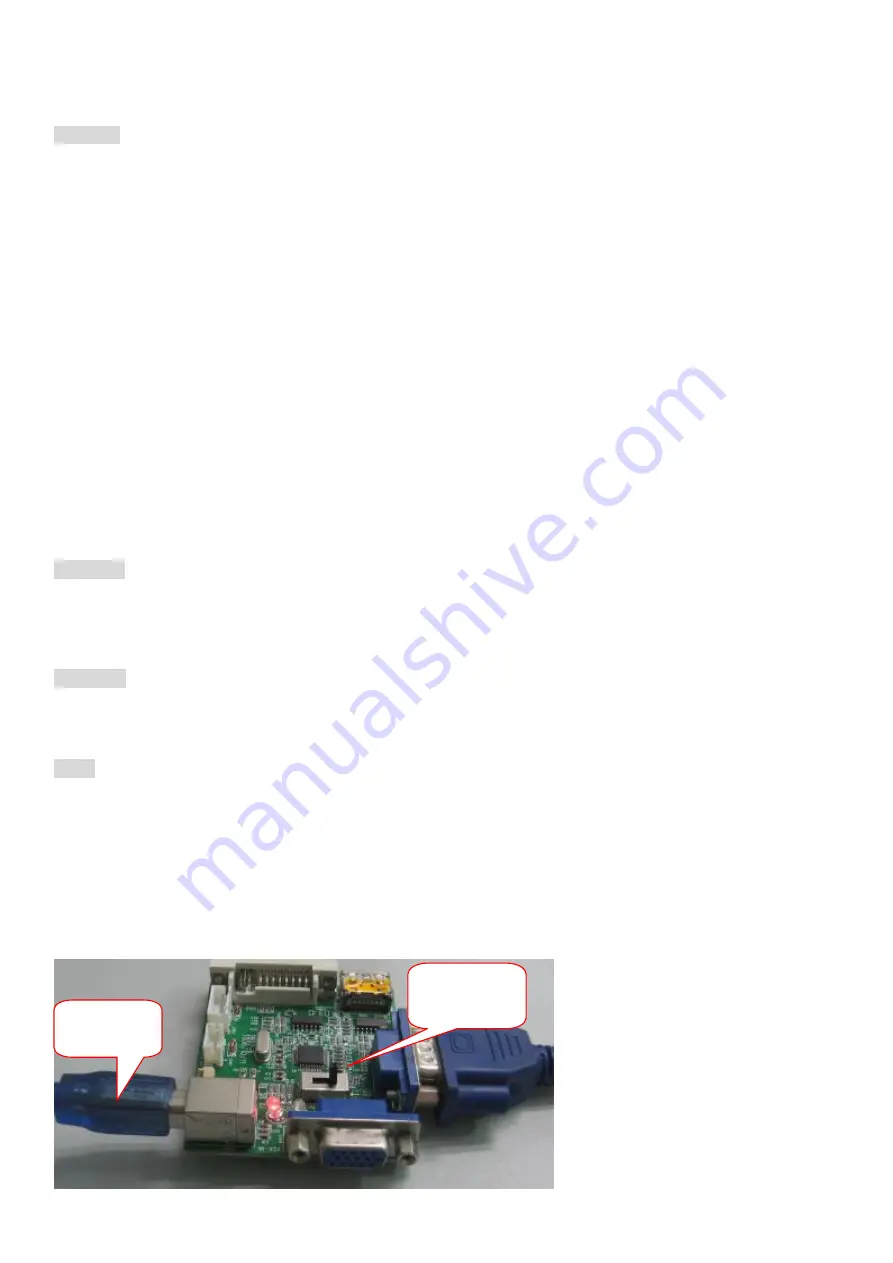
1.use USB connecting wire to connect programming board and personal PC.
To personal
PC
ISP
programming
board
38
Summary of Contents for 55C2U-DVB
Page 7: ...1 30 10 2 2 2 1 1 2 3 4 5 6 7 8 9 10 11 12 1 2 6...
Page 8: ...13 14 15 16 0 17 3 3 7 7...
Page 9: ...4 99 99 8...
Page 10: ...LCD LED 100 240V 30cm VCR 9...
Page 11: ...LCD LED 10...
Page 12: ...11...
Page 13: ...LED AOC AOC AOC AOC 12...
Page 14: ...4 CH 0 9 0 9 1 2 3 4 5 6 7 8 10 9 11 12 14 13 15 16 18 17 19 20 21 13...
Page 15: ...5m OK p q t u 21 20 14...
Page 16: ...5 LED 9 CH TV 15...
Page 17: ...1 2 p q 3 OK 16...
Page 18: ...6 1 9 2 OK p q ECO 1 u 2 OK 1 OK 2 1 2 OK 1 2 TV 17...
Page 19: ...PC PC u 4 3 4 3 16 9 4 3 16 9 4 3 16 9 TV 1 OK 2 OK 1 OK 2 OK 18...
Page 22: ...1 2 OK 3 WLAN 1 2 Wi Fi 21...
Page 23: ...7 1 2 OK 3 OK TV 1 1 2 3 2 1 2 OK 3 1 2 3 3 1 2 OK 3 4 OK 1 2 2 22...
Page 26: ...AOC AOC 1 2 2 2 5 5 3 50 200 200 4 M6 55 200 200 4 M6 25...
Page 27: ...10 AOC TV 0 26...
Page 28: ...HDCP HDMI HDMI HDMI Internet Internet HDMI HDMI 27...


