


26.09.18, 10*53
Antelope Audio : Customer Support
Seite 6 von 23
https://support.antelopeaudio.com/support/solutions/articles/42000017686-orion32-user-manual
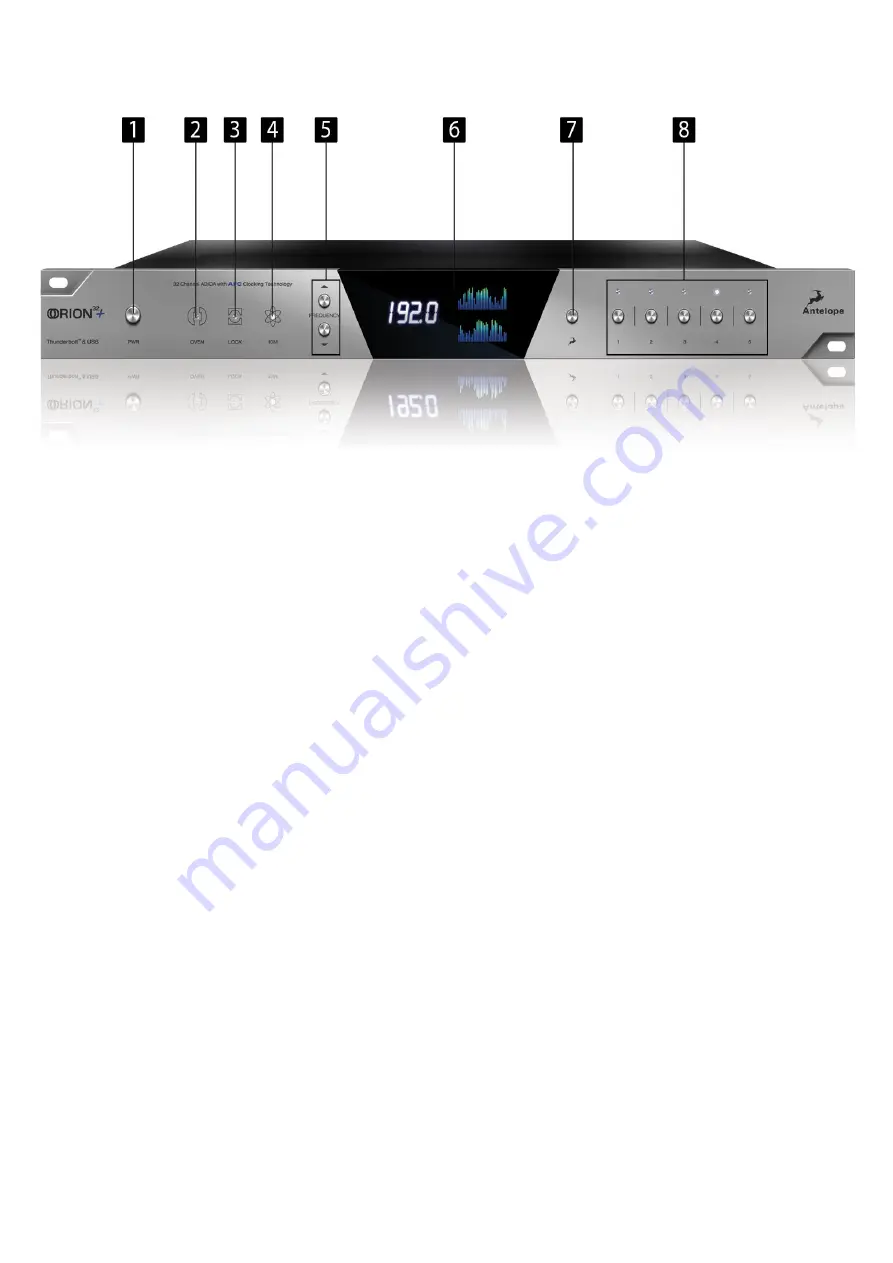
1. Power button
Toggles standby/operation state
Hold down the Power button to access the System Menu of the device, which allows you
to access the following sub-menus:
1. Comm. Interface (allows you to choose between, ThunderboltTM, USB connectivity)
2. Device Info
3. Brightness
4. Scr Save Time
5. Scr Save Style
6. Factory Reset
7. 10M Calibration
To scroll up and down, use the Frequency up/down buttons.
To enter each one of the sub-menus, press the Frequency down button.
To confirm a chosen setting, press and hold the Frequency down button.
2. Oven Clock light
When lit, this indicates is clocked by its own internal clock.
3. Lock light
When lit, this indicates is locked to the signal that enters through the digital
inputs on the rear panel (except ThunderboltTM and USB).
4. Atomic Clock Lock light
When lit, this indicates is locked to an atomic signal that enters through the
10M input on the rear panel. This overrides the Oven Clock lock light as soon as it is
plugged in and the Oven Clock lock light will automatically go o
ff
.
5. Frequency buttons
These two arrow buttons allow you to increase and decrease the sample rate, selecting
from:
32kHz, 44.1kHz, 48kHz, 88.2kHz, 96kHz, 176.4kHz, 192kHz. The current frequency is
indicated on the display (6) when adjusting.
6. Display
Multi-function display that shows Sample Rate on the left and volume levels for each


