Antec Quiet Computing Two Hundred User Manual Download Page 7


2.5


I

NTERNAL 

3.5”


D

EVICE 

I

NSTALLATION


The Two Hundred provides space for up to six 3.5” hard 
drives. Before you begin, remove the side panels and 
front bezel of the case as described in section 2.1. Behind 
the front bezel there is a fan cage which provides space 
for up to two fans at the front of the case. 

 
1.


Open the fan cage by pressing both clips to release 
it, then swing it open and detach it from the chassis. 

2.


Insert your 3.5” device into the 3.5” drive cage from 
the front of the case until the mounting holes align 
with the screw holes in the cage. 

3.


Fasten the device in place with the provided screws.  

4.


Mount any other 3.5” HDD devices accordingly. 

5.


Connect the appropriate power and data cables to 
the device(s).  

6.


Replace the fan cage. 


2.6  F

RONT

-L

OADED 

H

OT 

S

WAP 

SATA


H

ARD 

D

RIVE 

C

ADDY


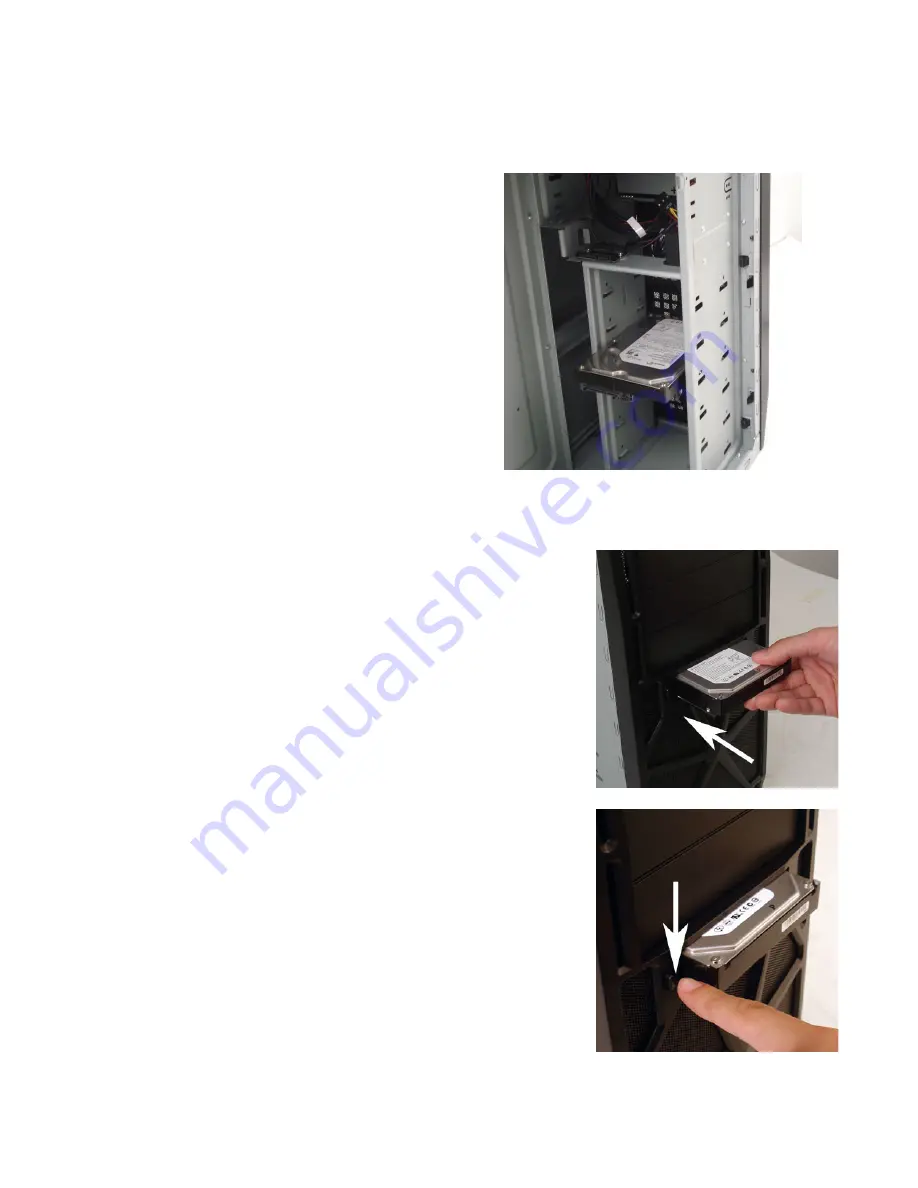
This case comes with a built-in, externally accessible 3.5” SATA 
drive bay where you can load/unload your drive without shutting 
down your computer.  

Note:

 Before you can use the hot swap feature, you must 

install all related drivers that come with your 
motherboard and turn on the “AHCI” function in the 
BIOS to activate the hot swap feature. 


Loading: 

1.


Align your SATA HDD with the drive bay with the connector 
facing the case. 

2.


Push the HDD all the way into the bay until it locks into 
position. 

 
Unloading: 

1.


Ensure that your HDD is not in use. 

2.


Push the release button on the left-hand side of the drive bay 
and pull the HDD free.


Summary of Contents for Quiet Computing Two Hundred

Page 1: ...TWO HUNDRED USER S MANUAL...

Page 2: ...rd Installation 5 2 5 Internal 3 5 Device Installation 6 2 6 Front Loaded Hot Swap SATA Hard Drive Caddy 6 2 7 External 5 25 Device Installation 6 CONNECTING THE FRONT I O PORTS 3 1 USB 2 0 Ports 7 3...

Page 3: ...upply that is compatible with your computer components and has a long enough power harness to reach your motherboard and peripheral devices We recommend our TruePower or Earthwatts power supplies for...

Page 4: ...0 Drive Bays 3 x External 5 25 drive bays 1 x External front loaded hot swap 3 5 SATA hard drive caddy 6 x Internal 3 5 drive bays Expansion Slots 7 Motherboard Size Mini ITX microATX Standard ATX Fro...

Page 5: ...release the bezel Swing the bezel open to about 45 and gently lift the bezel upward and it will come off easily Set the bezel in a safe place Note Do not use your fingernails to pry or lift the panels...

Page 6: ...up The drive cages and power supply should be visible 2 Make sure you have the correct I O panel for your motherboard If the panel provided with the case isn t suitable please contact your motherboar...

Page 7: ...4 Mount any other 3 5 HDD devices accordingly 5 Connect the appropriate power and data cables to the device s 6 Replace the fan cage 2 6 FRONT LOADED HOT SWAP SATA HARD DRIVE CADDY This case comes wi...

Page 8: ...as detailed in section 2 1 1 Remove the drive bay faceplate by applying pressure to the inside of the plate until it pops free of the bezel 2 Slide your 5 25 device into the bay from the front of the...

Page 9: ...in out of a motherboard header connector Examples could be for your USB header audio input header or some other front panel connector such as the Power Button connector Before performing any work plea...

Page 10: ...434 m min 51 2 CFM 1 212mm H2O 0 047 inch H2O 27 9 dBA 3 6W Low 900 0 18A 0 0843 m min 30 1 CFM 0 486mm H2O 0 02 inch H2O 16 9 dBA 2 16W Top TwoCool Fan The case comes with a 140mm top exhaust fan Th...

Page 11: ...must be installed so that the air is blowing into the case Side Fan The side fan enhances graphic cards cooling The fan should be installed so air is blowing into the case Front Fans You can install...

Page 12: ...h initially The frequency will change depending on environmental conditions and system usage Users who run their systems 24 7 will have to check their filters more often than those who don t run their...

Page 13: ...tel 31 0 10 462 2060 fax 31 0 10 437 1752 Customer Support US Canada 1 800 22ANTEC customersupport antec com Europe 31 0 10 462 2060 europe techsupport antec com www antec com Copyright 2009 Antec Inc...

Reviews: