background image

EN

11

     NOTE:   

•  The product must be switched off when 

charging. 

•  Charge the battery before using it for the 

first time.

HOW TO USE

1.  Select the required run mode with the 

switch. Mode 

I

 is full luminous flux (360 

lm). Mode 

II

 is reduced luminous flux 

(140 lm).

2.  Choose the required position on the 

handle by pushing in the button and 
turning the handle up/down.

     FIG.   3

MAINTENANCE

Clean the spotlight when necessary with a soft, 
dry cloth.

BATTERY

•  Do not allow the battery to fully discharge. 

Over-discharging reduces the life span of 
the battery.

•  To avoid the battery becoming completely 

discharged, recharge it every three 
months even when the spotlight is not in 
use.

DESCRIPTION

1.  Handle
2.  Power switch with two power levels I / II
3.  Stand
4.  Reflector

     FIG.   1

USE

CHARGING THE BATTERY

Charging 230 V

1. 

Connect the USB cable to the mains adapter 
and connect the other end of the cable to 
the micro USB port on the spotlight. 

     FIG.   2

2.  Connect the mains adapter to a power 

point.

3.  The red status light inside the charge 

connector on the spotlight goes on during 
the charging. When the battery is fully 
charged the green status light goes on.

     NOTE:   

•  The product must be switched off when 

charging. 

•  Charge the battery before using it for the 

first time.

Charging 12 VDC

1.  Connect the USB cable to the charger for 

12 V vehicle socket and connect the other 
end of the cable to the micro USB port on 
the spotlight.

2.  Connect the charger to a 12 V vehicle 

socket.

3.  The red status light inside the charge 

connector on the spotlight goes on during 
the charging. When the battery is fully 
charged the green status light goes on.

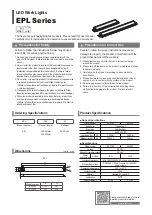
Summary of Contents for 002-657

Page 1: ...sanvisningen noggrant innan användning Spara den för framtida behov LED STRÅLKASTARE SE EN LED FLOODLIGHT Operating instructions Translation of the original instructions Important Read the user instructions carefully before use Save them for future reference NO LYSKASTER LED Bruksanvisning Oversettelse av original bruksanvisning Viktig Les bruksanvisningen nøye før bruk Ta vare på den for fremtidi...

Page 2: ...old om endringer Ved eventuelle problemer kan du kontakte vår kundeservice på telefon 67 90 01 34 www jula no Dbaj o środowisko Nie wyrzucaj zużytego produktu wraz z odpadami komunalnymi Produkt zawiera elektryczne komponenty mogące być zagrożeniem dla środowiska i dla zdrowia Produkt należy oddać do odpowiedniego punktu składowania lub przynieść go do jednego ze sklepów gdzie przy zakupie nowego ...

Page 3: ...1 2 3 1 2 3 4 ...

Page 4: ...nte leker med produkten Dränk inte produkten eller laddaren i vatten eller annan vätska risk för brand och eller elolycksfall Produkten får inte användas i närheten av antändliga material och får inte brännas explosionsrisk Utsätt inte produkten för alltför stor belastning det kan skada produkten permanent Använd inte produkten om den utsatts för vatten eller annan vätska risk för elolycksfall exp...

Page 5: ...mbrytare med två effektlägen I II 3 Ställ 4 Reflektor BILD 1 HANDHAVANDE BATTERILADDNING Laddning 230 V 1 Anslut USB kabeln till nätadaptern och anslut kabelns andra ände till strålkastarens mikro USB port BILD 2 2 Anslut nätadaptern till ett nätuttag 3 Den röda indikeringslampan inuti strålkastarens laddkontakt lyser under pågående laddning När batteriet är fulladdat tänds den gröna indikeringsla...

Page 6: ...ed produktet Produktet eller laderen må ikke senkes ned i vann eller annen væske fare for brann og eller el ulykker Produktet må ikke brukes i nærheten av brennbare materialer og må ikke brennes eksplosjonsfare Produktet må ikke utsettes for altfor stor belastning da dette kan føre til permanente skader på produktet Ikke bruk produktet dersom det har blitt utsatt for vann eller annen væske fare fo...

Page 7: ...E 1 BRUK BATTERILADING Lading 230 V 1 Koble USB kabelen til strømadapteren og sett den andre enden inn i lyskasterens mikro USB port BILDE 2 2 Koble strømadapteren til en stikkontakt 3 Den røde indikatorlampen i lyskasterens ladekontakt lyser mens lading pågår Når batteriet er fulladet tennes den grønne indikatorlampen MERK Produktet må være avslått under lading Lad batteriet før første gangs bruk...

Page 8: ...czytaj dokładnie wszystkie wskazówki bezpieczeństwa Zachowaj kontrolę nad produktem jeżeli jest on używany przez dzieci lub w ich pobliżu Należy dopilnować aby dzieci nie bawiły się produktem Nie zanurzaj produktu ani ładowarki w wodzie ani innym płynie ryzyko pożaru i lub porażenia prądem Produktu nie wolno używać w pobliżu materiałów łatwopalnych ani spalać ryzyko wybuchu Nie narażaj produktu na...

Page 9: ...tność Aby zapobiec całkowitemu rozładowaniu akumulatora należy go ładować co trzy miesiące nawet jeżeli reflektor nie jest używany Ładowarka do akumulatora 12 V Ładowarka do gniazda samochodowego 12 V DC Nominalny prąd wyjściowy 500 mA OPIS 1 Uchwyt 2 Przełącznik z dwustopniową regulacją mocy I II 3 Statyw 4 Odbłyśnik RYS 1 OBSŁUGA ŁADOWANIE AKUMULATORA Ładowanie 230 V 1 Podłącz przewód USB do zas...

Page 10: ... not play with the product Do not immerse the product or charger in water or any other liquid risk of fire and or electric shock Do not use the product near flammable materials or burn it risk of explosion Do not expose the product to severe strain this could result in permanent damage Do not use the product if it has been exposed to water or any other liquid risk of electric shock explosion perso...

Page 11: ...wo power levels I II 3 Stand 4 Reflector FIG 1 USE CHARGING THE BATTERY Charging 230 V 1 Connect the USB cable to the mains adapter and connect the other end of the cable to the micro USB port on the spotlight FIG 2 2 Connect the mains adapter to a power point 3 The red status light inside the charge connector on the spotlight goes on during the charging When the battery is fully charged the green...

Reviews: