background image

HOW TO GIVE A HAIRCUT

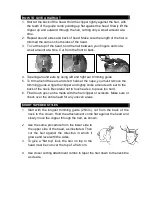
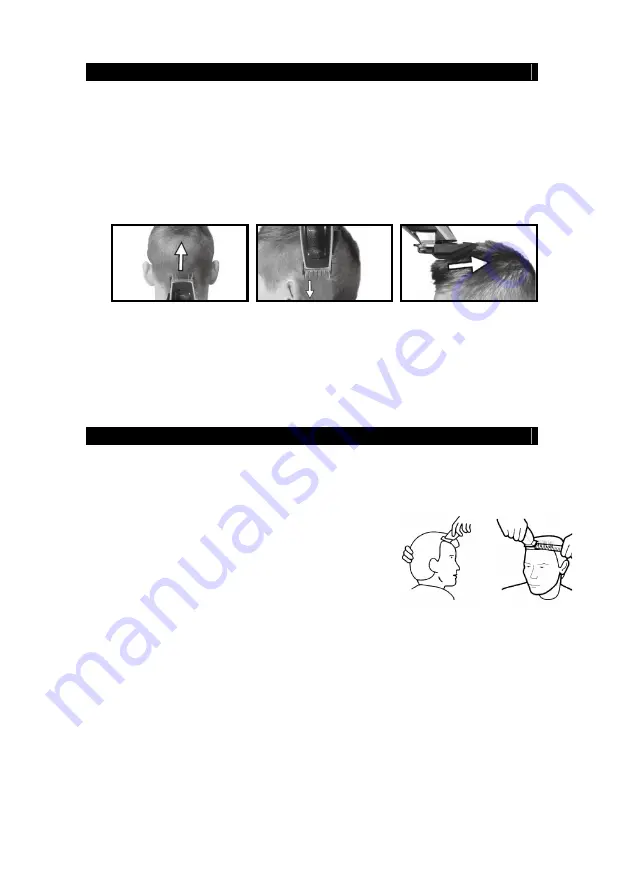
1. Start at the back of the head. Hold the clipper lightly against the hair, with

the teeth of the guide comb pointing up flat against the head. Slowly lift the

clipper up and outward through the hair, cutting only a small amount at a

time.

2. Repeat around sides and back of head. Make sure the length of the hair is

trimmed the same on both sides of the head.

3. To cut the top of the head, hold the hair between your fingers and cut a

small amount at a time. Cut from the front to back.

4. Tapering around ears by using left and right ear trimming guide.

5. To trim around the ears and short hairs at the nape, you must remove the

trimming guide. Angle the clipper and lightly stoke around each ear to the

back of the neck. Be careful not to touch ears o to press too hard.

6. Final touch ups can be made with the hair clipper or scissors. Make sure ot

check over the entire head for any uneven areas.

SHORT TAPERED STYLES

1. Start with the longest trimming guide (25mm), cut from the back of the

neck to the crown. Hold the attachement comb flat against the head and

slowly move the clipper through the hair, as shown.

2. Use the same procedure from the lower side to

the upper side of the head, as illustrated. Then

cut the hair against the direction in which it

grows and level with the sides.

3. To give a “flat top” look, the hair on top to the

head must be cut over the top of a flat com.

4. Use closer cutting attachment combs to taper the hair down to the neckline

as desire.

Summary of Contents for HC-5300

Page 1: ...Hair Clipper Instruction Manual Model no HC 5300...

Page 2: ...appliance unattended when it is plugged in 13 Before using the appliance ensure that the clipper blade are securely fitted 14 Do not use the appliance on young children 15 The appliance is not to be u...

Page 3: ...27 Do not submerge the appliance nor make it flow under water tap 28 Do not use salt water or boiling water when cleaning Also do not use cleaning products that are designed for toilets bathrooms or k...

Page 4: ...rrectly turn the clipper on for a few moments then turn off and unplug Loosen the two screws slightly and manually adjust the bottom blade until it is aligned Re tighten the screws 4 Ensure the hair c...

Page 5: ...ch off the device before replacing or changing the attachments NOTES The hair to be dressed must be dry NOTES The cutting length may deviate depending on the cutting angle Please start with a comb att...

Page 6: ...the trimming guide Angle the clipper and lightly stoke around each ear to the back of the neck Be careful not to touch ears o to press too hard 6 Final touch ups can be made with the hair clipper or...

Page 7: ...and make cleaning with the aid of the cleaning brush that was equipped in the product The cutting blades should be lightly oiled with the oil provided once every few haircuts Clean your hair clipper...

Page 8: ...suse abuse or neglect Please retain your receipt as proof of purchase and contact our Customer Service Centre on 1800 124 125 Australia or 0800 945 995 New Zealand or alternatively via Customer Help a...

Reviews: