


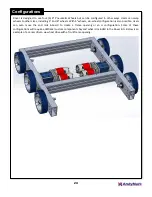

9
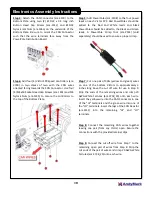
Step 1:
The 57 Sport gearbox is pre-assembled with a
cap on the back. Remove the four (4) #10-32 Socket
Head Cap Screws from the front of the gearbox and
carefully remove all components, being careful to
keep them together. The plastic cap can be discarded.
Step 2:
The short output shaft needs to be replaced
with the longer 3 inch output shaft. Using a pair of
snap ring pliers, remove the snap ring from the
backside of the face plate. Be careful not to
permanently deform the snap ring by opening it too
wide.
Gearbox Assembly Instructions (QTY 2)
Step 3:
Remove the output shaft by pulling it through
the front of the face plate and bearings.
Step 4:
Insert the new 57 Sport 3 inch Shaft (am-
3791) into the faceplate. Be sure to push the shaft all
the way in until it rests against the outer bearing and
make sure the inner bearing remains seated in the
faceplate.
Step 5:
Replace the snap ring on the new shaft. Be
careful to not permanently deform the snap ring by
opening it too wide. It should snap into the groove on
the output shaft around the full circumference.
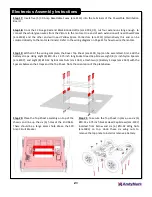
Step 6:
Reassemble the 57 Sport Gearbox using two
(2) #10-32 x 0.5 inch long Button Head Cap Screws
(am-1512) in place of the 0.375 inch long Socket Head
Cap Screws. Add the 57 Sport Flange Mount (am-
4132) to the front face of the gearbox – the screws
will be used in the pair of counter-bored holes on the
flange plate. Add a pea-sized amount of Red Tacky
Grease (am-2768) to each planet gear and the carrier
plate surfaces. Enough grease should be used so that
all internal surfaces get a coating of grease; however,
too much grease can cause the gearbox to drag.