background image


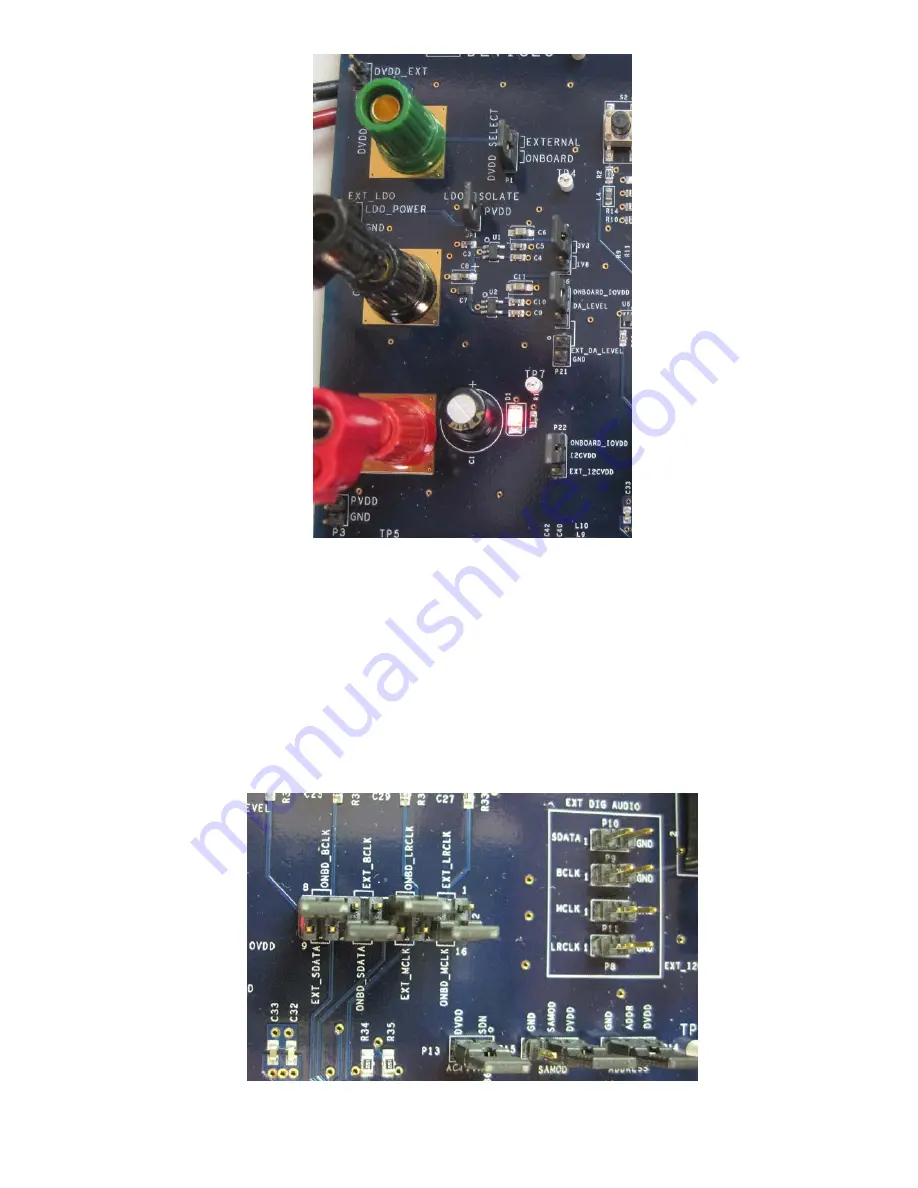
Figure 3: Picture of SSM2518 Eval Board Power Section – Basic Configuration with PVDD supplying all onboard power 

Section 2 – Digital Audio Source:


The SSM2518 evaluation board has two options for digital audio signals: 1) Use an external digital audio source, such 
as Audio Precision PSIA 2722 (source on pins P8-11), or 2) Use the onboard digital audio receiver and source digital 
audio using the SPDIF or TORX connections.  To select between external or onboard digital audio signals, insert the 
appropriate jumpers across the P12 bank of header pins.  If using the onboard digital audio receiver, adjust digital 
input source as “SPDIF” or “OPTICAL” using S1.   For example, OPTICAL source can be digital output channel of 
Audio Precision.  SPDIF can be the digital output of a CD player.  Please note: after setup of the evaluation board is 
complete, it is helpful to press the S2 button near the TORX port in order to initialize the onboard digital audio 
circuitry. 


Figure 4: Digital Audio Selection Header (Configured for Onboard Source) External Digital Audio Ports 

Summary of Contents for SSM2518

Page 1: ...I2C adapter dongle EVAL ADUSB2Z The SSM2518 can operate in stand alone mode without the need for I2C control as shown in Figure 1 In order to evaluate full functionality of the SSM2518 the user must...

Page 2: ...on the PVDD pin of SSM2518 the device must be isolated from this circuitry In order to do so remove the P23 jumper and connect an external power supply to P24 to activate U1 and U2 voltage regulators...

Page 3: ...ect between external or onboard digital audio signals insert the appropriate jumpers across the P12 bank of header pins If using the onboard digital audio receiver adjust digital input source as SPDIF...

Page 4: ...into I2C mode insert a jumper across the SAMOD and GND terminals of P15 Stand Alone Mode Operation Please refer to Table 1 for the functionality available while in Stand Alone mode I2C Mode Function S...

Page 5: ...hical user interface for the SSM2518 has been created in the Analog Devices Inc SigmaStudio environment SigmaStudio must first be downloaded and installed on the user s PC from the following link http...

Page 6: ...the following path by clicking the Browse tab C Program Files Analog Devices Inc SigmaStudio 3 1 USB drivers 5 Once the above path has been properly selected the user can continue with the driver ins...

Page 7: ...Figure 8 SSM2518 GUI Initial Project Setup in SigmaStudio note Link Compile Connect button is highlighted Figure 9 SSM2518 GUI Main Functionality Window...

Page 8: ...Figure 10 SSM2518 GUI DRC Functionality Window Figure 11 SSM2518 GUI I2C Register Direct Read Write Window...

Reviews: