DEMO MANUAL SCP-LT8609S-BEVALZ
Rev. 1
2
QUICK START PROCEDURE
Demonstration circuit SCP-LT8609S-BEVALZ is easy to
set up to evaluate the performance of any SCP hard-
ware configuration.
1. The SCP-LT8609S-BEVALZ ships with a default output
voltage of 5V. To change the output voltage, see “Con-
figuration Settings” section, and modify the board ac-
cordingly. Be sure to check for open connections or sol-
der shorts after making any modifications.
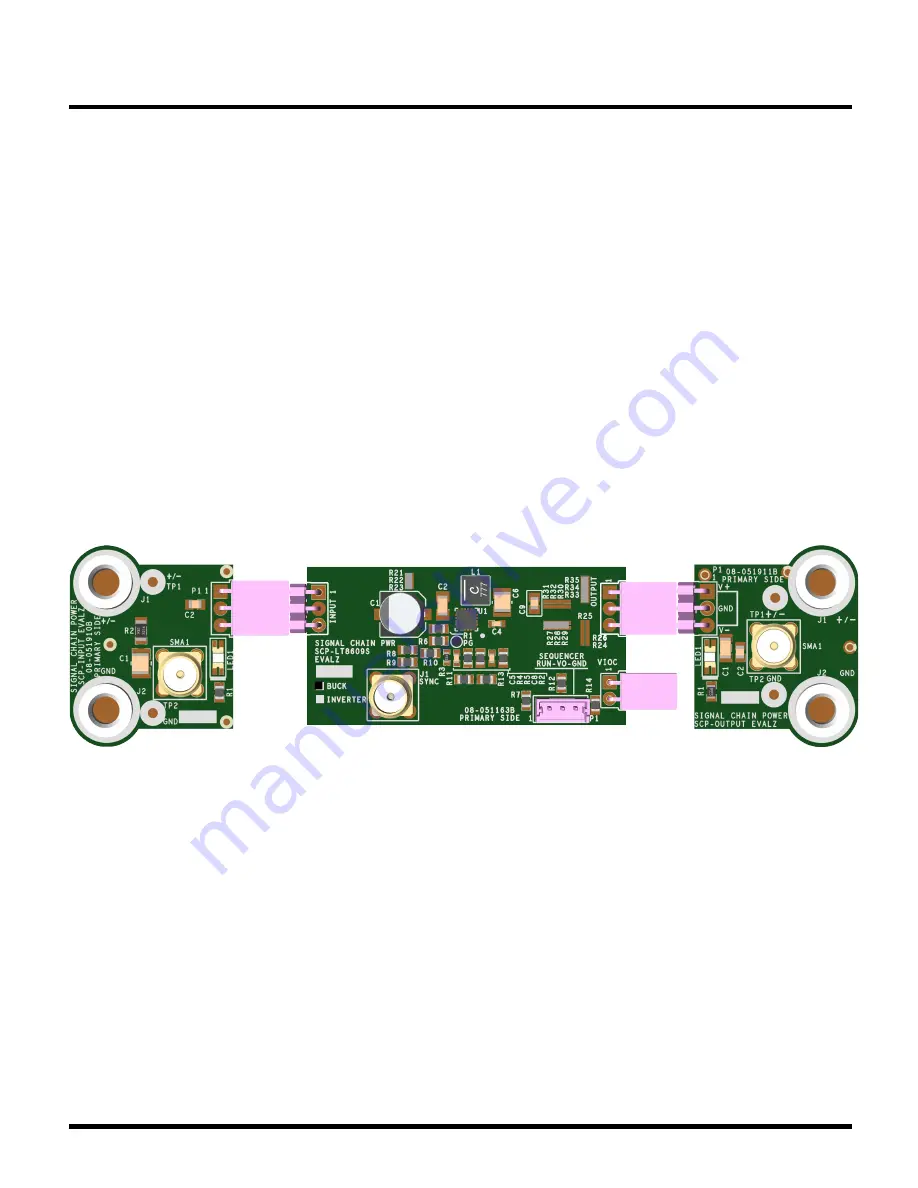
2. Connect the SCP-INPUT-EVALZ and SCP-OUTPUT-
EVALZ boards to the SCP-LT8609S-BEVALZ (refer to
Figure 2) and connect the input board to a voltage
source, V
SOURCE
. Connect the output board to a volt-
meter or dynamic load. Slowly raise the input voltage
until the SCP-LT8609S-BEVALZ powers up into regula-
tion and sweep V
SOURCE
through the desired range of
operation.
NOTE: Make sure that the input voltage is always within
spec. If using a dynamic load to measure output volt-
age, make sure the load is initially set to zero.
3. Check for proper output voltage. The output should be
regulated at the programmed value (±5%).
4. Once the proper output voltage is established, power
off V
SOURCE
and similarly test other boards in the SCP
system until all elements have been individually verified
prior to assembling into the final circuit configuration.
NOTE: When measuring the input or output voltage rip-
ple, use the optional SMA connector locations available
on the input, output, 1
´
5, 1
´
2, and 5
´
1 breakout
boards. Avoid using the test point connections with
long scope leads.
Figure 2.
Proper Measurement Equipment Setup (Use SMA connectors for Measuring Input or Output Ripple)


