ADA4571R-EBZ User Guide
UG-739
GETTING STARTED
SOFTWARE INSTALLATION PROCEDURES
There are two pieces of software to install: the Windows GUI
and the SDP drivers.
Windows GUI Installation
Use the following steps to install the GUI.
1.
Before connecting the USB cable or powering the board,
insert the
ADA4571-EBZ
setup CD and from the installer
directory, run the installer
Setup.exe
.
2.
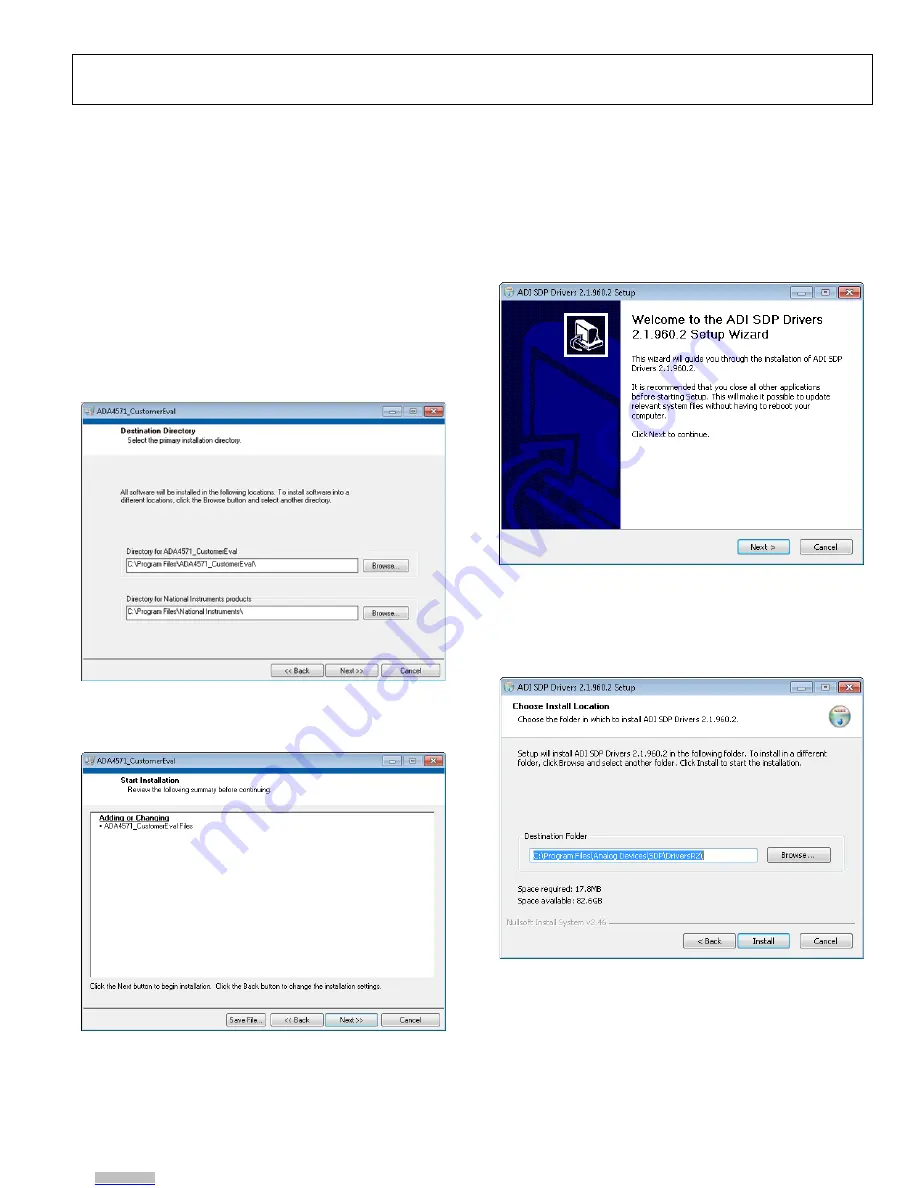
When the
Destination Directory
screen appears (see
Figure 2), click
Next
. Optionally, you may change the
destination folder by clicking
Browse
, selecting a different
destination folder, and clicking
Next
.
Figure 2. Choose Destination Location
3.
When the
Start Installation
window appears click
Next
to
continue with the installation (see Figure 3).
Figure 3. Review Installation
4.
Click
Next
to complete installation of the Windows
LabVIEW GUI.
SDP Installation
Next, install the Analog Devices, Inc., SDP driver. This driver
allows the SDP control board to interface with the LabVIEW
GUI.
1.
When the SDP drivers setup wizard appears, click
Next
(see Figure 4).
Figure 4. SDP Driver Installation
2.
When the
Choose Install Location
screen appears (see
Figure 5), click
Next
. Optionally, you may change the
destination folder by clicking
Browse
, selecting a different
destination folder, and clicking
Next
.
Figure 5. Choose Install Location
3.
Click
Finish
to complete the installation of the SDP
drivers.
4.
Connect the SDP control card to the motherboard and
plug the SDP control card into the PC with the supplied
USB cable. The computer now recognizes the SDP control
board and the LabVIEW GUI may be opened to continue.
Rev. 0 | Page 3 of 13
Downloaded from
Downloaded from
Downloaded from


