Installing the N7142
10
N7142 User Manual
Internal Switch Configuration
Once the switch’s IP address has been configured, you can access all switch settings via your web browser. Enter the switch’s IP
address into your browser window. When the login screen appears, enter
admin
as the username. Upon successful login, the
Port State
Overview
NOTE:
No password is required initially, but you should create one immediately for security purposes (select Configuration >
Security > Switch > Users).
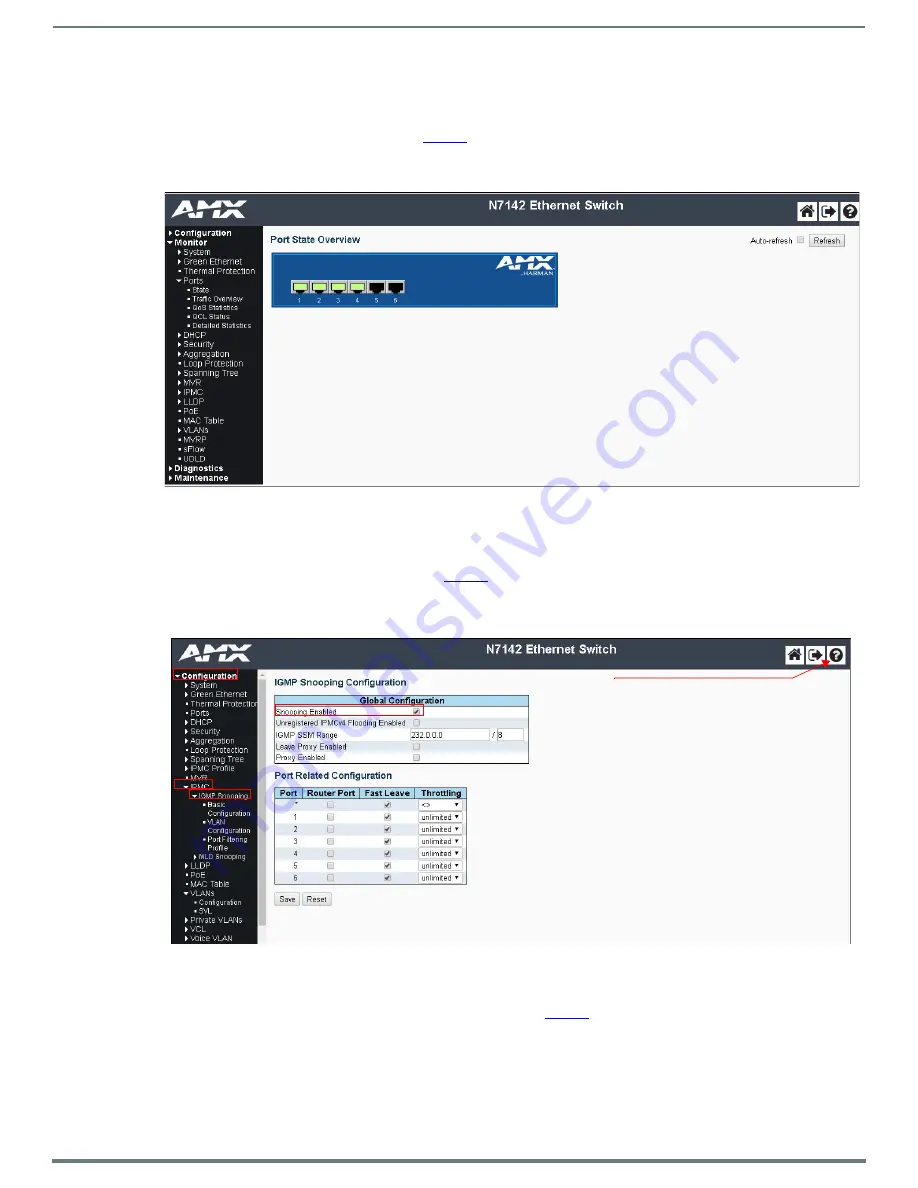
FIG. 5
Internal Switch Main Page
You can now configure the switch as required for your network setup. Some examples follow.
To enable IGMP Query for the internal switch, follow these steps
:
1.
Select
Configuration >
IPMC
> IGMP Snooping
from the menu at the left of the screen.
2.
Check the
Snooping
Enabled
box (as shown in
NOTE:
The options you will need for setting up a new VLAN can also be found in this area of the switch’s options (Configuration >
IPMC > IGMP Snooping > VLAN Configuration). For more information, click the ? icon at the top-right of the screen.
FIG. 6
Internal Switch IGMP Snooping Page
To configure the internal switch for 802.1x, follow these steps:
1.
Make sure the switch’s IP address is in the same subnet as the Radius server.
2.
Select
Configuration
> Spanning
Tree
>
CIST
Ports
)
.
3.
Uncheck
STP
Enabled
for each port.
Click the
?
for detailed
information on the internal
switch’s configuration options.


