


Appendix E - Upgrading/Downgrading the System
264
Enova Digital Media Switchers - Hardware Reference Manual
Audio Switching Boards, Dante Audio Switching Boards, and Audio Insert/Extract Boards are not compatible. Do
not install mixed types of expansion boards in the same enclosure. If two types of boards are present, the audio
subsystem is disabled.
For information on routing of audio signals (including the down-mixed audio input) using these boards, see page 128.
NOTE:
Enova DGX 100 Series switchers contain an audio-only virtual matrix (VM2). If ASB Boards are in the enclosure, you
can route audio switches on this matrix. If no audio boards are installed, route and disconnect commands are queued
until audio boards are present, while all other commands are NACK’d.
Upgrading the Enclosure (Including Boards)
The following procedure explains how to send a firmware (*.KIT) file to the enclosure to enable boards to work with the
new CPU.
NOTE:
EDIDs are not automatically updated when firmware is upgraded. To update input board EDIDs after an enclosure
firmware upgrade, you must use the
reset factory
DGX_SHELL command (see page 280).
1.
Download and unzip the "Enova DGX 100 Series Enclosure Firmware." .zip file:
a.
Navigate to the Enova DGX 100 Series product page that matches your system at www.amx.com.
b.
Locate the Firmware Files section on the right side of the page and select the .zip file for download.
c.
Unzip and open the downloaded file folder.
2.
Open the latest version of NetLinx Studio and navigate to the OnLine Tree.
3.
From the Settings tab, select Workspace Communication Settings, and click on Default Settings.
4.
In the Network tab, click New, enter the system’s new IP address (available through the control panel menu), click
OK. Select the system and click OK.
5.
Click OK to close the Workspace Communications Settings dialog box.
6.
In the OnLine Tree, right-click and select Refresh System OnLine Tree.
7.
Optional
(recommended) – Launch the System Configuration interface on a PC or device to monitor the upgrade.
a.
On the enclosure’s control panel, navigate to Function/Setup Options/Master Info/IP Address.
b.
Open a web browser on a PC or device on the same network as the Enova DGX and enter the system’s IP
address in the browser bar.
c.
Navigate to System/Devices and click on Switcher Update Status. Continue monitoring through the rest of the
process.
8.
In the OnLine Tree, right-click on the 5002 device and select Firmware Transfer.
9.
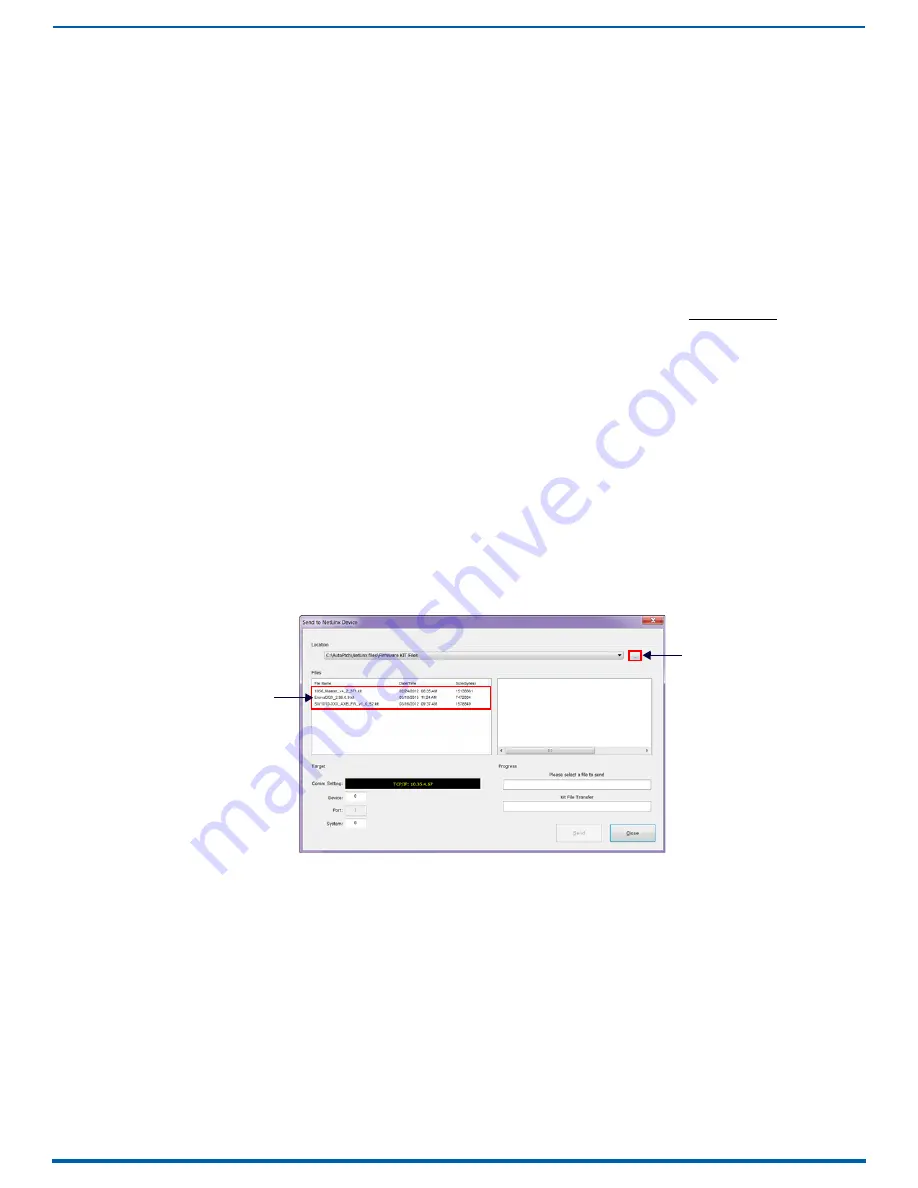
Click the Browse (...) button to navigate to the target directory (FIG. 150):
10.
Select the file for the Enova DGX from the Files list. Click Send.
During the switcher’s upgrade process:
The Enova DGX Switcher stays offline (does not display in the OnLine Tree).
The control panel and System Configuration interface (System/Devices/Switcher Update Status) display upgrade
status messages.
Power cycles will not abort the upgrade; let it run until completion.
Once the upgrade is complete:
The LEDs return to normal.
The Enova DGX Switcher comes back on line (displays in the OnLine Tree).
The System Configuration interface upgrade status (System/Devices/Switcher Upgrade Status) reports that the
system is rebooting.
NOTE:
If any of the boards do not upgrade, the 5002 device can take 15-30 minutes to come online (depending on enclosure).
FIG. 150
NetLinx Studio - Send to NetLinx Device dialog
Browse for the downloaded
(unzipped) Enclosure firmware
Select the Enclosure
.kit file
file


