


www.amulethotkey.com | Page 19
I
nstall
Dual
DXP4
carDs
4
4. How to install dual DXP4 cards
To set up an eight display configuration (octal mode), install two
DXP4s and connect them with two zero clients.
The information below tells you how to install two DXP4s into
a standard PC. There may be slight variations for other PCs or
workstations.
Note:
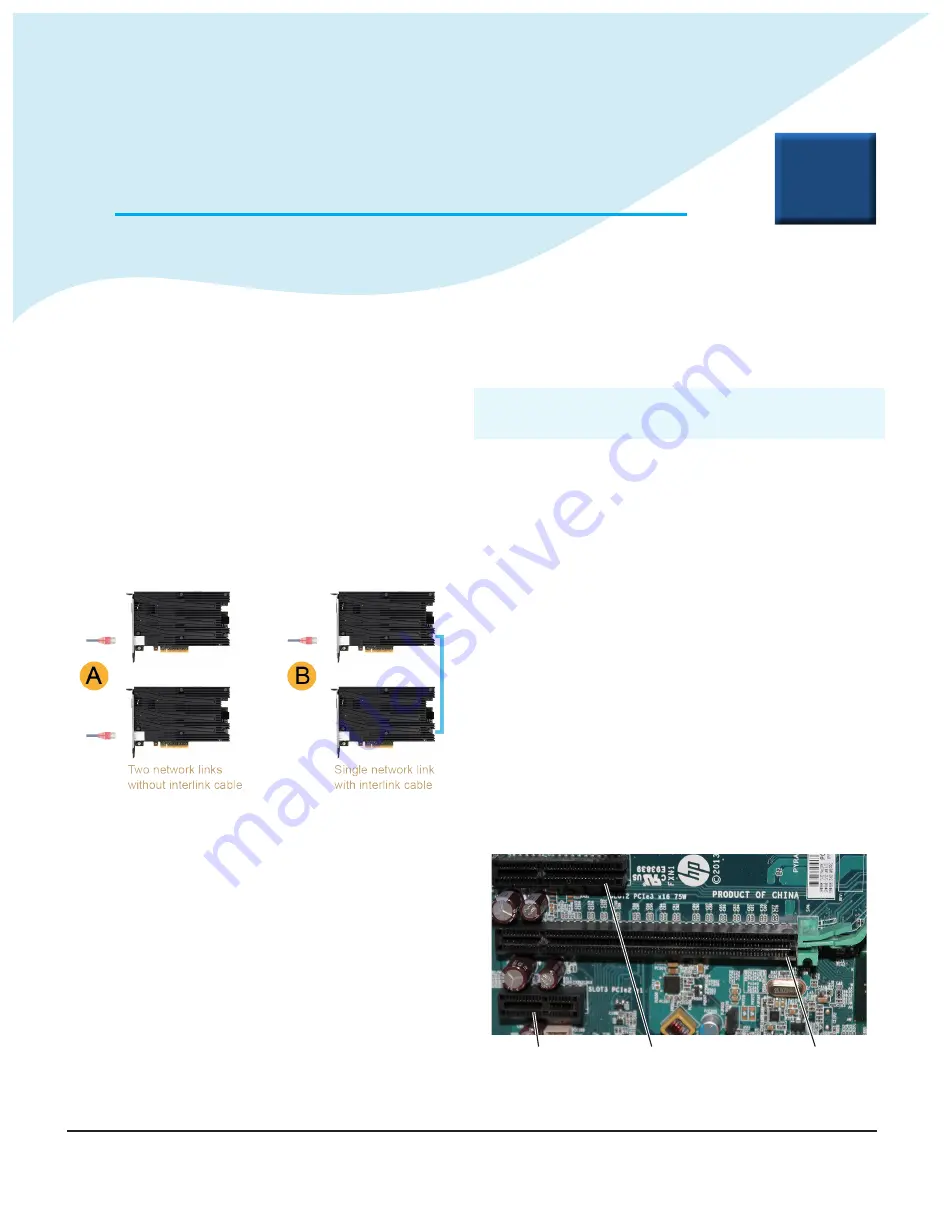
There are two possible network solutions. See
.
A.
Two DXP4 cards with independent network links
B.
Two DXP4 cards with a single network link, linked internally.
Figure 10:
Dual.DXP4.network.solutions
4.1 Before you install the DXP4s
Caution:
!
Do not install dual
DXP4
cards onto a single network
unless that network supports Spanning Tree Protocol (STP).
1.
Make sure that the PC power cable is unplugged before you
install the DXP4s.
2.
Make sure that the power supply is fitted with two PCIe
power connectors that can provide supplemental PCIe power to
the DXP4.
3.
Make sure you wear a wriststrap or follow suitable anti-static
precautions before you handle any cards or work on the PC.
4. Make a note of the MAC address on the label on each DXP4.
Example:
MAC: 00 17 FD 46 03 56
4.2
Install the first DXP4
You will need one interlink cable to connect the DXP4 cards.
1.
(For network solution B only) Connect one end of the
interlink cable to the connector on the first DXP4.
2.
Connect one of the two available PCIe power connectors to
the connector on the first DXP4.
3.
Install the first DXP4 into any free x8 or x16 PCIe slot in the
host PC. See
x16 PCIe slot
x1 PCIe slot
x4 PCIe slot
Figure 11:
PCIe.slot.examples


