13
8.
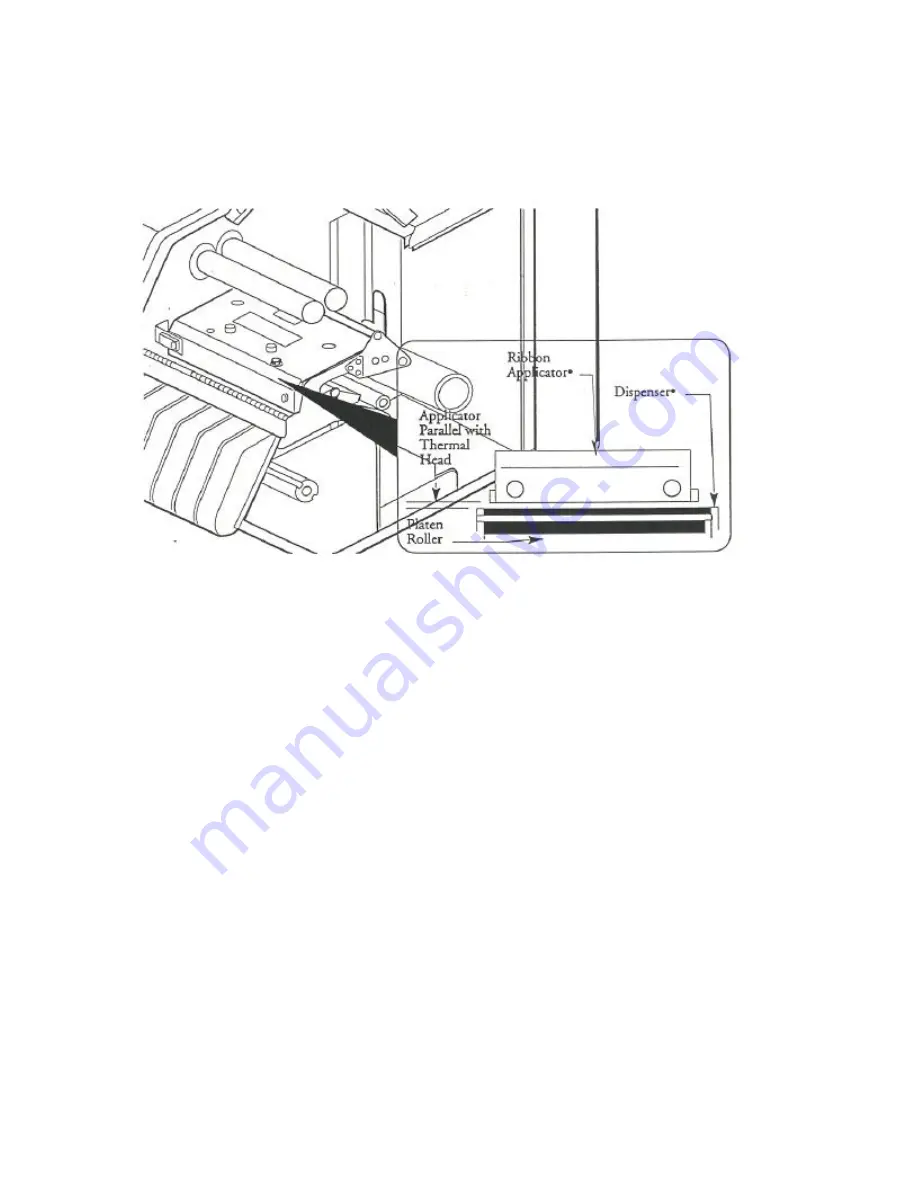
Check to see if the bottom edge of the ribbon applicator aligns to the bottom edge
of the thermal head. (See Figure 8) If not, adjust the alignment following Steps 5
through 7. The right h/s screw is used for adjustments.
Figure 8. Thermal Head Alignment
9.
After adjustments have been made, check to see if the elements of the thermal
head are clean. If they are not, clean them with a soft cloth dampened with
isopropyl alcohol.
10.
Load ribbon and media (labels) into the printer. Power the printer on. Feed the
media (labels) a few times in order to align media (labels) and remove any
wrinkles from the ribbon.
11.
Check to make sure all the parameters are set to the factory defaults. Set the
parameter as indicated below:
•
Print Speed: 85
•
Print Contrast: Less than 30% as weak as printing result can be readable.
•
Label Width: 5.03 in./128 mm
•
Label Length Intervening Label Gap: Varies according to the label stock
being used.
12.
Issue a few labels. Then perform test printing under the following conditions:
•
Issued under normal conditions = Result 1
•
Issued while pushing the right hand side of the thermal head block down
slightly with your finger = Result 2
•
Issued while lifting the right hand side of the thermal head block up
slightly with your finger = Result 3
Summary of Contents for CodeWriter 5106
Page 1: ...CodeWriter 5106 Technical Reference PART NO 108741 Rev A ...
Page 6: ......
Page 8: ......
Page 13: ...5 2 4 Parameter Tree Version 1 90 ...
Page 32: ...24 9 0 ELECTRICAL CIRCUITRY ...


