background image

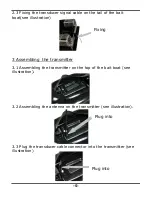
3.4 Connect the power cable to the transmitter and socket of boat
power.

4.2  Assembling the antenna

4 Assembling the receiver

4.1 Installing the batteries  

-6-

When you first use the Fish Finder you will need to installing the
batteries. Slide the Battery Door,  and insert  4 "AA" batteries to
the battery compartment.
Be certain to align the batteries as per the diagram within the
battery compartment.

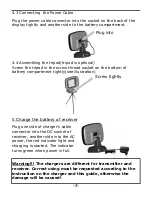
Plug the antenna into the socket on the  back of display tightly(see
illustration)

Plug into

Plug into

Summary of Contents for FD39C

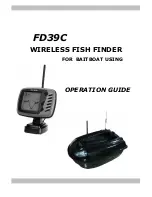
Page 1: ...WIRELESS FISH FINDER FOR BAITBOAT USING OPERATION GUIDE FD39C...

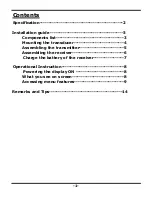
Page 2: ...ing the transmitter 5 Powering the display ON 8 Operational Instruction 8 What you see on screen 8 Accessing menu features 9 Charge the battery of the receiver 7 Assembling the receiver 6 Remarks and...

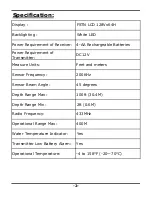
Page 3: ...and meters 100ft 30 4M Specification Power Requirement of Receiver Power Requirement of Transmitter Measure Units Sensor Beam Angle 2 Depth Range Min 2ft 0 6M Water Temperature Indicator Yes Radio Fr...

Page 4: ...Installation guide 3 1 Components list 1 3 2 5 4 8 6 9 10 7 11...

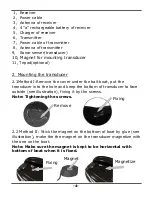
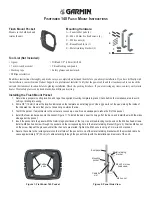
Page 5: ...magnet on the bottom of boat by glue see illustration make the the magnet on the transducer magnetize with the one on the boat Note Tightening the screws 2 Mounting the transducer 2 1Method I Remove...

Page 6: ...the transmitter on the top of the bait boat see illustration 2 3 Fixing the transducer signal cable on the tail of the bait boat see illustration 3 Assembling the transmitter 3 3 Plug the transducer...

Page 7: ...teries 6 When you first use the Fish Finder you will need to installing the batteries Slide the Battery Door and insert 4 AA batteries to the battery compartment Be certain to align the batteries as p...

Page 8: ...ed The indicator turns green when power is full Warning The chargers are different for transmitter and receiver Correct using must be requested according to the instruction on the charger and this gui...

Page 9: ...Unit powers on the Start Up menu temporarily appears From this menu select either Start Up for on the water use or Simulation for learning to use the system with simulated sonar data The Start Up men...

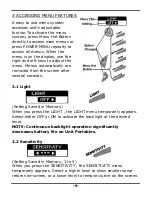
Page 10: ...ll menus When the menu is on the display use the right and left keys to adjust the menu Menus automatically are removed from the screen after several seconds Setting Saved in Memory When you press the...

Page 11: ...0 Setting Saved in Memory When you press the DEP RANGE the DEPTH RANGE menu temporarily appears Select AUTO for the automatically setting Depth Range or manually select 8 15 30 60 or 120 ft This locks...

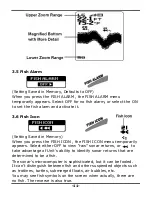
Page 12: ...ut it can be fooled It can t distinguish between fish and other suspended objects such as trotlines turtles submerged floats air bubbles etc You may see fish symbols on the screen when actually there...

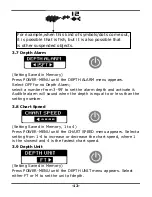
Page 13: ...ved in Memory Press POWER MENU until the DEPTH UNIT menu appears Select either FT or M to set the unit of depth 3 7 Depth Alarm 3 8 Chart Speed Setting Saved in Memory 1 to 4 Press POWER MENU until th...

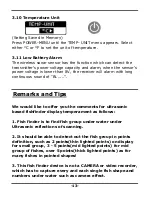
Page 14: ...oltage is lower than 8V the receiver will alarm with long continuous sound of Bi 13 1 Fish finder is to find fish group under water under Ultrasonic reflections of scanning 3 This fish finder device i...

Page 15: ...ng 9 Never use a blunt to strike the sonar sensor as this may cause damage to the sensitive internal electronics 10 Never use the same two FD39 in the same area as this may cause the product can not w...

Page 16: ......

Reviews: