AMES Colt Series Repair Parts Download Page 2

2

Guidelines

1.

Most field problems occur because dirt and debris present
in the system at the time of installation becomes trapped in
the #1 check. 

The system should be flushed before the

valve is installed.

If the system is not flushed until after the

valve is installed, remove both check modules from the
valve and open the inlet shutoff to allow water to flow for a
sufficient time to flush debris from the water line. If debris in
the water system continues to cause fouling, a strainer can
be installed upstream of the backflow assembly.

2.

The Series C400 and C500 may be installed in either 
horizontal, “N” pattern, or “Z” pattern position as long as the
backflow assembly is installed in accordance with the direc-
tion of the flow arrow on the assembly and the local water
authority approves the installation. 

3.

The assembly should be installed with adequate clearance
around the valve to allow for inspection, testing and servicing.
12" (300mm) should be the minimum clearance between the
lower portion of the assembly and the floor or grade. The
valve should be protected from freezing.

4.

Installing a backflow preventer in a pit or vault is not 
recommended.

5.

Normal discharge and nuisance spitting are accommodated
by the use of an Ames air gap fitting and a fabricated indirect
waste line. Floor drains of the same size must be provided in
case of excessive discharge.

6.

The C400 and C500 backflow preventer should be tested by
a certified tester at the time of installation.

Note: Assembly body should not be painted.

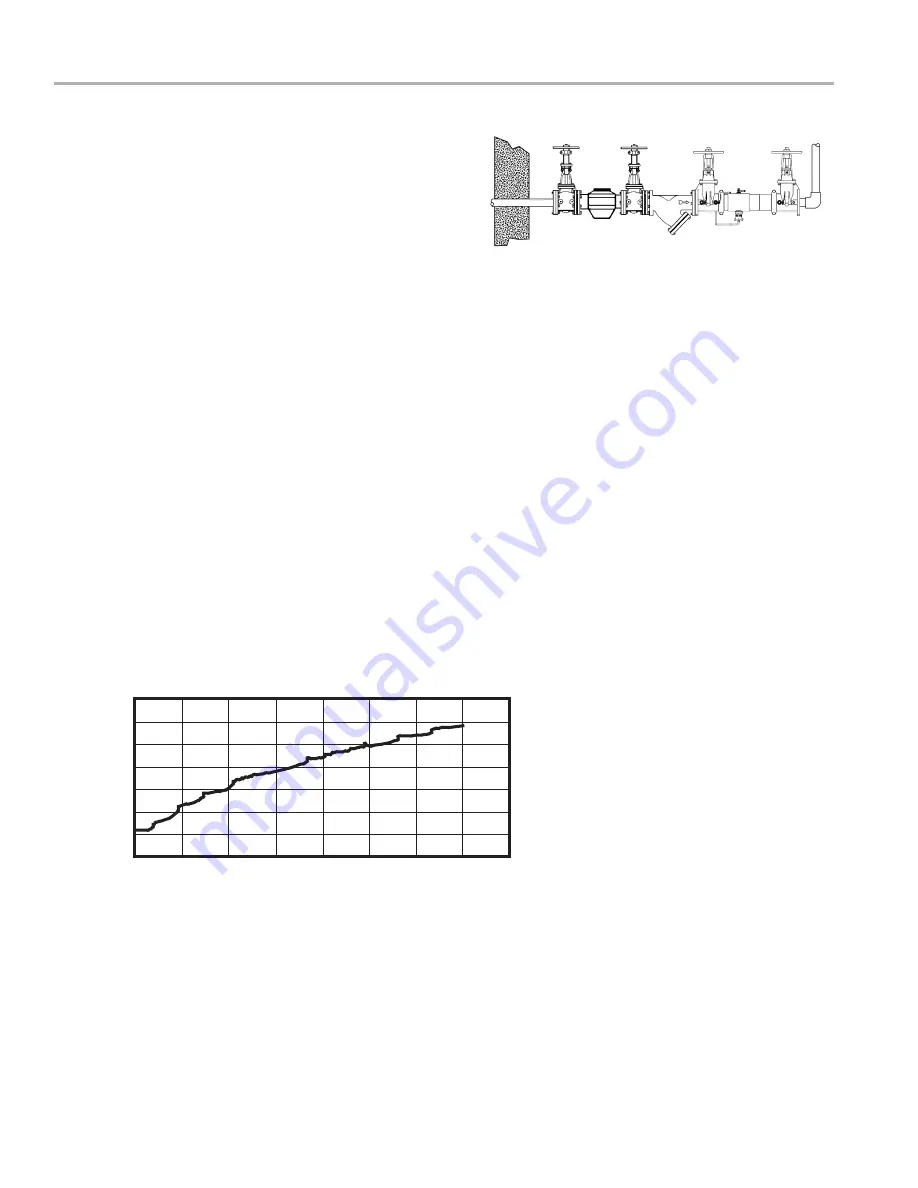
Horizontal Installation

Basic Installation Instructions

Relief Valve Discharge Rates 

2

1

2

" – 10" (65-250mm) C400 and C500

lpm gpm

1330 350

1140 300

950 250

760 200

570 150

380 100

190

50

0

0

0

20

40

60

80 psi

0

138

276

413

551 kPa

Rate of Flow

Pressure

Summary of Contents for Colt Series

Page 1: ...ECT TO THE PRODUCT THE COMPANY MAKES NO OTHER WARRANTIES EXPRESS OR IMPLIED THE COMPANY HEREBY SPECIFICALLY DISCLAIMS ALL OTHER WARRANTIES EXPRESS OR IMPLIED INCLUDING BUT NOT LIMITED TO THE IMPLIED WARRANTIES OF MERCHANTABILITY AND FITNESS FOR A PARTICULAR PURPOSE The remedy described in the first paragraph of this warranty shall constitute the sole and exclusive remedy for breach of warranty and...

Page 2: ...ty approves the installation 3 The assembly should be installed with adequate clearance around the valve to allow for inspection testing and servicing 12 300mm should be the minimum clearance between the lower portion of the assembly and the floor or grade The valve should be protected from freezing 4 Installing a backflow preventer in a pit or vault is not recommended 5 Normal discharge and nuisa...

Page 3: ...eck module with the same instructions as in 4 above For servicing 6 150mm checks see 8 10 200 250mm instructions on p 4 6 To clean or inspect either check module insert a 3 screw driver through the downstream side of the check module as shown in Figures D and E When the screwdriver is in place remove the E clip Figure F and pin connecting the structural members and the check clapper will open with...

Page 4: ... until it contacts the linkage Figure A 4 Continue to thread in service bolt with the wrench until the service hole in the linkage is aligned with the service notches on the spring arbors Figure A 5 Insert the Phillips screwdriver through the arbors and service hole of the linkage making sure that the tip of the screwdriver extends past the ends of the arbors by a minimum of 1 4 6mm Figure B 6 Bac...

Page 5: ...ness Requirements Valve must be tight against reverse flow under all pressure differentials Close high valve A and open test cock 2 Close test cock 4 Disconnect vent hose at test cock 4 Open valves B and C bleeding to atmosphere Then closing valve B restores the system to a normal static condition Observe the pressure differential gauge If there is a decrease in the indicated value check valve No ...

Page 6: ...uard only 7018894 7018894 7018894 NS O ring 3 Test Cock 7017897 7017897 7017897 NS Stainless Steel Check Retainer 7018408 7018408 7018408 ITEM DESCRIPTION ORDERING ORDERING ORDERING NO CODE 6 150MM CODE 8 200MM CODE 10 250MM 1 First Check Module EPDM 7018115 1 First Check Module Red Silicone 7018761 7018118 7018401 2 Second Check Module a EPDM 7018121 2 Second Check Module a Red Silicone 7018765 7...

Page 7: ...ir or replace hose Relief Valve Replacement Parts Listing ITEM DESCRIPTION ORDERING NO CODE 1 Relief Valve Assembly 7018107 2 Diaphragm RV 7017809 3 Spring RV 7013368 4 Spider Bushing RV 7017811 5 Piston Assembly RV 7018227 6 Body RV 7018889 7 Hose Cover Plate Assembly 7018228 8 Screw Cover RV 7017822 9 O ring Inlet coupler 7017826 10 E Clip 5 per pack 7017870 NS Sensing Elbow 7018888 ITEM DESCRIP...

Page 8: ...rks 2009 www amesfirewater com A Division of Watts Water Technologies Inc USA Backflow 1427 N Market Blvd Suite 9 Sacramento CA 95834 T 916 928 0123 F 916 928 9333 Control Valves 18550 Hansen Road Houston TX 77075 T 713 943 0688 F 713 944 9445 Canada 5435 North Service Rd Burlington ONT L7L 5H7 T 905 332 4090 F 905 332 7068 ...

Reviews: