Amerex 570 Owner'S Service Manual Download Page 4


PN 08220


04/2020


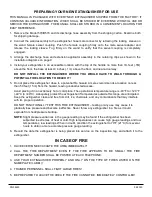
PREPARING YOUR NEW EXTINGUISHER FOR USE


THIS  MANUAL IS PACKAGED WITH EVERY NEW EXTINGUISHER SHIPPED FROM THE FACTORY. IT 
CONTAINS VALUABLE INFORMATION, WHICH SHALL BE STUDIED BY EVERYONE WHO WILL USE OR 
SERVICE THE EXTINGUISHER. THE MANUAL SHALL BE STORED IN A CONVENIENT LOCATION FOR 
EASY REFERENCE.


1.


Remove the Model 570/B570 and its discharge hose assembly from the shipping carton. Examine both 
for shipping damage.


2.


Connect the wand assembly to the extinguisher hose male connector by retracing the locking  sleeve on 
the  wand  female  swivel  coupling.  Push  the  female  coupling  firmly  onto  the  male  swivel  adapter  and 
release  the  locking  sleeve.  Tug  firmly  on  the  wand  to  verify  that  the  swivel  coupling  is  completely 
engaged.


3.


Arrange  the  discharge  hose  and  extension  applicator  assembly  in  the  retaining  clips  as  shown  in  the 


installation diagrams on page 9.


4.


Install your extinguisher in an accessible location with the top of the handle no more than 3½ feet (.1M)  
above the floor, the base at least 4 inches (.1 m) above the floor, and near a doorway. 


      DO  NOT  INSTALL  THE  EXTINGUISHER  WHERE  YOU  WOULD  HAVE  TO  WALK  THROUGH  A 

POTENTIAL FIRE LOCATION TO REACH IT!


5.


Do not place this extinguisher close to a potential fire hazard. Amerex recommends a location no less 
than 50 feet (15 m) from the hazard, leaving unobstructed access. 


Avoid placing it in an extremely hot or cold place. The operational temperature range is 

-

40°F to +120°F 

(

-

40°C to +49°C). Adequately protect the extinguisher if temperatures outside this range are anticipated. 

Keep the extinguisher clean and free from dirt, ice, chemicals, and any contaminants that may interfere 
with its  proper operation. 


DO NOT FUNCTIONALLY TEST THIS FIRE EXTINGUISHER –


testing or any use may cause it to 

gradually lose pressure and become ineffective. Never throw any extinguisher in a fire as it could  
explode from heat/pressure buildup.


NOTE

: Slight pressure variances in the gauge reading may be found if the extinguisher has been 

subjected to extremes of heat or cold. High temperatures can cause high gauge readings and low 
temperatures, low readings. When in doubt, condition the extinguisher to 70°F (21°C) for several 
hours to obtain a more accurate pressure gauge reading.


6.


Record the date the extinguisher is being placed into service on the inspection tag, and attach it to the 
extinguisher.


IN CASE OF FIRE


1.


HAVE EVERYONE EVACUATE THE AREA IMMEDIATELY!


2.


CALL  THE  FIRE  DEPARTMENT  EVEN  IF  THE  FIRE  APPEARS  TO  BE  SMALL!  THE  FIRE 
DEPARTMENT NUMBER SHALL BE POSTED AT EACH TELEPHONE.


3.


USE  YOUR  EXTINGUISHER  PROPERLY  AND  ONLY  ON  THE  TYPE  OF  FIRES  LISTED  ON  THE 

NAMEPLATE (LABEL)! 


4.


TRAINED PERSONNEL SHALL FIGHT LARGE FIRES!  


5.


BE PREPARED TO LEAVE THE AREA IF THE FIRE CANNOT BE  IMMEDIATELY CONTROLLED!


Summary of Contents for 570

Page 1: ...EREX CORPORATION IT SHALL NOT BE DUPLICATED USED OR DISCLOSED TO OTHERS WITHOUT THE EXPRESS WRITTEN CONSENT NOTES 1 THIS COVERSHEET FOR INFORMATIONAL PURPOSES ONLY DO NOT PRINT THIS PAGE IN MANUAL 2 DESCRIPTION MANUAL OWNER S SERVICE FOR MODEL B570 PORTABLE EXTINGUISHER 3 ACTUAL PRINTED MATERIAL TO CONSIST OF ATTACHED 4 OVERALL SIZE OF PRINTED DOCUMENT PAGES 8 1 2 X 11 ON 20 LB PAPER 5 PRINTED MAT...

Page 2: ...EDIATELY AFTER ANY USE OWNER S SERVICE MANUAL INSTALLATION OPERATING SERVICING INSTRUCTIONS MANUAL PN 08220 CLASS D PORTABLE EXTINGUISHER MODEL B570 AMEREX CORPORATION DOES NOT SERVICE MAINTAIN OR RECHARGE FIRE EXTINGUISHERS THIS MANUAL IS PUBLISHED AS A GUIDE TO ASSIST QUALIFIED SERVICE PERSONNEL IN THE INSPECTION MAINTENANCE AND RECHARGE OF AMEREX FIRE EXTINGUISHERS ONLY NO INSTRUCTION MANUAL CA...

Page 3: ... applicable standards of Factory Mutual to ANSI UL 711 and ANSI UL 299 It also complies with industry standards as presented in the National Fire Protection Association Standard No 10 Standard for Portable Fire Extinguishers WARNINGS USE THIS EXTINGUISHER ONLY ON CLASS D BURNING METALS CLASS D FIRES NORMALLY GENERATE EXTREMELY HIGH HEAT AMEREX RECOMMENDS THE USE OF PROTECTIVE CLOTHING AND SELF CON...

Page 4: ...ess than 50 feet 15 m from the hazard leaving unobstructed access Avoid placing it in an extremely hot or cold place The operational temperature range is 40 F to 120 F 40 C to 49 C Adequately protect the extinguisher if temperatures outside this range are anticipated Keep the extinguisher clean and free from dirt ice chemicals and any contaminants that may interfere with its proper operation DO NO...

Page 5: ...ob the chemical onto the fire Be careful not to spread the fire surface when using this technique 4 Reapply powder to visible hot spots 5 To avoid re ignition allow metal to cool before cleanup 6 Evacuate and ventilate the area immediately after use The fumes and smoke from any fire may be hazardous and can be deadly INSPECTION INSPECTION NFPA 10 is a quick check intended to give reasonable assura...

Page 6: ...late label Recharge extinguisher if weight is not within indicated allowable tolerances see instructions in Recharge Procedure 4 Check the date of manufacture stamped on the bottom of the extinguisher or nameplate for model B570 and on the wall hanger loop for Model 570 Cylinder must be hydrostatically proof pressure tested every 12 years to the test pressure indicated on the nameplate 585 psi 403...

Page 7: ...available 4 Use a regulated pressurizing source of ARGON ONLY Set the regulator to no more than 220 psi 1520 kPa 5 Check and calibrate regulator gauge at frequent intervals The regulator gauge shall be used to determine when the intended charging pressure has been reached Do not use the extinguisher gauge for this purpose 6 Never leave an extinguisher connected to a regulator of a high pressure so...

Page 8: ... fluid or a solution of soapy water to the valve discharge orifice around the collar O ring sealing area cylinder welds and gauge Remove leak detecting fluid from valve assembly by blowing out with air or argon Wipe exterior of extinguisher to remove any remaining residue 11 Install the hose assembly to the operating valve Reconnect the female swivel on the extension applicator to the male swivel ...

Page 9: ...ROBLEM CORRECTIVE ACTION 1 Leak at operating valve col lar O ring Remove valve assemble clean collar thoroughly and install new collar O ring Lubricate with Bluestar V 711 2 Leak through valve Install new valve stem assembly Check valve seat scratches or foreign matter Install new valve stem assembly 3 Leak around gauge thread Remove gauge and reinstall using Teflon tape on the gauge threads 4 Def...

Reviews: