


5
Note: There may be slight differences in functionality due to the existence of different product series.
IMPORTANT:
Due to specific hardware limitations within your camera it is important to note that these devices will not be able
to automatically pan/tilt or pivot in either the app or via the web UI on a computer. For this reason, it is imperative to make sure
to mount the cameras properly and position them as efficiently as you can to the areas you wish to monitor. All positioning
actions to the camera will have to be performed manually.
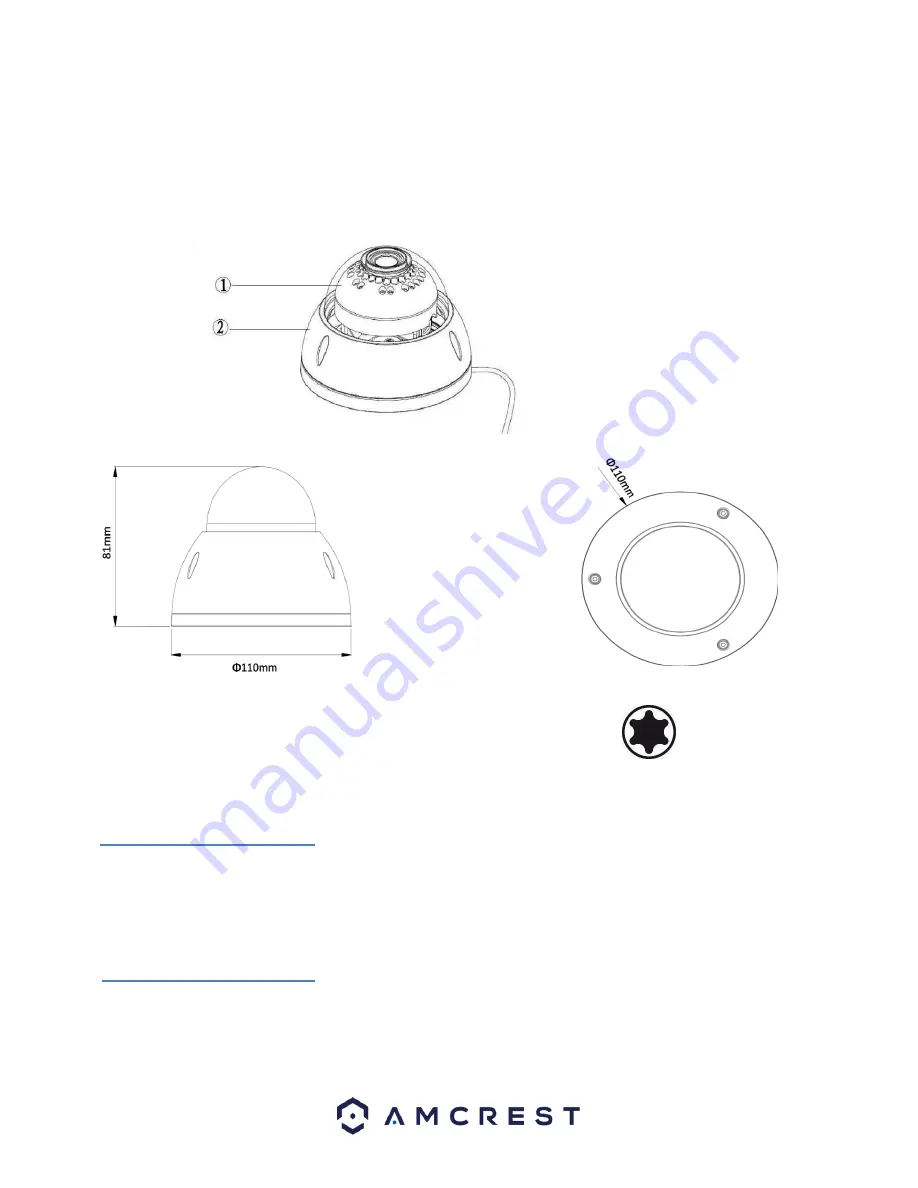
2 Device Overview
The image below shows the structure of the camera:
The images below show the dimensions for the camera. The measurements are in millimeters (mm):
To access the reset button and to adjust the camera angle, use a Torx/Hex wrench to open the camera assembly
by removing the 3 screws. For reference, a Torx/Hex screwdriver tip looks like this:
3 Connection & Installation
This section provides information about the connection and installation of your camera.
3.1 Connection Guide
The camera initially should be connected via the following method:
•
WiFi Connection
•
Ethernet Connection
For more information on how to connect your camera, refer to
section 4, Camera Access Setup.
3.2 Installation Guide
To install the camera on a ceiling or wall, please reference the below diagram as well as the steps:
Note
: Prior to installation, please ensure that the installation environment can support at least 3x the weight of
the bracket.


