


4
HDD
abnormal
indication
light
HDD
When an HDD error occurs or the HDD capacity is below the
specified threshold, this LED becomes red to alert you.
IR Receiver
This is used to receive the signal from the remote control.
2.
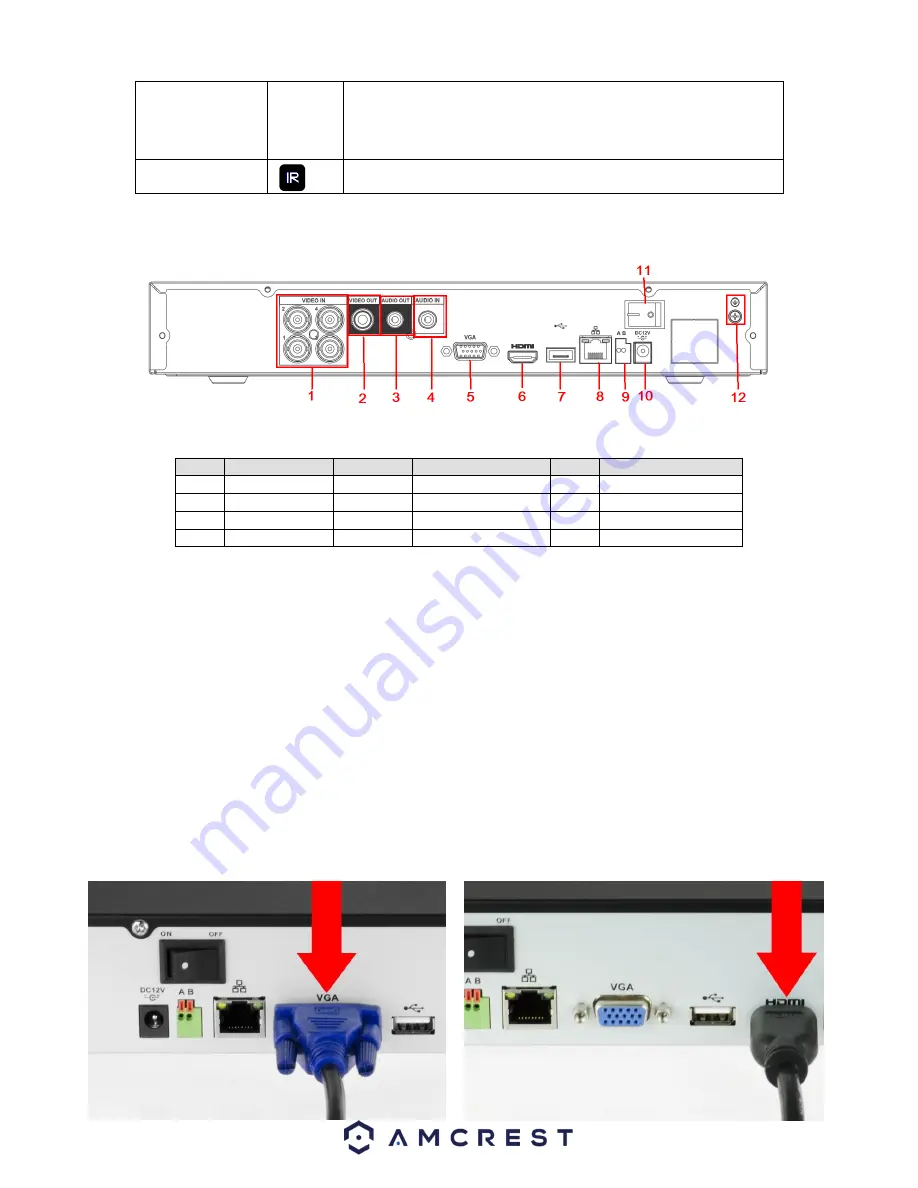
Rear Panel
Please refer to the following chart for detailed information on the rear panel ports:
#
Name
#
Name
#
Name
1
Video input
2
Video output
3
Audio output
4
Audio input
5
Video VGA output 6
HDMI port
7
USB port
8
Network port
9
RS-485 input port
10
Power socket
11
On/Off button
12
GND port
3.
Hardware Setup
Before setting up the HDCVI, you will probably need the following items. The items are not
included:
A computer monitor or TV with either an HDMI or VGA input
A power strip with room for 4 large power plugs
Note
: It is recommended to connect all components of the system as shown below BEFORE
mounting any of the cameras. This is to ensure all components are working. If any components
are not functioning, please contact Amcrest Support.
To set up the DVR hardware, there are 7 major steps:
1. Connecting a monitor to the DVR. The DVR is compatible with any monitor that uses a
VGA or HDMI connection. For purposes of this guide, we will use a VGA connection.


