


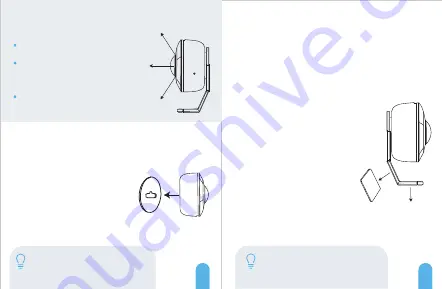
Install Using the Mounting Bracket
The bracket offers two separate angles for the sensor to face.
Use the included two-sided mounting adhesive to install the
sensor to the bracket.
1. Peel one portion of the circular mounting
adhesive and adhere it to the center portion
of the sensor.
2. Peel the other portion of the circular
mounting adhesive and adhere it to the back
of the bracket.
3. Place another mounting adhesive to
the bracket to achieve the desired angle.
4. Peel the other portion of the
mounting adhesive and place the
bracket onto a flat surface.
Installing the Motion Sensor
Location Tips:
• Install the motion sensor indoors on a
flat surface.
11
0°
26 ft
• The motion sensor should be placed 6
to 8 feet high to keep prevent from
falling and out of reach of children or
pets.
• To detect smaller objects, it is
recommended to use one of the angled
sides of the bracket.
1. Peel one portion of the circular
mounting adhesive and adhere
it to the center portion of the
sensor.
2. Peel the other portion of the
mounting adhesive and adhere
it to a flat surface.
Use the included two-sided mounting adhesive to
install the sensor.
Install Using the Mounting Adhesive
Note:
The sensor can be placed on
a table or at a 45° angle using the
included bracket.
Note:
For more information on how
to change a battery, please visit
amcrest.com/support
17
18


