

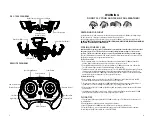

ASC-1000 DIAGRAM
REMOTE DIAGRAM
FLYING TIPS
• It is recommended that you operate the ASC-1000 in a wide space. The ideal space should have a 61
m/200 ft radius.
• Parental guidance or adult supervision is suggested at all times.
• If you are flying the ASC-1000 with others, make sure all spectators are behind you.
• For best performance, it is recommended that you operate the ASC-1000 in zero wind conditions.
Wind can greatly affect the performance of the ASC-1000.
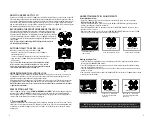
SYNCING YOUR ASC-1000
Important! When syncing your ASC-1000 quadrocopter with the controller always make sure that
the quadrocopter is on a flat level surface and that your digital trim settings are in the center
position. This ensures that the 6 Axis gyro is properly programmed to mimic your trim settings.
Your ASC-1000 utilizes an automatic 2.4G channel selection system that allows up to 8 people to fly side
by side in the same wireless range with no interference.
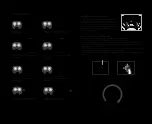
For One-Person Play:
1. Before starting, make sure that the power on both your controller and ASC-1000 are in the OFF
position. Make sure that there are no other 2.4G devices in the area as well.
2. Press On/Off switch and hold for 2 seconds turn ON the ASC-1000 and set it down on a flat surface.
The LED indicator lights of the ASC-1000 should begin to flash rapidly.
3. Turn ON the remote, you will hear two short beeps. The ASC-1000’s LED lights flash rapidly. Push the
throttle on the left all the way forward(1 beep) and then pull the throttle all the way back. A 2nd
beep will sound and the ASC-1000’s lights should turn to solid. This indicates your controller and the
quadrocopter are successfully synced. If not, repeat above steps.
For Multi Person Play:
4. Before starting, make sure that the power on all ASC-1000 drones and Controllers are in the OFF
position. Make sure that there are no other 2.4 G devices in the area.
5. Each person will have to sync their ASC-1000 individually at a different time to avoid interference.
Follow steps 1 to 3 above making sure that no one else is syncing at the same time.
6. After syncing a player’s ASC-1000, it should be left ON until all players have synced their ASC-1000
quadrocopters.
7. Should there be a mistake or interference, all players must turn off their controllers and ASC-1000
quadrocopters for up to 60 seconds and then begin the process again.
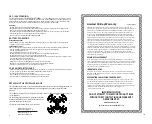
DO NOT FLY YOUR ASC-1000 IN FOUL WEATHER!
WARNING
• Verify that there are 2 “AAA” batteries inside the remote control unit and the ASC-1000 has been fully charged.
• Make sure to be in a large space with an open radius of at least 50 feet.
• Make sure the empty space has no obstacles or rivers. Set your ASC-1000 on a clean flat surface before take-off.
DO NOT ATTEMPT TO FLY YOUR ASC-1000 IF THERE IS RAIN, SNOW, HEAVY WINDS, THUNDER OR LIGHTNING
OUTDOORS. IT COULD DAMAGE YOUR PRODUCT.
PREPARING FOR FLIGHT
3
4
Throttle/Yaw
Direction Control
Right Trim
Left Trim
Backward Trim
Forward Trim
Speed Setting Button
Stunt Button
AUTO Start/Land
Power Switch
Power Indicator
LED Light
Rear Rotor Blades
Front Rotor Blades
Charging Socket
(Bottom position)
LED Light
On/Off Switch
Safety Guard


