background image


21 

OPERATION 

The fireplace can be operated either by the switches located on the left bottom of the fireplace 
unit or by supplied remote control. 
Plug the fireplace into a 15 Amp wall socket. 

MANUAL OPERATION 


1.  The main power ON/OFF switch in position O, the fireplace is OFF. 
2.  When main power ON/OFF switch is at position I, the fireplace is ready to use. 
3.  Press  the 

  button  repeatedly  to  set  the  heater  to  desired  heat  setting.  The  heater 

indicator LED will glow which shows the current heater settings. 
a)  RED 1500W HEAT OUTPUT 
b)  BLUE 750W HEAT OUTPUT 
c)  PURPLE AUTO MODE 

AUTO MODE 

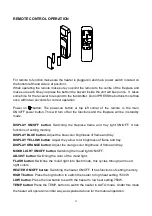
4.  Flame  effect:  Press  the  button  marked 

  to  adjust  the  flame  brightness.  The  flame 

brightness will cycle through 

Low-Medium-High -OFF. 

5.  Mood light effect: Press the button marked 

  to change the mood light colour. 

NOTE:

 If operated at the Low heat setting, the fireplace will not provide as much heat output 

as in the High heat setting, however the low setting will not require as much electrical power 
to operate. To avoid overloading a circuit, do not plug the fireplace into a circuit that already 
has other appliances working. When the fireplace is not in use switch off and unplug. 

SAFETY CUT-OFF 

l


This appliance is fitted with a safety cut-off which will operate if the fireplace overheats 
(eg.  Due  to  blocked air  vents).  For  safety reasons,  the  fireplace  will  NOT  automatically 
reset. 

l


To  reset  the  appliance,  disconnect  the  appliance  from  the  main  supply  for  at  least  10 
minutes. Reconnect the supply to the main  and  switch on the appliance. 

Under this mode the heater will automatically turn ON at high heat setting 1500W heat output when 
the  room  temperature  drops  below  22

(72

).  When  the  room  temperature  is  between 

22-25

(72-77

)  the  heater  output  will  switch  to  low  heat  setting  750W. When  the  room 

temperature goes above 25

(77

) the heater will be turned off and the cycle will continue. The 

LED indicator will be PURPLE in colour under this mode. 

Summary of Contents for INSERT-26-3825-BG

Page 1: ...mable vapors and liquids in the vicinity of this or any other appliance INSTALLER LEAVE THIS MANUAL WITH THE APPLIANCE CONSUMER RETAIN THIS MANUAL FOR FUTURE REFERENCE ZECL 26 2923 BG ZECL 30 3226 BG...

Page 2: ...FIREPLACE 4 CLEARANCES WHTN BUILT IN 5 ZECL 26 2923 BG 7 ZECL 30 3226 BG 8 ZECL 33 3624 BG 9 ZECL 39 4134 BG 10 ZECL 2939 BG 11 INSERT 26 3825 BG 12 INSERT 30 4026 BG 13 INSERT 33 4230 BG 14 ZECL 26 2...

Page 3: ...not insert or allow foreign objects to enter any ventilation or exhaust opening as this may cause an electric shock fire or damage to the heater 10 To prevent a possible fire do not block air intakes...

Page 4: ...ble for connecting three blade grounding type plugs to two slot receptacles The green grounding lug extending from the adapter must be connected to a permanent ground such as a properly grounded outle...

Page 5: ...tible surface not on linoleum or carpet The minimum clearance from the top of the appliance to a mantel combustible or non combustible is 2 50 8 mm The sides and back must maintain 1 25 4mm clearance...

Page 6: ...6...

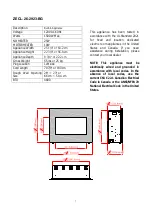
Page 7: ...cm 58 4 cm BTU 4800 This appliance has been tested in accordance with the UL Standard 2021 for fixed and location dedicated electric room appliances in the United States and Canada If you need assista...

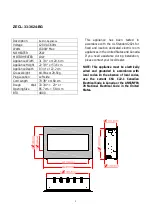
Page 8: ...76 5 cm 63 8 cm BTU 4800 This appliance has been tested in accordance with the UL Standard 2021 for fixed and location dedicated electric room appliances in the United States and Canada If you need a...

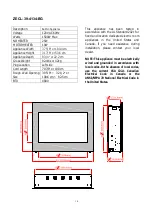
Page 9: ...85 7 cm 58 4 cm BTU 4800 This appliance has been tested in accordance with the UL Standard 2021 for fixed and location dedicated electric room appliances in the United States and Canada If you need as...

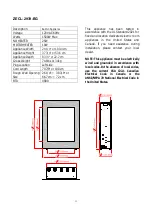
Page 10: ...100 6 cm 82 5 cm BTU 4800 This appliance has been tested in accordance with the UL Standard 2021 for fixed and location dedicated electric room appliances in the United States and Canada If you need...

Page 11: ...or 66 7 cm 72 cm BTU 4800 This appliance has been tested in accordance with the UL Standard 2021 for fixed and location dedicated electric room appliances in the United States and Canada If you need...

Page 12: ...69 2 cm 43 8 cm BTU 4800 This appliance has been tested in accordance with the UL Standard 2021 for fixed and location dedicated electric room appliances in the United States and Canada If you need as...

Page 13: ...ted in accordance with the UL Standard 2021 for fixed and location dedicated electric room appliances in the United States and Canada If you need assistance during installation please contact your loc...

Page 14: ...7 cm 58 4 cm BTU 4800 This appliance has been tested in accordance with the UL Standard 2021 for fixed and location dedicated electric room appliances in the United States and Canada If you need assis...

Page 15: ...m 58 4 cm BTU 4800 This appliance has been tested in accordance with the UL Standard 2021 for fixed and location dedicated electric room appliances in the United States and Canada If you need assistan...

Page 16: ...7 cm 64 1 cm BTU 4800 This appliance has been tested in accordance with the UL Standard 2021 for fixed and location dedicated electric room appliances in the United States and Canada If you need assis...

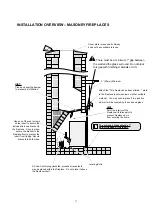
Page 17: ...ve the fireplace insert The surround glass extends 1 below the base of the insert Attach the This fireplace has been altered plate to the fireplace use two screws or other suitable method You may wish...

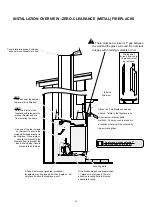
Page 18: ...extends 1 below the base of the insert A Code Conforming jacketed grounded receptacle may be placed within the fireplace Do not place it above the fireplace insert Leveling Bolts Attach the This fire...

Page 19: ...electrically connected and grounded in accordance with local codes if hard wired In the absence of local codes use the current CSA C22 1 CANADIAN ELECTRICAL CODE in Canada or the current ANSI NFPA 70...

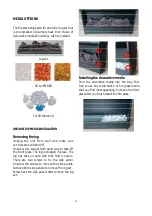
Page 20: ...crews both hand side to take off the front glass The log is shipped in place The log has tabs on each side that hold it secure There are two screws to fix the side panel Unscrew the screws to remove t...

Page 21: ...e as much heat output as in the High heat setting however the low setting will not require as much electrical power to operate To avoid overloading a circuit do not plug the fireplace into a circuit t...

Page 22: ...lace flame and tray light ON OFF It has functions of setting memory DISPLAY BLUE button Adjust the blue color brightness of flame and tray DISPLAY YELLOW button Adjust the yellow color brightness of f...

Page 23: ...mostat prior to installing the fireplace WALL THERMOSTAT WIRING 24 VAC Install Wall Thermostat per instructions provided with kit and per the following information 1 Turn off circuit breaker 2 Remove...

Page 24: ...6 301506 301506 301506 301506 REMOTE RECEIVER 1 8 385010D ZECL 386009D INSERT 387010D ZECL 388009D INSERT 389005D 391010D 392010D FLAME EFFECT BLACK PLASTIC GLASS 1 9 601136B 601136B 601137B 601136B 6...

Page 25: ...25 EXPLODED VIEW...

Page 26: ...se has blown Replace the fuse Appliance is not plugged into an electrical outlet Check plug and plug in Appliance has overheated and safety device has caused the thermal switch to disconnect Turn off...

Page 27: ...27 SERVICE HISTORY This heater must be serviced annually depending on usage Date Dealer Name Service technician Name Service Performed Special Concerns NOTES...

Page 28: ...28...

Reviews: