3
Step 2 – Prepare Unit for Installation
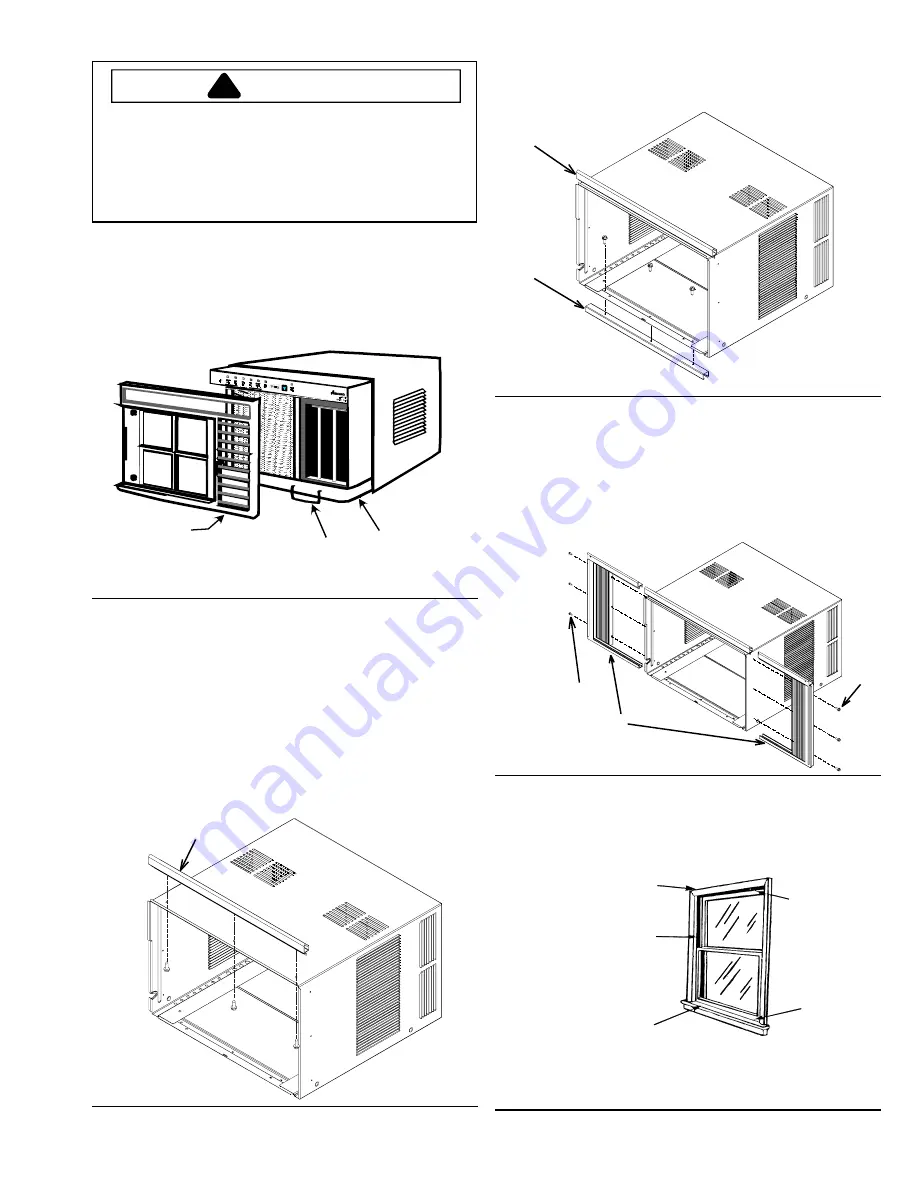
Remove chassis from outer case. Slide grille to left; pull
out and remove. Slide air filter to left and remove. Re-
move screws and plastic front panel.
Using basepan handle, slowly and evenly pull chassis 9
to 12 inches from outer case. With additional help, grasp
chassis basepan and pull chassis from outer case. Set
chassis aside until Step 9.
Attach top rail (Item 1) to outer case with three
3
/
8
" screws
(Item 2). Top rail flange faces front of unit. From inside of
case, insert screws through case and into holes in top
rail.
CAUTION
!
To avoid risk of personal injury or product damage
due to the weight of this device:
•••••
Have someone help install unit. Air conditioner
weighs between 80 and 150 pounds (depending
upon model). Use proper lifting and carrying
techniques to prevent injury or strain.
Attach bottom rail (Item 3) to outer case with three
3
/
8
"
screws (Item 2). From inside of case, insert screws
through case and into holes in bottom rail.
Slide left-hand curtain assembly (Item 4) into left ends of
top and bottom rails. Repeat for right-hand curtain
assembly (Item 5) on right ends of top and bottom rails.
Fasten curtain retainer strips to sides of outer case with 6
or 8 (depending on model) ¼" screws (Item 6).
Step 3 – Prepare Window for Installation
Inspect window track, sash, and sill to ensure they are
strong enough to hold an air conditioner.
A.
Plastic front
B.
Basepan handle
C.
Chassis
Prepare unit for installation
A.
Top Rail
Install top rail
A.
Top rail
B.
Bottom rail
Install bottom rail
A.
Curtain assemblies
B.
Screws
Install left-hand and right-hand curtain assemblies
A.
Window frame
B.
Window track
C.
Window sill
D.
Outdoor sash
E.
Indoor sash
Prepare window for installation
A
B
C
D
E
A
A
B
A
B
B
A
C
B


