background image

5

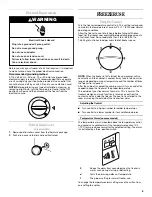
Electrical Requirements

Before you move your freezer into its final location, it is important 
to make sure you have the proper electrical connection.

Recommended grounding method

A 115 Volt, 60 Hz., AC only, 15- or 20-amp fused, grounded 
electrical supply is required. It is recommended that a separate 
circuit serving only your freezer be provided. Use an outlet that 
cannot be turned off by a switch. Do not use an extension cord.

NOTE: Before performing any type of installation, cleaning, or 
removing a light bulb, turn the Temperature Control to the OFF 
position as shown and then disconnect the freezer from the 
electrical source. 

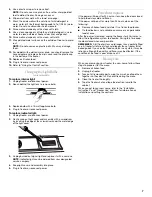
Defrost Drain Cover

(on some models)

1. Remove defrost drain cover from the literature package.
2. Push drain cover into drain hole as illustrated.

FREEZER USE

Using the Control

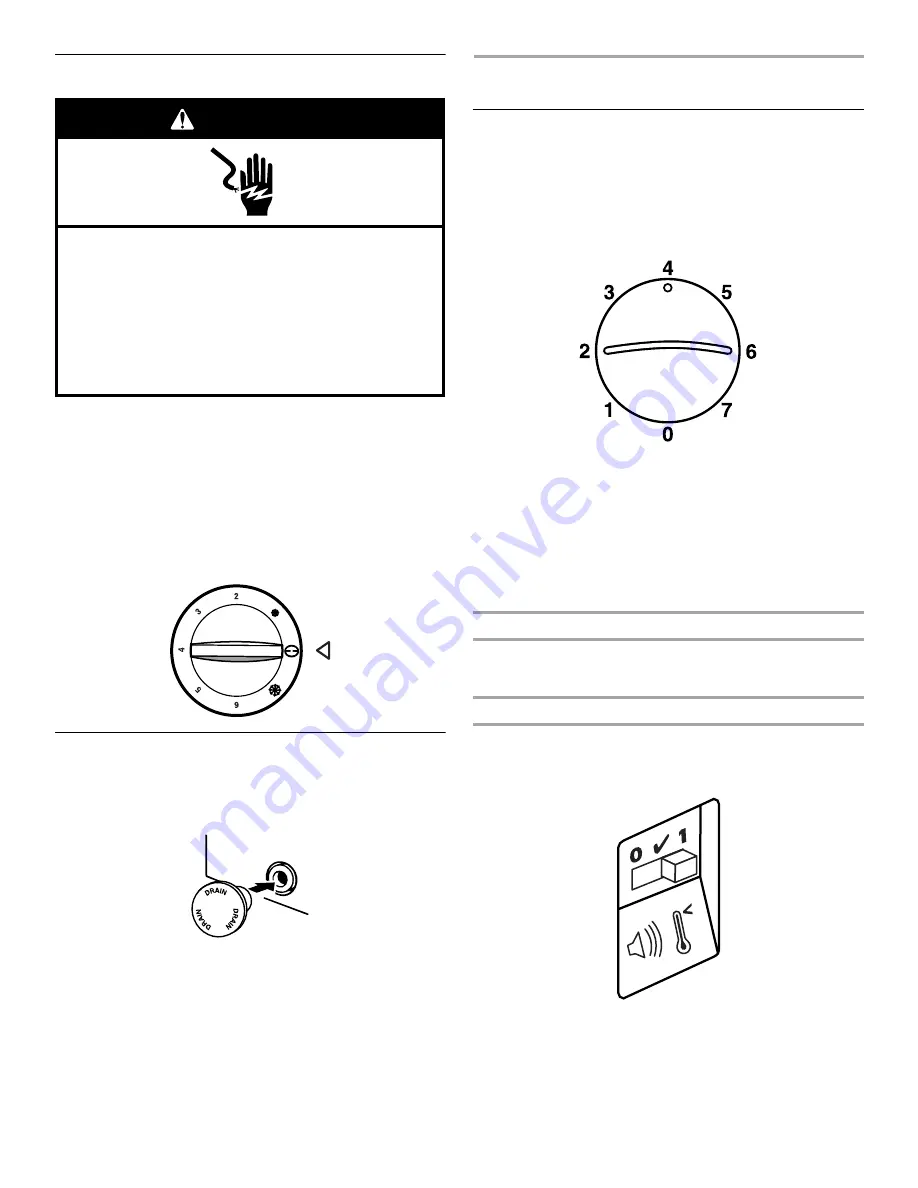
Turn the freezer temperature control to 4. This setting is designed 
to maintain the temperature at or near 0°F (-17.8°C) under normal 
operating conditions.
Allow the freezer to cool 6 to 8 hours before filling with frozen 
food. Let the freezer cool overnight before adding large amounts 
of unfrozen food. Do not add more than 2 to 3 lbs (0.907 to 
1.360 kg) of unfrozen food per cubic foot of freezer space. 

NOTE: When the freezer is first started, the compressor will run 
constantly until the cabinet is cooled. It may take 6 to 8 hours (or 
longer), depending on room temperature and the number of times 
the freezer lid is opened.
After the cabinet is cooled, the compressor will turn on and off as 
needed to keep the freezer at the proper temperature. 
The outside of your freezer may feel warm. This is normal. The 
freezer’s design and main function is to remove heat from the 
contents and air inside the freezer. The heat is transferred to the 
room air, making the outside of the freezer feel warm.

Adjusting the Control

Turn control to a higher number for colder temperatures.

Turn control to a lower number for less cold temperatures.

Temperature Alarm (on some models)

The temperature alarm is located above the temperature control 
and sounds an audible alarm if the temperature reaches 10°F 
(-12°C) or more above normal for the selected setting. The alarm 
is controlled by a three-position switch.

To change the temperature alarm setting, move the switch from 
one setting to another.

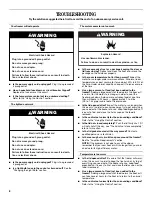
Electrical Shock Hazard

Plug into a grounded 3 prong outlet.

Do not remove ground prong.

Do not use an adapter.

Do not use an extension cord.

Failure to follow these instructions can result in death, 
fire, or electrical shock.

WARNING

0

Keeps the alarm from sounding when the freezer is 
warm, such during start-up or defrosting.

Tests the alarm regardless of temperature. 

1

The proper setting for normal freezer use.

Summary of Contents for AQC1513TE

Page 1: ...00 688 9900 In Canada call for assistance 1 800 807 6777 or visit our website at www amana com or www amana ca CONG LATEUR COFFRE Guided utilisation etd entretien Au Canada pour assistance composez le...
Page 2: ...he U S A 9 In Canada 9 Accessories 9 WARRANTY 10 TABLE DES MATI RES S CURIT DU CONG LATEUR 11 Mise au rebut appropri e de votre vieux cong lateur ou r frig rateur 11 INSTRUCTIONS D INSTALLATION 12 D b...

Page 3: ...and either the word DANGER or WARNING These words mean follow instructions instructions DANGER WARNING IMPORTANT SAFETY INSTRUCTIONS To reduce the risk of fire electric shock or injury when using your...

Page 4: ...both sides of the freezer and 2 5 cm between the back of the freezer and the wall Leave room above the freezer to open the lid 6 It should not be necessary to remove the lid during installation If fo...

Page 5: ...he compressor will run constantly until the cabinet is cooled It may take 6 to 8 hours or longer depending on room temperature and the number of times the freezer lid is opened After the cabinet is co...

Page 6: ...use cleaning waxes concentrated detergents bleaches or cleaners containing petroleum on plastic parts Damage can occur NOTE For models with a defrost water drain the drain cap must be removed before d...

Page 7: ...tal edge of the light cover 3 Unplug burned out signal light and replace it with a new one NOTE Indicator lights can be ordered from your designated service company 4 Snap light cover and assembly int...

Page 8: ...as soon as the food is removed Is the control set correctly for the surrounding conditions Refer to the Using the Control section Is the lid not closed completely Push the lid firmly shut If it will...

Page 9: ...enance procedures Accessory and repair parts sales Specialized customer assistance Spanish speaking hearing impaired limited vision etc Referrals to local dealers repair parts distributors and service...

Page 10: ...bor on major appliances with original model serial numbers that have been removed altered or cannot be easily determined 12 Any damage or discoloration of dry erase door surface caused by markers othe...

Page 11: ...INSTRUCTIONS DE S CURIT Pour r duire les risques d incendie de choc lectrique ou des blessures lors de l utilisation du cong lateur prendre quelques pr cautions fondamentales y compris les suivantes A...

Page 12: ...du cong lateur pour ouvrir le couvercle 6 Il ne devrait pas tre n cessaire d enlever le couvercle durant l installation Si pour toute raison les charni res ont besoin d ajustement contacter une compag...

Page 13: ...efroidir pendant 6 8 heures avant de le remplir d aliments congel s Laisser le cong lateur refroidir une nuit avant d ajouter de grandes quantit s d aliments non congel s Ne pas ajouter plus de 2 3 lb...

Page 14: ...le sortir Pour replacer le panier abaisser le panier en position T moinindicateur surcertainsmod les Un t moin indicateur vous assure que le cong lateur fonctionne Si le t moin indicateur n est pas i...

Page 15: ...e ponge 7 Laver les parois int rieures avec une solution de d tergent doux dans de l eau ti de ou avec 2 cuiller es soupe 26 mg de bicarbonate de soude pour 1 pinte 0 95 L d eau ti de Ne pas utiliser...

Page 16: ...nagement 4 Bien nettoyer le cong lateur 5 Immobiliser le couvercle du cong lateur avec un ruban adh sif et fixer le cordon lectrique la caisse avec un ruban adh sif Lorsque vous arrivez la nouvelle de...

Page 17: ...emps que votre ancien gr ce son moteur plus efficace La temp rature est trop chaude Le couvercle est il ouvert fr quemment Le cong lateur sera plus chaud lorsque le couvercle est ouvert fr quemment Po...

Page 18: ...re de service d sign le plus proche Pour assistance installation ou service contacter sans frais au 1 800 807 6777 Nos consultants fournissent l assistance pour Caract ristiques et sp cifications de n...

Page 19: ...ervice du produit si votre gros appareil m nager est situ dans une r gion loign e o un fournisseur de services d entretien ou de r paration Amana autoris n est pas disponible 10 La d pose et la r inst...

Page 20: ...e situ e sur le produit Nom du marchand ______________________________________________ Adresse ________________________________________________________ Num ro de t l phone ____________________________...

Reviews: