background image

AMACAM AM-M80 


USER MANUAL


1. 

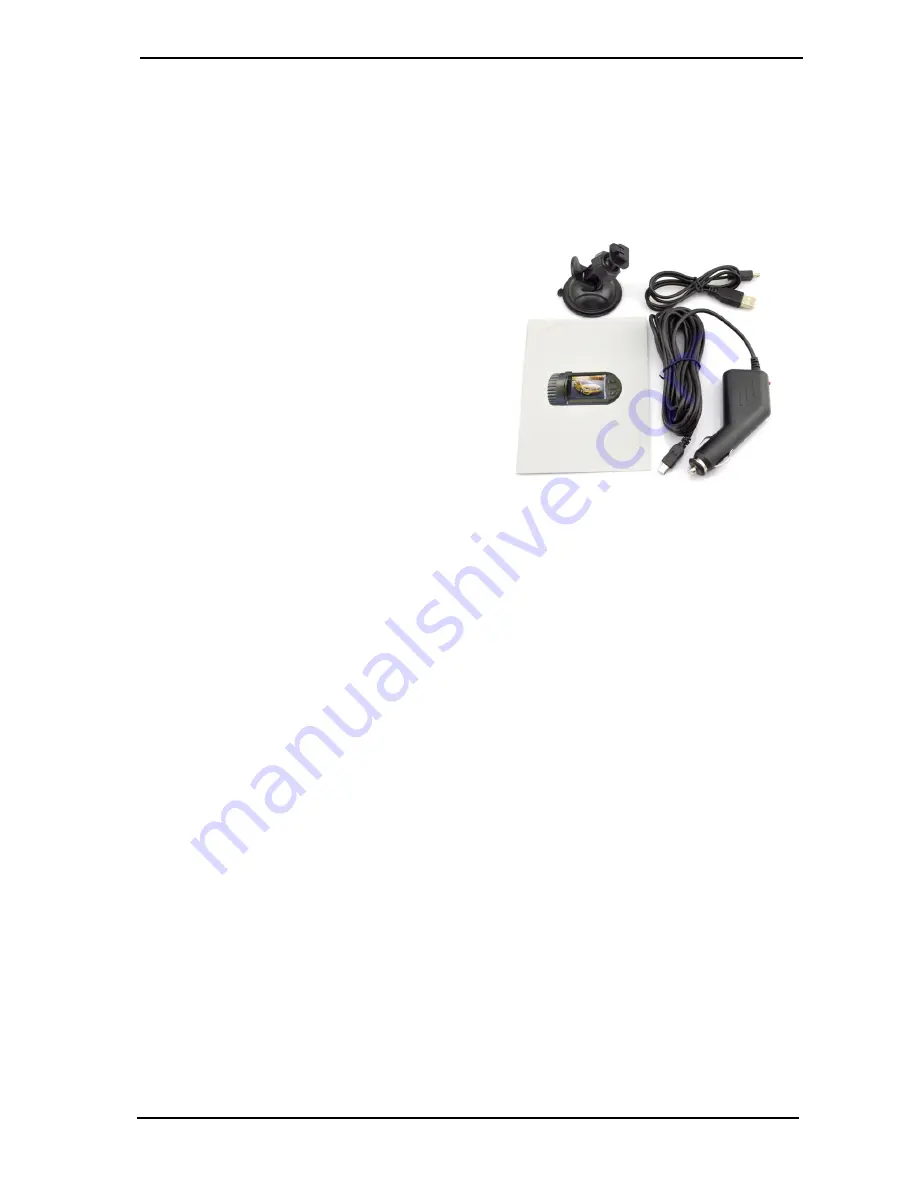
PACKAGE CONTENTS 


  Camera – Note that the camera requires a micro SD memory card, which is not 

supplied with the camera.  (See Section 4.1 Below) 


  Mounting Bracket for car windscreen 

  Charging lead for use in car (Car 

Cigarette lighter to Mini-USB cable) 

  Connection lead for computer (Mini USB 

to USB Cable) 

  User Manual 


2. 

OVERVIEW 


The Amacam AM-M80 camera is designed primarily as a small video camera for 

mounting on the front or rear windscreen of a car.  This is for the purpose of 

recording the car movements and externals activities, and would be of use in 

providing evidence for Insurance purposes.  It is designed in this mode to start 

recording as soon as the car ignition is switched on. 


In addition it can be used for short periods hand held outside the car, but the 

battery life in this instance is limited to approximately 40 minutes of recording 

before being reconnected to the car or a charger for recharging.. 


The camera may also be used to take still photos as a manual operation. 


The video or still pictures recorded can be reviewed on the inbuilt small screen, or 

the camera can be connected to a PC computer for review of all photos and 

videos taken. 


Page 2   


Summary of Contents for AM-M80

Page 1: ...AM M80 USER MANUAL...

Page 2: ...n Playback mode 8 5 4 USB Mode 8 6 VIDEO MENU VIDEO MODE 9 7 STILL MENU PHOTO MODE 11 8 SET UP MENU ALL MODES 14 9 PLAYBACK MENU PLAYBACK OR REVIEW MODE 17 10 FURTHER OPERATIONS 18 10 1 Indicator ligh...

Page 3: ...ose of recording the car movements and externals activities and would be of use in providing evidence for Insurance purposes It is designed in this mode to start recording as soon as the car ignition...

Page 4: ...HDMI Slot 2 Micro SD Card slot 3 Reset 4 Microphone 5 AV out 6 USB Socket 7 UP Button 8 OK Button 9 DOWN Button 10 Screen Display 11 Power Button 12 Mounting Bracket 13 Camera lens 14 Speaker 15 indic...

Page 5: ...UP MENU below Set up Loop recording See Menu Options VIDEO MENU below Set up Motion Detection See Menu Options VIDEO MENU below Camera will now operate in default settings mode Note If problems are e...

Page 6: ...are not provided 4 3 Recording 4 3 1 In car operation If set up as above with Motion detection set to ON See VIDEO MENU below the camera will start recording automatically when the ignition is switch...

Page 7: ...the computer below Note Protected Files See section 10 3 can only be deleted using a connection to the computer 4 4 2 To review files on the camera Turn the camera on by pressing the Power button 11...

Page 8: ...nu To exit the menu press the Power button 11 twice from VIDEO Menu or one more time from SET UP menu to return to the Video mode 5 2 In Photo mode One press click of the Power button 11 will result i...

Page 9: ...this is the same SET UP menu as in Video mode To exit the menu press the Power button 11 twice from PLAYBACK Menu or one more time from SET UP menu to return to the Playback mode 5 4 USB Mode When con...

Page 10: ...Recording Off 3 mins 5 mins 10 mins Off Determines the size of files into which the recording is divided When the memory card is full and when loop recording is on the files are progressively recorded...

Page 11: ...the date time stamp on the Video recording Record Audio Off On On Records Audio as well as video material G Sensor High Normal Low Off Normal This senses an impact and then protects that file to prev...

Page 12: ...after pressing OK Resolution 12M 4032 x 3024 10M 3648 x 2736 8M 3264 x 2448 5M 2592 x 1944 3M 2048 x 1636 2M 1920 x 1080 VGA 640 x 480 1 3M 1280 x 960 12M 4032 x 3024 This gives the resolution as the...

Page 13: ...ensitive and useful when in dark or gloomy light However the images are more noisy i e they show more grain Low ISO settings are used when there is plenty of light The pictures will be less noisy i e...

Page 14: ...time that the picture taken is shown after release of shutter before returning to photo mode Date stamp Off Date Date Time Date Time This only switches the date stamp on or off The date must be set i...

Page 15: ...figure can be set using the UP 7 and DOWN 9 buttons and then fixed and move to next number with the OK Button 11 The date style can be set as DD MM YY MM DD YY or YY MM DD Auto Power Off Off 2 mins 5...

Page 16: ...Hz This is only relevant when charging from AC Mains 60 Hz is normal in American continent Caribbean and some Asian countries 50 Hz is normal in Europe and rest of world Please check in your location...

Page 17: ...after switching the ignition off before the camera stops recording and switches off Anti shaking Off On Off Image Rotation Off On Off This will rotate the image through 180 to allow the camera to be m...

Page 18: ...ancel or OK should be selected with UP 7 and DOWN 9 buttons and confirmed with OK 8 button If Delete All is chosen there is no confirmation requested all pictures will be deleted immediately Important...

Page 19: ...Not supplied IMPORTANT NOTE The mains frequency setting in the SET UP menu must be set to the correct frequency for the mains supply used 10 3 Protecting Files Files may be protected This will preven...

Page 20: ...elect DCIM directory This will then list all the sub directories and files stored on the SD card in the camera Still Photos are stored as JPG files Video clips are stores as AVI files From here files...

Page 21: ...camera b Using the 3 5 mm AV out socket 5 by using a suitable cable adaptor as illustrated This cable is not supplied with the camera 1 2 3 4 Right Ground Video Left 10 6 System reset There are two me...

Page 22: ...age Micro SD Card Class 4 4 GB 8 GB 16 GB or 32 GB Not included USB Interface USB2 0 AV Out 3 5 mm Mini jack or HDMI NTSC or PAL format Battery capacity 250 mAH approx 40 mins recording Charger Time 3...

Page 23: ...audio recording Does one of the buttons do that A The audio recording facility can be turned OFF ON within the settings This setting can be found in the first menu on the second page The default setti...

Page 24: ...lick is heard and felt not pressing firmly as if you are turning the unit on To enter the second menu please press twice quickly so two clicks are felt and heard It really is just a light quick press...

Page 25: ...omatically begin recording when you start to drive please follow these instructions Turn the camera on and select the first menu press the POWER button once after the camera is on Scroll down to the t...

Reviews: