background image

SRP-IV 


- 8 - 

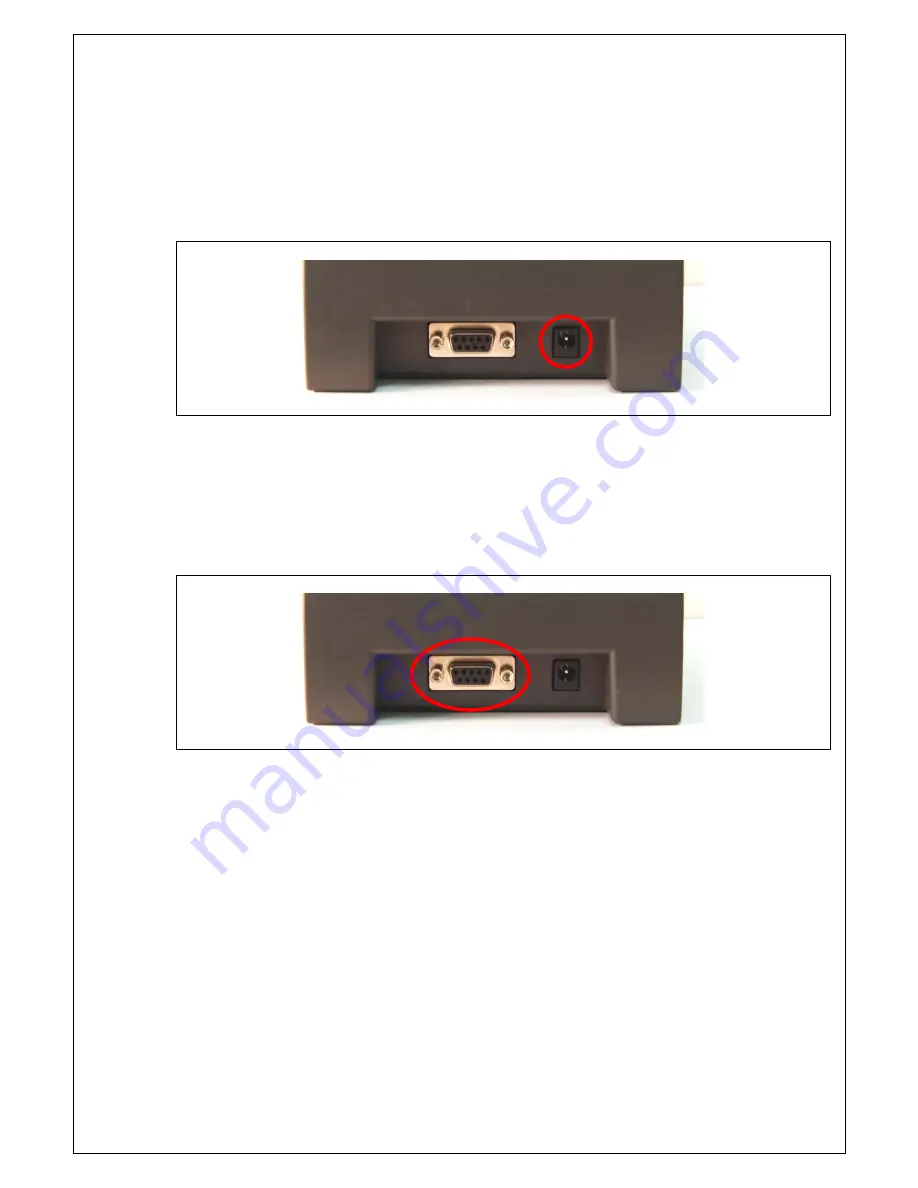
3.2 Supplying Power to Printer   

Insert ‘Power supply connector’ into the ‘power port’ (red circle) 


3.3 Interface Cable Connection   

Prepare dedicated Serial cable. Insert ‘9 pin end’ into ‘Serial port’ (red circle). Connect the other 

end of the cable to the device to be connected 


3.4 How to do Self test 


The self test lets you know if your printer is operating properly. It checks the control circuits, 

printer mechanisms, print quality, and ROM version. 

Running the self test 

1.  Make sure the printer is ‘off’ and the printer covers are closed properly. 

2.  Make sure a paper roll has been installed properly 

3.  Press and hold ‘feed button’

 and then turn on 

the power.   

The self test receipt shows the printer settings. 


Summary of Contents for SRP-IV

Page 1: ...U Us se er r s s M Ma an nu ua al l S SR RP P I IV V http www amteq co kr...

Page 2: ...SRP IV 2 Record of Revisions Revision Version Date DESCRIPTION 1 00 1 10 26 Jan 2008 30 Mar 2009 Preliminary Changing Power Spec Upgrade printing speed...

Page 3: ...l Information Product Features 2 The name of parts and Accessories 3 Installation Usage 3 1 Paper Loading 3 2 Supplying Power to Printer 3 3 Interface cable connection 3 4 How to do self test 4 Printe...

Page 4: ...otification Copyright 2006 AM TECH CO LTD KOREA 1 Specifications Features 1 1Technical Specifications Item Description Printer Method Direct Line Thermal Printing Printing width 72mm Resolution 8dots...

Page 5: ...boosts printing precise characters and clear image at high resolution of 8dots mm Easy Paper Loading Paper roll can be loaded easily and replaced quickly by clamshell design Very Silent printing This...

Page 6: ...IV 6 2 The name of parts and accessories Serial Cable 9pin 9pin 24V 2A Power adaptor Top Cover Feed Button Error LED Power LED Power Button Open Knob Power port Serial Port MSR Receipt Slot with Tear...

Page 7: ...printer and close cover Make sure that the paper cutting direction is correct like picture CAUTION 1 Don t touch the print head It can be very hot after printing continuously for a long time 2 Make su...

Page 8: ...e device to be connected 3 4 How to do Self test The self test lets you know if your printer is operating properly It checks the control circuits printer mechanisms print quality and ROM version Runni...

Page 9: ...rs one time Card reading is Good ERROR LED flashed two times and buzzers two times Card reading is Bad 5 Troubleshooting This chapter gives solutions to some printer questions you may have The lights...

Page 10: ...ies It may cause fire or damage on printers C Use the type of electrical power supply indicated on the printer label if in doubt do not use D When deciding where to place the printer make sure it is p...

Reviews: