


Locations to avoid
DON’T place Smoke Alarms in any of the
following areas:
• Bathrooms, kitchens, shower rooms,
garages or other rooms where the
Smoke Alarm may be triggered by
steam, condensation, normal smoke or
fumes. Keep at least 6 metres (20ft) away
from sources of normal smoke/fumes.
• Locate away from very dusty or dirty
areas as dust build-up in the chamber
can impair performance. It can also block
the insect screen mesh and prevent
smoke from entering the smoke detector
chamber.
• Do not locate in insect infested areas.
Small insects getting into the smoke
detector chamber can cause intermittent
alarms.
• Places where the normal temperature
can exceed 100°F (38.7°C) or be below
40°F (4.4°C) (e.g. attics, furnace rooms,
directly above ovens or kettles etc.) as
the steam could cause nuisance alarms.
• Near a decorative object, door, light
fitting, window moulding etc., that may
prevent smoke from entering the Alarm.
• Surfaces that are normally warmer or
colder than the rest of the room (e.g.
attic hatches). Temperature differences
might stop smoke from reaching the
Alarm.
• Next to or directly above heaters or air
conditioning vents, windows, wall vents
etc. that can change the direction of
airflow.
• In very high or awkward areas (e.g.
over stairwells) where it may be difficult
to reach the Alarm (for testing, hushing
or battery replacement).
• Locate the Alarm at least 1m (39”) from
dimmer controlled lights and wiring as
some dimmers can cause interference.
• Locate Alarm at least 1.5m (59”) and
route wiring at least 1m away from
fluorescent light fittings as electrical
“noise” and/or flickering may affect the
unit.
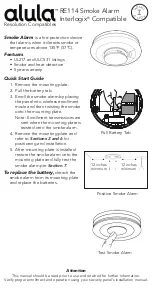
3. Fire Safety Advice
When using household protective
devices, basic safety precautions should
always be followed, including those
listed below
• Please read all instructions.
• Rehearse emergency escape plans so
everyone at home knows what to do
in case the alarm sounds.
Figure 3
PLACE IN CENTRAL
LOCATION AND
NOT WITHIN
305mm (12”)
OF ANY CORNER
SMOKE ALARMS
<610mm (24”) FROM APEX
DEAD AIR
SPACE
Wall Mounting
If ceiling mounting is impractical, Smoke
Alarms may be mounted on a wall,
provided that:
a) the top of the detection element is
between 150mm (6”) and 305mm (12”)
below the ceiling (see; Figure 3a).
b) the bottom of the detection element is
above the level of any door openings;
Wall mounting should only be considered
where close spaced beams or similar
obstructions may preclude ceiling
mounting. It is considered to be the
responsibility of the installer/client to
determine if the presence of asbestos in
the ceiling material would make ceiling
mounting ‘impractical’.
Figure 3a
On a Sloping Ceiling
With a sloping or peaked ceiling install a
Smoke Alarm within 610mm (24”) of the
peak (measured vertically). If this height
is less than 610mm (24”) the ceiling is
regarded as being flat (see Figure 4).
Figure 4
SMOKE ALARMS
<610mm (24”)
APEX
x
x
5


