#859 Operation & Care Manual • 2.
held, it is necessary to periodically use a pocket
thermometer to check each item to make certain the correct
temperatures are being maintained. Proper temperature
range is between 150° and 160°F (66° and 71°C). Normally,
this will require a thermostat setting of between number
“6” and “8,” although a higher or lower setting may
sometimes be required. The full service unit always
requires a higher setting.
6. SERVE FRESH HOT FOOD
Keep foods looking fresh. Occasionally stir or rotate foods as
needed. Serve products in the proper heat tested package or
container. Keep merchandiser doors closed after serving.
Wipe spills immediately to assure maximum eye appeal, and
to ease end of the day cleanup.
The cleanliness and appearance of this unit will
contribute considerably to operating efficiency
and savory, appetizing food. Good equipment
that is kept clean works better and lasts longer.
THOROUGHLY CLEAN THE MERCHANDISER
DAILY
1.
Turn lights and adjustable thermostat to the “
OFF
”
position. Disconnect unit from the power source.
2.
Remove, cover or wrap, and store unused products
under refrigeration.
3.
Remove all detachable items such as pan separator bars,
pans, baskets, etc. Clean these items separately.
4.
Clean the interior metal surfaces with a damp cloth
and any good alkaline or alkaline chlorinated based
commercial detergent or grease solvent at the
recommended strength. Use a plastic scouring pad
or an approved oven cleaner for difficult areas.
Avoid the use of abrasive cleaning compounds,
chloride based cleaners, or cleaners containing
quaternary salts. Rinse carefully to remove all residue and
wipe dry. Clean glass with a window cleaner.
NOTE:
Never use hydrochloric acid (muriatic acid) on stainless steel.
5.
To help maintain the protective film coating on polished
stainless steel, clean the exterior of the unit with a cleaner
recommended for stainless steel surfaces. Spray the
cleaning agent on a clean cloth and wipe with the grain of
the stainless steel.
Always follow appropriate state or local health (hygiene)
regulations regarding all applicable cleaning and sanitation
requirements for equipment.
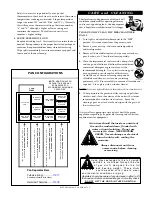
PAN CONFIGURATIONS
TY-30, TYSYS-30, TY-30/RM, TYSYS-30/RM
NOTE:
ADDITIONAL PAN
SEPARATOR BARS MAY
BE REQUIRED TO
ACCOMMODATE MAXIMUM
CAPACITIES.
A
A
A
A
A
A
A
A
A
A
A
A
AA
AA
AA
AA
AA
AA
AAA
AAA
AAA
AAAA
AAAA
ONE-HALF
SIZE PAN
ONE-HALF
SIZE PAN
TWO-THIRDS
SIZE PAN
ONE-THIRD
SIZE PAN
ONE-THIRD
SIZE PAN
ONE-THIRD
SIZE PAN
2 PAN
ZONES
O
n
e
(1
) F
U
L
L
-S
IZ
E
P
A
N
a
n
d
O
n
e (
1
) O
N
E-
THI
RD SI
ZE PAN per
pan zone.
—
U
p
t
o
2 Ful
l-S
iz
e Pans w
ith
2 O
n
e-
Thi
rd Si
ze Pans
Two (
2
) ONE-
HALF SI
ZE PANS a
n
d
O
n
e (
1
) O
N
E-
THI
R
D SI
ZE PAN per
pan zone.
—
U
p
t
o
4 O
n
e-
H
a
lf Si
ze Pans w
ith
2 O
ne-
Thi
rd Si
ze Pans
One
(
1
) TW
O-
THI
R
DS SI
ZE PAN a
n
d
Tw
o (
2
) O
N
E-
THI
RD SI
ZE PANS per
pan zone.
—
Four
(
4
) O
N
E-
THI
RD SI
ZE PANS per
pan zone.
—
U
p t
o 8 O
ne-
Thi
rd Si
ze Pans per
m
er
c
handi
ser
U
p
t
o
2 Tw
o-
Thi
rds Si
ze Pans w
ith
4 O
ne-
Thi
rd Si
ze Pans
AA
AA
AA
AA
AA
AA
AAA
FULL-SIZE
PAN
ONE-THIRD
SIZE PAN
A
A
A
A
A
A
AAA
AAA
AAA
AAA
ONE-THIRD
SIZE PAN
ONE-THIRD
SIZE PAN
ONE-THIRD
SIZE PAN
ONE-THIRD
SIZE PAN
Pan Separator Bars
Full-size (long)...............
11317
3 needed (center & both sides)
Half-size/Third-size........
11318
At no time should the inside or outside of
the unit be washed down, flooded with
water or liquid solution. Do not use
water jet to clean. NEVER STEAM
CLEAN. Severe damage or electrical
hazard could result, voiding the
warranty.
Always disconnect unit from
power source before cleaning
or servicing.
C A R E a n d C L E A N I N G
H o o d g l a s s ex t e n d e d t o t h e f u l l u p r i g h t
p o s i t i o n i s s t a b i l i z e d t h r o u g h t h e u s e
o f g a s s t r u t s d e s i g n e d f o r t h e f u l l
l o a d b e a r i n g w e i g h t .
T h e s e s t r u t s
c o u l d w e a k e n o r f a i l d u e t o w e a r,
e nv i r o n m e n t a l c o n d i t i o n s o r a g i n g .
Operators should be aware of any decrease in effort to lift
the hood and initiate an immediate gas strut safety check.
D O N OT L I F T T H E H O O D I N T H I S C O N D I T I O N .
!
C A U T I O N
Summary of Contents for TY-30
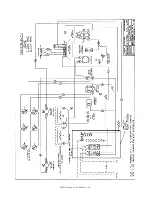
Page 7: ... 859 Operation Care Manual 6 ...
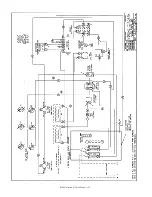
Page 8: ... 859 Operation Care Manual 7 ...
Page 10: ... 859 Operation Care Manual 9 ...
Page 11: ... 859 Operation Care Manual 10 ...
Page 12: ... 859 Operation Care Manual 11 ...
Page 13: ... 859 Operation Care Manual 12 ...
Page 14: ... 859 Operation Care Manual 13 ...
Page 15: ... 859 Operation Care Manual 14 ...
Page 16: ... 859 Operation Care Manual 15 ...


