background image

LINE DRIVERS

6

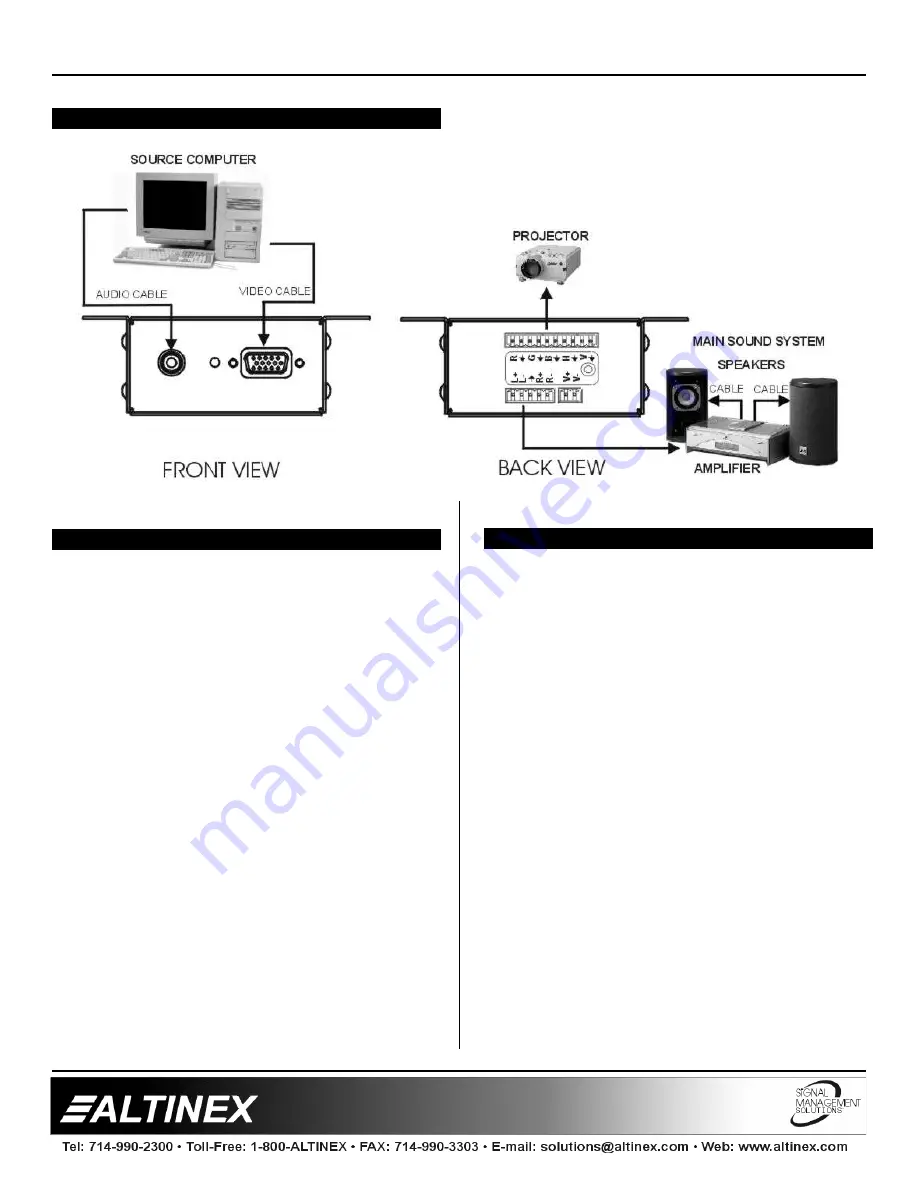
APPLICATION DIAGRAM

5

INSTALLING YOUR DA2000TM

6

Step 1.  

Mount the 

DA2000TM

 to the underside of

a table and apply 9VDC power to the unit.
The LED should turn red, indicating power
but no incoming video signal.

Step 2.  

Connect an active video source to the
front of the 

DA2000TM

.  The LED should

turn green.  If the 

DA2000TM

 is

connected to a display, you should see an
image.

Step 3.  

Connect an active audio source to the
front of the 

DA2000TM

.  If the 

DA2000TM

is connected to an audio amplifier with
speakers, you should hear sound.

Note that the coaxial cable’s braided shield is
twisted into a single conductor with multiple
strands. There is approximately ¼ inch of the
center conductor exposed, and ½ inch of the center
conductor shield exposed.

OPERATION

7

The 

DA2000TM 

will operate successfully as long

as all cables are attached properly and other
technical specifications are followed.

Summary of Contents for Table Mount Computer Video + Audio Line Driver DA2000TM

Page 1: ...LINE DRIVERS MANUAL PART NUMBER 400 0174 001 1 IN 1 OUT TABLE MOUNT COMPUTER VIDEO AUDIO LINE DRIVER USER S GUIDE DA2000TM...

Page 2: ...AL SPECIFICATION 3 PRODUCT DESCRIPTION 4 VIDEO INPUT 5 VIDEO OUTPUT 5 AUDIO INPUT OUTPUT 5 POWER INPUT CONNECTOR 5 POWER SIGNAL PRESENT INDICATOR 5 APPLICATION DIAGRAM 6 INSTALLING YOUR DA2000TM 6 OPE...

Page 3: ...to ensure that the DA2000TM is never installed in an enclosure that has high voltages within it 1 3 CLEANING Clean surfaces with a dry cloth Never use strong detergents or solvents such as alcohol or...

Page 4: ...5mm stereo audio Outputs Video Output Connector 10 pin terminal block Audio Output Connector 5 pin terminal block Power 9VDC 500mA supply 2 pin terminal block Compatibility VGA SVGA XGA UXGA MAC SUN...

Page 5: ...LINE DRIVERS 4 PRODUCT DESCRIPTION 4...

Page 6: ...for video output 4 3 AUDIO INPUT OUTPUT The DA2000TM accepts computer audio input and offers balanced stereo output through a terminal block connector on the back panel There is a 3 5mm jack for compu...

Page 7: ...to a display you should see an image Step 3 Connect an active audio source to the front of the DA2000TM If the DA2000TM is connected to an audio amplifier with speakers you should hear sound Note that...

Page 8: ...for Germany PS5542JP 9V 500mA Power Supply for Japan FREQUENTLY ASKED QUESTIONS 9 No Question Answer 1 How many feet of cable can I use with the DA2000TM The DA2000TM is optimized for 75ft but longer...

Page 9: ...lity in connection with the sale of the products This warranty shall not apply to any product that shall have been repaired or altered outside of company s factory in any way so as in its judgment to...

Reviews: