Altina A8330 User Manual Download Page 18


17

3. Using Music Playback


3.1 

Starting Music Player


This chapter introduces you how to play music files with your device 


The Music Player Program turns your device into a Music Player.   

It features: 

z


Playback of Music files   

z


Basic playback controls such as play, pause, stop, next audio profiles   

z


Playback includes single selection playback, repeat, single repeat, sampling 

playback, normal sequence and random sequence 

z


Play list support 


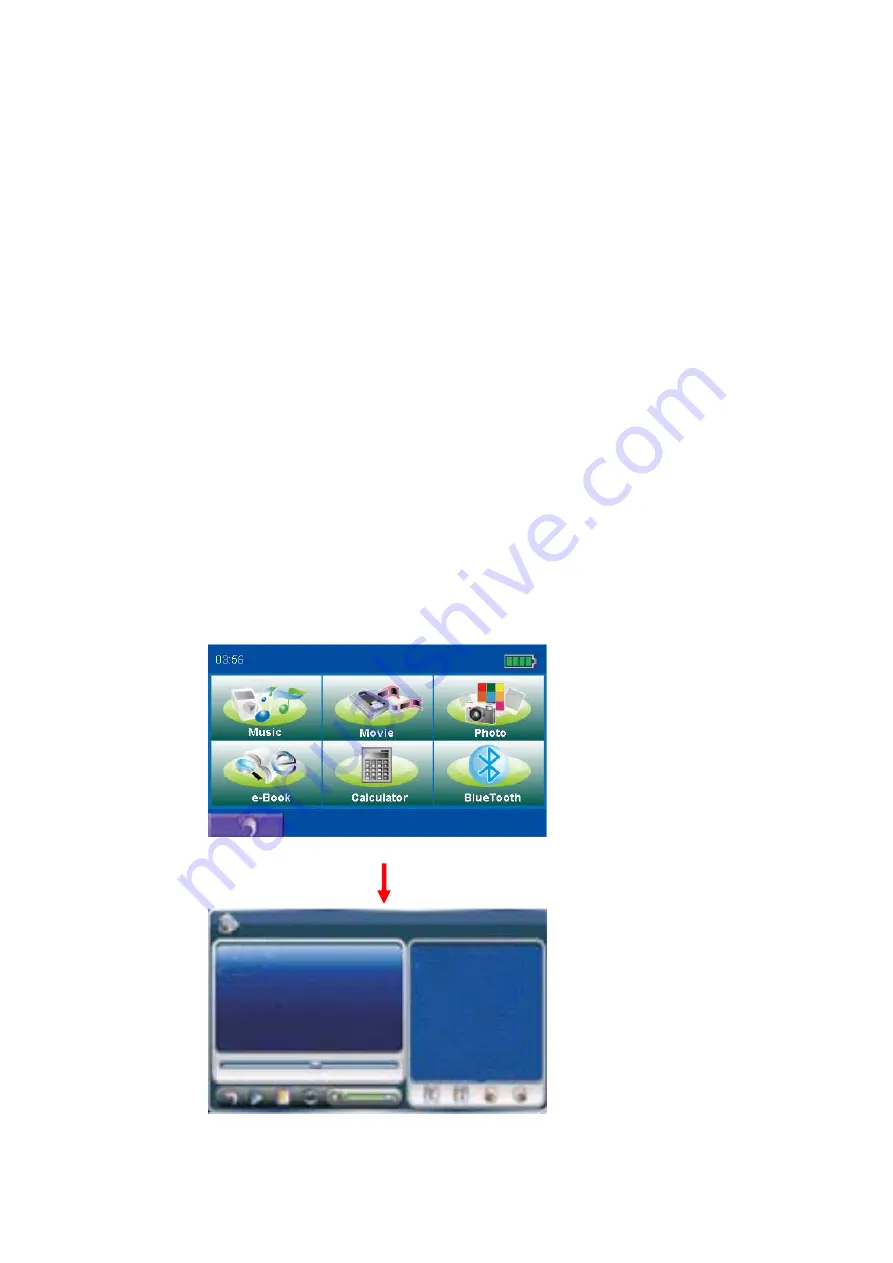
Tap the music player icon on the Main screen as shown below.


Summary of Contents for A8330

Page 1: ...English English Version R02 Oct 2008 Trademarks All brand and product names are trademarks or registered trademarks of their respective companies Note The information in this manual is subject to chan...

Page 2: ...uracy of all GPS equipments GPS satellite signals cannot pass through solid materials except glass When you are inside a tunnel or building GPS positioning is not available A minimum of 4 GPS satellit...

Page 3: ...turn voice and visual guidance Various ways for searching a location on the map Using a known address Using a POI point of interest Using Favorites personal stored locations Using History previous des...

Page 4: ...ded into four major parts Part I Basic Operations tells you how to get your device running and customize system settings Part II Media introduces Music Player Photo Viewer Video Player and E Book Part...

Page 5: ...4 Part I Basic Operations Part I guides you through the process of getting your device running familiarizes you with the external components and tells you how to customize system settings...

Page 6: ...orm the initial startup and introduces you to the external components of your device 1 1 Understanding Hardware Features Note Depending upon the specific model purchased the color and ID may not exact...

Page 7: ...itch to the ON place Then the device will be turned on automatically Note Always leave the ON OFF switch in the ON status for normal operation It is strongly recommended that charge your GPS device co...

Page 8: ...couple of hours NOTE Depending on your region of purchase the connector converter may not look exactly the same as the picture shown Do not disconnect your device from AC power until the battery is f...

Page 9: ...l purchased the car holder supplied with your device may not look exactly the same as the picture shown Notes for Use in a Vehicle Take care that the holder does not present any risk to safety even in...

Page 10: ...hased the car holder supplied with your device may not look exactly the same as the picture shown 1 Connect one end of the car charger to the power connector of your device 2 Connect the other end to...

Page 11: ...ush the Power button the device will open if push the button again the device will off Note When you press the power button to turn off the device it actually enters a suspend state and the system sto...

Page 12: ...on again which resets the unit to factory defaults Inserting a SD MMC Card Your device has a SD MMC slot where you can insert an optional Secure Digital or Multi Media Card storage card To use a SD MM...

Page 13: ...12 Using System Settings Tap the System button on the main menu To open the Settings menu first tap the Settings button shown as below 2 2 1 Language Tap arrow to select the language you want...

Page 14: ...e Date 1 Tap theDate Time button on the Device Settings menu The Date Time Function menu appears as shown below 2 Tap the date button to enter into the date menu 3 Tap the time button to enter into th...

Page 15: ...zone to select the time zone 2 2 3 Volume Tap the Audio button on the Device Settings menu The volume Function menu appears as shown below Tap arrows to adjust the volume 2 2 4 Backlight Tap arrows to...

Page 16: ...unction menu appears as shown below 2 Tap the Calibration button on the About Function menu The Calibration Function menu appears as shown below 3 Tap and hold the centre of the target When the target...

Page 17: ...16 Part II Media Part II introduces Music Player Picture Viewer Movie Player EBook and Calculator...

Page 18: ...turns your device into a Music Player It features z Playback of Music files z Basic playback controls such as play pause stop next audio profiles z Playback includes single selection playback repeat s...

Page 19: ...PS device The program will search for the files in your storage card when the files are detected they will be added to the play list 3 3 Music Playback Control Tap one of the Music files the control p...

Page 20: ...sing your device The program turns your device into a Photo player It features Playback of JPEG files Basic playback controls such as the picture with zoom in out rotation in full screen 4 1 Starting...

Page 21: ...card reader you can easily copy Photo files from your computer to a storage card The Photo Player can detect Photo files in all folders of a storage card If picture is too big or the device does not...

Page 22: ...r device The Video Player program turns your device into a Video player It features Basic playback controls such as play pause stop next and previous Play list support Playback of AVI files 5 1 Starti...

Page 23: ...back Control After start the movie player tap on the file you would like to play No Name Description 1 Play Pause Play Pause the playback 2 Previous Play previous file 3 Next Play next file 4 Stop Sto...

Page 24: ...ts txt file formats only 6 1 Starting EBook Player Tap EBook Player on the Main screen to switch to the program 6 2 Preparing EBook Files for Your Device With the card reader you can easily copy EBook...

Page 25: ...24 7 Calculator Tap calculator on the Main screen to switch to the program...

Page 26: ...25 Part III Hands Free Calling Part III introduces how to use hands free calling function...

Page 27: ...26 8 1 Connecting to cell phone 1 Tap the Bluetooth on the main menu and enter into following display...

Page 28: ...one detect the GPS device the pin code will be asked to enter and the default pin code is 8888 when it shows succeeed the connection is established when it shows failed the connection is not establish...

Page 29: ...28 In talking mode the interface has shown as below Each outgoing call received call and missed call can be recorded...

Page 30: ...n be changed by tapping the right icon to enter a new code and enter the new pin code when start up hands free calling function next time The default code is 8888 z You can set up the ring bell by tap...

Reviews: