background image

15

-EN

EN

DE

FR

IT

RU

Channel Delete

After entering the channel editing menu, select the ‘

DELETE

’ button on 

the screen by pressing the [

u

]/[

t

] buttons.

Press the [

OK

] button to delete the channel.

NOTE: this function will permanently delete the channel from the current 

program list. Users will only restore the previous channels back by performing 

the auto search again.

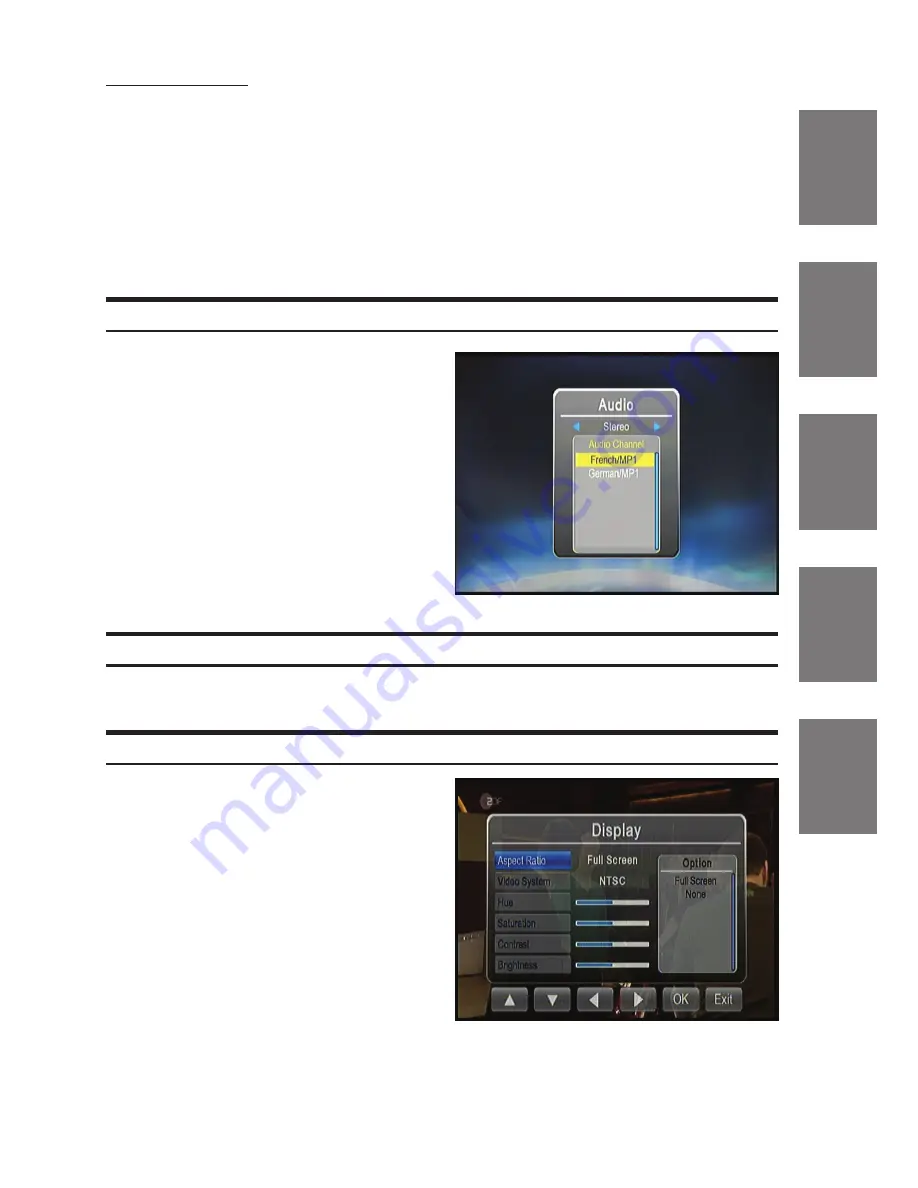
Audio

Highlight the ‘

Audio

’ option on 

the TV menu screen and press the 

[

OK

] button to enter the ‘

Audio

’ .

Select the stereo/left/right audio 

channel and scroll the available 

languages. Press the [

OK

] button 

to select the language of the 

current service.

Press the [

EXIT

]/[

MENU

] key to exit.

Service Type

To toggle between TV and Radio service (where available).

Display

To adjust the image to your 

preferences, highlight the item you 

want to change.

Press the [

OK

] button to activate 

your settings.

After adjusting, press the [

EXIT

]/

[

MENU

] button to exit the 

Display

’ menu.

Summary of Contents for TUE-T220DV

Page 1: ...61 3 8787 1200 ALPINE ELECTRONICS GmbH Wilhelm Wagenfeld Strasse 1 3 80807 Munich Germany Phone 49 0 89 324264 0 ALPINE ELECTRONICS OF U K LTD Alpine House Earlplace Business Park Fletchamstead Highw...

Page 2: ......

Page 3: ...l System Start Up 11 Operation 12 Select a Channel from the Channel List 12 Channel Information CH Info 13 Channel Scan 14 Channel Sorting CH sorting 14 Skipping a Channel 14 Move Channels 14 Channel...

Page 4: ...vehicle Installing this product incorrectly enables the driver to watch TV Video while driving This may cause a distraction preventing the driver from looking ahead thus causing an accident The driver...

Page 5: ...through a hole in metal use a rubber grommet to prevent the wire s insulation from being cut by the metal edge of the hole DO NOT INSTALL IN LOCATIONSWITH HIGH MOISTURE OR DUST Avoid installing the u...

Page 6: ...ehicle and the installer may need to try anetnna mounting positions to determine the best position for most stable signal reception in vehicles Important Notes on Antenna Installation For a better rec...

Page 7: ...Front Windscreen but at least 5cm away from the metal body of the car Top of the Rear Windscreen but at least 5cm away from the metal body of the car Bottom of the Rear Windscreen at least 5cm away f...

Page 8: ...8 EN Antenna Cable Routing Once a suitable position is found carefully route the antenna cables to the receiver unit and then connect to the Antenna Inputs on the TUE T220DV...

Page 9: ...ssed to select the next previous favourite service 8 Number buttons Preset services and Teletext pages can be directly accessed by using the number buttons 9 Scan button Press the button to start the...

Page 10: ...d output REMOTE EYE INPUT IR Remote input for optional remote eye KRE 500E POWER AV Combination of power input ACC input Remote input CVBS Video Audio GND Rear Service For connection with USB stick or...

Page 11: ...nd others 1 Use p q buttons to navigate to the items 2 Use OK button to enter the options available of selected item 3 Press p q buttons to scroll up and down the options 4 Pressing the OK button to s...

Page 12: ...hannel information for TV selection program preview and to access the Electronic Program Guide EPG 1 Select CH List in the TV menu and press the OK button The CH List will appear on the screen Scroll...

Page 13: ...eturn to the Schedule view Press one more time to return to the Channel List Channel Information CH Info Shows detailed parameters and signal information of the currently received channel 1 Highlight...

Page 14: ...to enter the editing menu for the chosen channel Options are skip move and delete functions 3 Press EXIT MENU button to exit anytime Skipping a Channel 1 After entering the channel editing menu selec...

Page 15: ...n Audio 1 Highlight the Audio option on the TV menu screen and press the OK button to enter the Audio 2 Select the stereo left right audio channel and scroll the available languages Press the OK butto...

Page 16: ...s the EXIT MENU key to exit Teletext 1 Highlight the Teletext option and press the OK button to enter Teletext 2 Press the button to view the next page or the to view the previous teletext page 3 Pres...

Page 17: ...lly switching the TV frequency when needed 1 Highlight the AFS Setting option on the Setting screen and press the OK button to enter AFS Setting menu 2 When selecting On another screen will open allow...

Page 18: ...ing menu Version Upgrade To upgrade the software version 1 Insert the USB device containing the software upgrade file into the USB slot 2 After entering the Version Upgrade menu press the OK button to...

Page 19: ...unit s setting menu 1 Go to Settings Audio AUX and enable the AUX input 2 When the AUX input is enabled the option AUX Name becomes available Select DVB T from the menu 3 When DVB T was selected the D...

Page 20: ...rness AVN Unit To ACC Power Harness AVN Unit To Vehicle Ground To REMOTE OUT AVN Unit To AV INPUT AVN Unit To SPDIF IN optional Processor To HDMI IN optional Monitor ANTENNA INPUT HDMI OUT SPDIF OUT R...

Page 21: ...VC ISO IEC 14496 10 SD HD H 265 HEVC ISO IEC 23008 2 SD HD Software Features OSD Language English French German Italian Spanish Portuguese Rus sian Czech Slovak Greek Features DVB T2 TV Auto Channel S...

Page 22: ...Contact your local authority for details in locating a recycle facility nearest to you Proper recycling and waste disposal will help conserve resources whist preventing detrimental effects on our heal...

Page 23: ......

Page 24: ...R...

Reviews: