background image

32

-EN

Setting item:

Source Volume Setup 

 Radio / DAB / Compressed Media*

1

 / 

iPod Music / AUX / HDMI*

2

 / Bluetooth Audio / Apple CarPlay / 

Android Auto

Setting contents*

3

:

-14 to +14 (Initial setting: 0)

Setting the Volume for Apple CarPlay

When an iPhone 5 or later is connected, after touching [Apple 
CarPlay], you can adjust Media, Phone Calls, Ringtones & Alerts 
level, Notifications & Guidance level, Siri and Microphone Level 
for Apple CarPlay mode.

Setting item: 

Media / Phone Calls / Ringtones & Alerts / Notifications & Guidance / Siri / 
Microphone Level

Setting contents for Media: 

-14 to +14 (Initial setting: 0)

Setting contents for Ringtones & Alerts:

1 to 6 (Initial setting: 3)

Setting contents for other items: 

1 to 11 (Initial setting: 5)

Setting the Volume for Android Auto

When an Android Smartphone is connected, after touching 
[Android Auto], you can adjust Media, Phone Calls, Ringtones & 
Alerts level, Notifications & Guidance level, Voice Recognition 
and Microphone Level for Android Auto mode.

Setting item: 

Media / Phone Calls / Ringtones & Alerts / Notifications & Guidance  /  Voice 
Recognition /  Microphone Level

Setting contents for Media: 

-14 to +14 (Initial setting: 0)

Setting contents for Phone Calls:

1 to 35 (Initial setting: 10)

Setting contents for Ringtones & Alerts:

1 to 6 (Initial setting: 3)

Setting contents for other items: 

1 to 11 (Initial setting: 5)

*1

Compressed Media is the music data in a USB flash drive (MP3/
WMA/AAC/FLAC). 

*2

The source name set in “HDMI Setup” (page 41) is displayed.

*3

Except for Apple CarPlay/Android Auto mode.

• Settable source differs depending on the connected device and settings.

You can adjust the volume of the incoming call.

Setting item:

Caller Level

Setting contents:

1 to 35 (Initial setting: 10)

You can adjust the transmit volume, during the call.

Setting item:

Microphone Level

Setting contents:

1 to 11 (Initial setting: 5)

You can adjust the receive volume, during the call.

Setting item:

Ring Tone Level

Setting contents:

1 to 6 (Initial setting: 3)

You can change the volume of the sound heard when a button is 
touched. 

Setting item:

Key Sound

Setting contents:

0 to 6 (Initial setting: 3)

The volume of the sound heard is raised automatically according to the 
noise level by detecting engine noise and road noise.

Setting item:

Auto Volume

Setting contents:

Off (Initial setting) / Low / Middle / High

• The increasing rate of volume becomes large in this order: Low 


Middle  

High.

The sound can be muted when the shift gear lever is set to the reverse 
(R) position enabling you to easily hear sensors, etc., while reversing 
your car.

Setting item:

Mute while backing up

Setting contents:

Off / On (Initial setting)

Set this item when Apple CarPlay is used/Android smartphone which 
installed Android Auto App is connected.
You can turn on or off the Microphone Effect.
This setting influences Apple CarPlay/Android Auto mode.

Setting item: 

Microphone EC / NR

Setting  contents: 

On (Initial setting) / Off

You can restore the Dual HD EQ*/X-OVER*/Time Correction*/MX HD 
Level/Rear Speaker/Subwoofer/Subwoofer Level/Subwoofer Phase to 
factory settings.

Setting item: 

Default Sound Settings

Touch 

[Set]

, and the confirmation message appears.

To initialise, touch 

[OK]

.

*

The setting values that are stored in Preset 1 to Preset 3 cannot be 
initialised.

Setting the Volume for Each Source

Adjusting the Caller Level

Adjusting the Microphone Level

Adjusting the Ring Tone Level

Key Sound Volume Setting

Auto Volume Setting

Setting Audio Mute On/Off while Backing up

Off:

Does not mute.

On:

Mutes when the shift gear lever is set to the reverse (R) 
position.

Setting the Microphone Effect

Default Sound Settings

Summary of Contents for INE-W987A

Page 1: ...161 165 Princes Highway Hallam Victoria 3803 Australia Phone 03 8787 1200 ALPINE ELECTRONICS GmbH Ohmstra e 4 85716 Unterschlei heim Germany Phone 089 32 42 640 ALPINE ELECTRONICS OF U K LTD Alpine Ho...

Page 2: ......
Page 3: ...n 21 How to Input Characters and Numbers Keypad 21 Favourite Function Using the Favourite Function 22 Editing the Favourite Screen 22 Registering Items 22 Changing Item Names 23 Changing Icons only th...

Page 4: ...B Setting 39 Setting Alarm Emergency Broadcast Reception 39 Setting Announcement Reception 40 Setting the FM Linking ON OFF Service Following 40 Setting the DAB Antenna ON OFF 40 AUX Setup 40 Setting...

Page 5: ...Full Search Mode 59 Alphabet Search Function 60 Repeat Play 60 Random Play Shuffle 60 HDMI Device Optional About HDMI selector Optional 61 DVD Player Operation DVD Player SETUP 61 CD MP3 WMA AAC WAV P...

Page 6: ...the car is in reverse 80 Switching the Image Pattern for the Rear Camera 80 Guide Display ON OFF Setting 80 Adjusting the Caution Display Location 80 About the Rear Camera Guide 81 Front Camera Opera...

Page 7: ...her factors which may affect the safety or timing of your driving experience Use your personal judgement if the navigation system is unable to provide you with an alternate route There may be situatio...

Page 8: ...r if you are not sure Failure to do so may result in fire etc KEEP SMALL OBJECTS SUCH AS SCREWS OUT OF THE REACH OF CHILDREN Swallowing them may result in serious injury If swallowed consult a physici...

Page 9: ...s connected to the unit via Bluetooth 2 Your personal data is not transmitted to any third parties The only exception to this rule is if you provide the physical device to Alpine or some third party f...

Page 10: ...Apple CarPlay is a trademark of Apple Inc Windows Media and the Windows logo are trademarks or registered trademarks of Microsoft Corporation in the United States and or other countries Use of the Ma...

Page 11: ...the Favourite screen For details see Favourite Function page 22 Favourite screen example Frequently used functions and useful functions can be customised for your convenience You can register up to 5...

Page 12: ...The Search mode differs depending on the audio source For details see the operating instructions of the audio source Shortcut Setup Screen page 17 Preset button or Quick Search mode Screen You can se...

Page 13: ...navigation operations refer to Navigation System OM in the CD ROM You can switch the left right positions of the Audio Visual screen and Navigation screen Each time you touch the positions of Audio Vi...

Page 14: ...rn the ignition key to the ACC or ON position The system turns on When turned on the system displays the last screen that was displayed before the ignition key was turned off For example if the unit i...

Page 15: ...ing the audio back to its previous level Touch Screen Operation You can operate the system by using the touch panel on the screen Be sure to touch the onscreen button lightly with the pad of your fing...

Page 16: ...Android smartphone which installed Android Auto App is connected To play Apple CarPlay music shall impact iPod source when an iPhone 5 or later is connected and vice versa Refer to Apple CarPlay Setup...

Page 17: ...en Touch the upper central area of the Audio source screen The Sound Setup screen or the Rear Seat Entertainment System Setup Screen is displayed Sound Setup screen Tone Adjustment mode example Closes...

Page 18: ...erlinked with Band2 of Dual HD EQ and the Treble adjusted setting value is interlinked with Band8 Setting the BASS ENGINE SQ Setting the BASS ENGINE Type Creating the ideal Bass impact for your musica...

Page 19: ...ected Also displays the current position counting from the leftmost audio source Touch to return to previous source screen Audio source select area Touch your desired source icon to change the audio s...

Page 20: ...reen by touching the shortcut key Sound setup shortcut button Touch to display Bal Fad Screen of Sound setup Refer to Setting the Balance Fader Rear Speaker Subwoofer page 29 Phone shortcut button Tou...

Page 21: ...ly one BMP image can be set as the opening screen 3 If Customisation failed is displayed touch OK and then check that the folder name file name and file format are correct Do not perform the following...

Page 22: ...ng shortcut dialing after the message of confirmation of outgoing phone calls is displayed touch Call For details see Calling by Favourite Function page 71 Editing the Favourite Screen 1 Touch Edit A...

Page 23: ...tcut dialing stored in the Phone Book If multiple phone numbers are stored select a number you want to register You can register directly by touching of the Contacts list page 69 You can change the ic...

Page 24: ...Alpine dealer Before these operations set TuneIt to USB iPhone or Bluetooth Android depending on the connected Smartphone For details see Application Setup page 45 The application programme and relat...

Page 25: ...only available when Bluetooth is set to On 2 Cannot be adjusted when Apple CarPlay is used Android smartphone which installed Android Auto App is connected 1 Select the desired item 2 To switch the s...

Page 26: ...rity on the Primary Secondary setting screen For details see Hands free Device Primary Secondary Setting page 27 3 When the device registration is complete a message appears and the device returns to...

Page 27: ...ntered in step 2 again and then touch OK You can select the character code that is used when transferring the phone book or history from a mobile phone If unreadable characters appear in the transferr...

Page 28: ...ch the setting touch or mark the checkboxes Off or On If appears there is a further hierarchy Touch the desired item 3 Touch to return to the main source screen To return to the previous List screen t...

Page 29: ...em Subwoofer Phase Setting contents 0 Initial setting 180 This setting is only available when Subwoofer is set to On Media Xpander MX HD makes vocals or instruments sound distinct regardless of the mu...

Page 30: ...el Touch or of Level to adjust the level of selected band Setting contents 14 to 14 Initial setting 0 Setting the Bandwidth Touch or of Q Adjustment to select the bandwidth Setting contents Wide Initi...

Page 31: ...OVER adjusted value Touch Preset 1 Preset 2 or Preset 3 on the X OVER screen The setting stored in the Preset will be recalled Before performing the following procedures see About Time Correction page...

Page 32: ...ng 10 You can adjust the transmit volume during the call Setting item Microphone Level Setting contents 1 to 11 Initial setting 5 You can adjust the receive volume during the call Setting item Ring To...

Page 33: ...ristics This is caused by the time delay between the sound reaching the listener s right versus the left ear To correct this this unit is able to delay the audio signal to the speakers closest to the...

Page 34: ...ce cm Distance inch Time Difference msec Distance cm Distance inch 0 0 0 0 0 0 5 1 173 4 68 3 0 1 3 4 1 3 5 2 176 8 69 7 0 2 6 8 2 7 5 3 180 2 71 0 0 3 10 2 4 0 5 4 183 6 72 4 0 4 13 6 5 4 5 5 187 0 7...

Page 35: ...etup Menu screen in step 2 See General Setup page 28 You can set up the brightness colour display etc of the screen 1 Touch Screen Lighting in the Display Key Setup Menu screen The Screen Lighting set...

Page 36: ...display is available if folder name file name or tag information is entered Setting item Text Scroll Setting contents Off On Initial setting You can set the artwork position to the centre or the left...

Page 37: ...ity Code is set to Off Input numbers are displayed as About enables you to check the Serial Number Firmware Version Model Name and to initialise various settings Displaying the Product Information You...

Page 38: ...items 1 This setting cannot be changed while the AUX source is being selected 2 This setting is only available when AUX is set to On 3 This setting cannot be changed while the HDMI source is being sel...

Page 39: ...ontents Normal Initial setting HiFi Stable Noise may be more noticeable when HiFi is set depending on the reception status In this case the Normal setting is recommended DAB Setting DAB is selected on...

Page 40: ...page 38 You can set up the items related to the Auxiliary device The items related to AUX cannot be changed while the AUX source is being selected Setting item AUX Setting contents Off On Initial set...

Page 41: ...en Camera Select is Rear 5 Set this setting after closing the Alpine TuneIt App 1 Select the desired item 2 To switch the setting touch or mark the checkboxes Off or On If appears there is a further h...

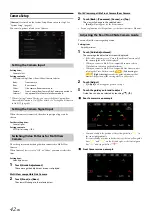
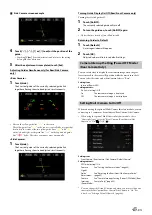
Page 42: ...You can adjust the camera guide position Setting item Guide Adjustment 1 Touch Guide Adjustment The camera guide adjustment screen is displayed If the video pattern is set to Corner Rear Front Camera...

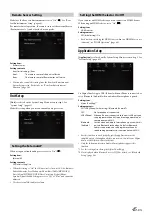
Page 43: ...uch Default A message window will appear 2 Touch OK Adjusted values will return to default settings You can set whether to display the rear camera image when the gear lever is moved to the reverse R p...

Page 44: ...etting For details see About Vehicle Interlock Function page 84 Rear Seat Entertainment Setup Rear Seat Entertainment is selected on the System Setup Menu screen in step 1 See System Setup page 41 Whe...

Page 45: ...switching the HDMI source when two HDMI devices are connected see HDMI Operation page 68 Application Setup Application is selected on the System Setup Menu screen in step 1 See System Setup page 41 Se...

Page 46: ...ple CarPlay is a smarter safer way to use your iPhone in the car Apple CarPlay takes the things you want to do with your iPhone while driving and puts them right on the unit You can get directions mak...

Page 47: ...Radio Text page 50 Preset mode button Touch when you use the Preset mode screen PTY list button Touch when you use the PTY list screen Preset mode screen example Preset button Swipe vertically in the...

Page 48: ...bands simply select the desired band and repeat the procedure A total of 48 stations can be stored in the preset memory 12 stations for each band FM1 FM2 MW or LW For details on switching to the Pres...

Page 49: ...e Type and Setting PTY31 Emergency Broadcast Reception Interruption Function If the Interruption Function is enabled when the following broadcast is received the unit switches to the Radio source scre...

Page 50: ...ion which is broadcasting the traffic information You can seek the traffic information in DX Seek mode or Local Seek mode Selecting the Receivable PTY You can select and receive the currently receivab...

Page 51: ...t DAB Antenna Power to Off otherwise a malfunction may occur See Setting the DAB Antenna ON OFF page 40 When FM Linking is set to On if the digital signal is weak this unit will automatically switch t...

Page 52: ...Service list or Current Ensemble list in the Full Search mode screen is displayed 3 Touch the desired Service component The Selected service component is received A Secondary Service list that was de...

Page 53: ...is received the TP indicator lights up and the unit switches to the DAB source screen to receive it The TP indicator lights up during standby mode off in a condition other than the DAB source to indi...

Page 54: ...hat is DAB WorldDMB the organisation in charge of the DAB standards announced DAB a major upgrade to the DAB standard in 2006 when the HE AAC v2 audio codec also known as eAAC was adopted The new stan...

Page 55: ...n screen display during video file playback Touch the screen while the USB Video playback screen is displayed The USB Video operation screen is displayed The operation screen changes to the visual scr...

Page 56: ...h and hold Fast reverse or touch and hold Fast forward Touch and hold for more than 1 second to forward reverse at 8x speed Keep touching to switch the speed to 16x and 32x 2 Release or to return to n...

Page 57: ...r For details on switching to the Full Search mode see in USB Audio main screen example page 55 To switch the displayed list or return to the previous page in the Full Search mode see About Basic Oper...

Page 58: ...iPhone 7 Plus Ver 12 1 iPhone SE Ver 12 1 iPhone 6s Plus Ver 12 1 iPhone 6s Ver 12 1 iPhone 6 Plus Ver 12 1 iPhone 6 Ver 12 1 iPhone 5s Ver 12 1 iPhone 5c Ver 10 1 1 iPhone 5 Ver 10 1 1 iPhone 4s Ver...

Page 59: ...the search mode the list is not displayed in the Quick Search mode In this case go to the Full Search mode In Quick Search mode touch the desired list for example Album list The selected Album is pla...

Page 60: ...peat Play 1 Touch The Repeat mode select pop up screen is displayed displays the currently selected mode 2 Select your desired Repeat mode The selected Repeat mode changes the button Random Play Shuff...

Page 61: ...nnected page 68 You can operate discs using the Remote Control unit supplied with the DVE 5300 DVD Player For details on operating the Remote Control unit refer to the Owner s Manual of the DVE 5300 F...

Page 62: ...lder are repeatedly played back If the Repeat Play mode is activated during MIX playback the MIX mode will be cancelled MIX Random Play Touch during playback The tracks files on the disc will be playe...

Page 63: ...ch the screen while the DVD playback screen is displayed To display the operation screen touch Control The operation screen changes to the visual screen in the DVD mode for 5 seconds after an operatio...

Page 64: ...p 1 Touching Key displays the numeric keypad input mode screen For details of the numeric keypad input mode screen see Numeric Keypad Input Operations page 65 4 Touch Enter to confirm the selected ite...

Page 65: ...ack starts from the beginning when is touched while playback is stopped Fast forwarding Fast reversing 1 During playback touch and hold Fast reverse or touch and hold Fast forward When pressed for mor...

Page 66: ...discs on which no title numbers are recorded Some disc may not accept any operation You cannot operate them while driving Searching Directly by Chapter Number Use this function to easily move to the b...

Page 67: ...ing the subtitles during playback In these cases select subtitles from the DVDs menu The subtitle language selected becomes the default setting every time the power is turned on or the disc is replace...

Page 68: ...eo is not displayed and only audio can be heard while driving 2 In HDMI player mode the screen of the device displays the content of electronic equipment by mirror image You can select Display Mode Fo...

Page 69: ...der s network settings may limit the feature s functionality Always contact your service provider about feature availability and functionality All features functionality and other product specificatio...

Page 70: ...uring a conversation to hide the call info area To display it again Touch or swipe downward on on the upper part of the screen During an incoming call or a conversation on the Primary Secondary Hands...

Page 71: ...ion page 22 1 Press and hold the Favourite button for at least 2 seconds The Favourite screen is displayed Favourite screen 2 Touch the Short Cut icon A contact s name phone number and a confirmation...

Page 72: ...the VOICE button Depending on the iPhone the Siri function may finish automatically Adjusting the volume Adjust the speaker microphone volumes in Voice Control mode Perform the same procedure to adjus...

Page 73: ...ith the Keypad For details see How to Input Characters and Numbers Keypad page 21 Displayed when multiple phone numbers are registered Touch to display the registered phone number list Use to narrow d...

Page 74: ...five registered items in the phone book you cannot use the phone book search function If a Bluetooth compatible mobile phone portable player etc is connected by wireless you can play back a song oper...

Page 75: ...ed list differs with the connected Bluetooth device You can search for your desired song by using one of two modes the Quick Search mode and the Full Search mode Quick Search mode Touch your desired G...

Page 76: ...ction will start 1 Touch Phone Setting The Device Setting select pop up screen is displayed 2 Touch Disconnect The Bluetooth connection is disconnected If multiple Bluetooth devices are registered in...

Page 77: ...AUX AUX DVD GAME USB Player mode display Display Mode For details see Switching Display Modes page 67 You cannot operate them while driving External DVD player display example Touch the switch to go b...

Page 78: ...mode screen are the same as the external DVD player operation screen See Operating an External DVD Player External DVD changer screen example Disc1 Disc6 Selects a Disc Touch the left side of the oper...

Page 79: ...ration mode screen example Switches the Channel number Preset channel down Switches the Channel number Preset channel up Band Switches the band Tune Channel or Preset or Manual Switches amongst Channe...

Page 80: ...see Adjusting the Rear Front Side Camera Guide page 42 If the camera has a view switch function the Direct Change switch is displayed 1 Touch the screen when the image from the rear camera is display...

Page 81: ...under the bumper or at opposite ends of the bumper may not be in the its field of vision The rear camera image may have a tint which is different from the actual surroundings Depending on the car the...

Page 82: ...played and touch or to return to the main source screen or previous screen You can perform a Guide Adjustment For details see Adjusting the Rear Front Side Camera Guide page 42 If the camera has a vie...

Page 83: ...amera and Front Camera at the same time touch Rear or Front in the Rear Camera image to switch the Camera image If the camera has a view switch function the Direct Change switch is displayed 1 Touch t...

Page 84: ...imate screen example The Climate screen turns on when you adjust the air conditioning in your vehicle The icons of adjusted items are high lighted Parking Sensor screen The Parking sensor screen turns...

Page 85: ...art of the data to improve compression efficiency However FLAC can reconstruct compressed data to be an identical copy of the original data by performing lossless compression The compression ratio of...

Page 86: ...ected Verity the writing order in the software s documentation The playback order of the folders and files is as follows The following numbers may differ from actually displayed numbers Terminology Bi...

Page 87: ...nected replace the antenna or cable if necessary Unable to tune stations in the seek mode You are in a weak signal area Make sure the tuner is in DX mode If the area you are in is a primary signal are...

Page 88: ...to the iPod iPhone and connect to the unit There are no data in the USB flash drive Download data to the USB flash drive and connect to this unit Un readable song was skipped A copy protected WMA fil...

Page 89: ...eration System TFT active matrix Number of Picture Elements 1 152 000 pcs 800 480 3 RGB Effective Number of Picture Elements 99 or more Illumination System LED Tuning Range 87 5 108 0 MHz Mono Usable...

Page 90: ...extent explicitly permitted by mandatory laws e g national laws based on the European Software Directive 91 250 and the Database Directive 96 9 you may not extract or reutilize substantial parts of th...

Page 91: ...not include any consideration for assumption of risk of consequential indirect or unlimited direct damages which may arise in connection with your use of the Database Accordingly in no event shall HE...

Page 92: ...ake precautions so as not to contact damage or obstruct pipes fuel lines tanks or electrical wiring Failure to take such precautions may result in fire DO NOT USE BOLTS OR NUTS IN THE BRAKE OR STEERIN...

Page 93: ...se box make sure the fuse for the intended circuit of the unit has the appropriate amperage When in doubt consult your Alpine dealer The unit uses female RCA type jacks for connection to other units e...

Page 94: ...your attention away from safely driving your vehicle Carefully consider direction and distance while mounting the microphone Confirm that the driver s voice can be easily picked up at the selected lo...

Page 95: ...k lamp signal lead of the car To the parking brake signal lead To power antenna Rear Left Front Left Front Right Rear Right Speakers To remote control input lead of DVE 5300 To remote control input le...

Page 96: ...k Connect this lead to a good chassis ground on the vehicle Make sure the connection is made to bare metal and is securely fastened using the sheet metal screw provided Left Rear Speaker Output Lead G...

Page 97: ...V plug to 3 RCA Wiring convention of this system is as follows Configuration commercially available 4 pole mini AV plugs is not standardised Audio L White Audio R Red Ground Video Yellow Yellow Red Wh...

Page 98: ...CC power supply is not available X308AU INE W987A Red Yellow SPST SW Optional FUSE 5A Optional FUSE 20A Optional Battery ACC BATTERY To prevent external noise from entering the audio system Locate the...

Page 99: ...ay not be able to play it again When connecting to an iPod iPhone with a Lightning connector USB connector USB extension cable Included iPod iPhone with a Lightning connector sold separately Lightning...

Page 100: ...acket For details on how to secure it see Note on using HDMI Connection Cables page 94 Set the HDMI Setup to HDMI For details see HDMI Setup page 41 USB connector USB Flash Drive sold separately USB e...

Page 101: ...xation Bracket For details on how to secure it see Note on using HDMI Connection Cables page 94 USB connector HDMI Type D conversion adapter HDMI input connector USB extension cable Included HDMI conn...

Page 102: ...MI Fixation Bracket For details on how to secure it see Note on using HDMI Connection Cables page 94 Set the HDMI Setup to DVD For details see HDMI Setup page 41 HDMI output connector HDMI input conne...

Page 103: ...e Cable 4 pole mini AV plug to 3 RCA sold separately RCA Extension Cable sold separately You can change the name of an external device For details see Setting the Auxiliary AUX Name page 40 For detail...

Page 104: ...ld separately PRE OUT connector Power Supply connector Blue White REMOTE ON Blue White Subwoofer REMO Amplifier for subwoofer sold separately To subwoofer input terminal Red White SUBW FRONT OUT REAR...

Page 105: ...Camera Select to Front For details see Setting the Camera Input page 42 CAN I F connector Reverse Connect to the plus side of the car s reverse lamp Camera extension cable included with direct rearvi...

Reviews: