


18
-EN
SETUP
You can flexibly customize the unit to suit your own preferences and
usage. From the SETUP menu, choose from Sound Customizing,
Visual Customizing, etc., to make your desired settings.
A typical SETUP procedure is shown in steps 1 to 4
as follows. See below for further information about
each SETUP menu.
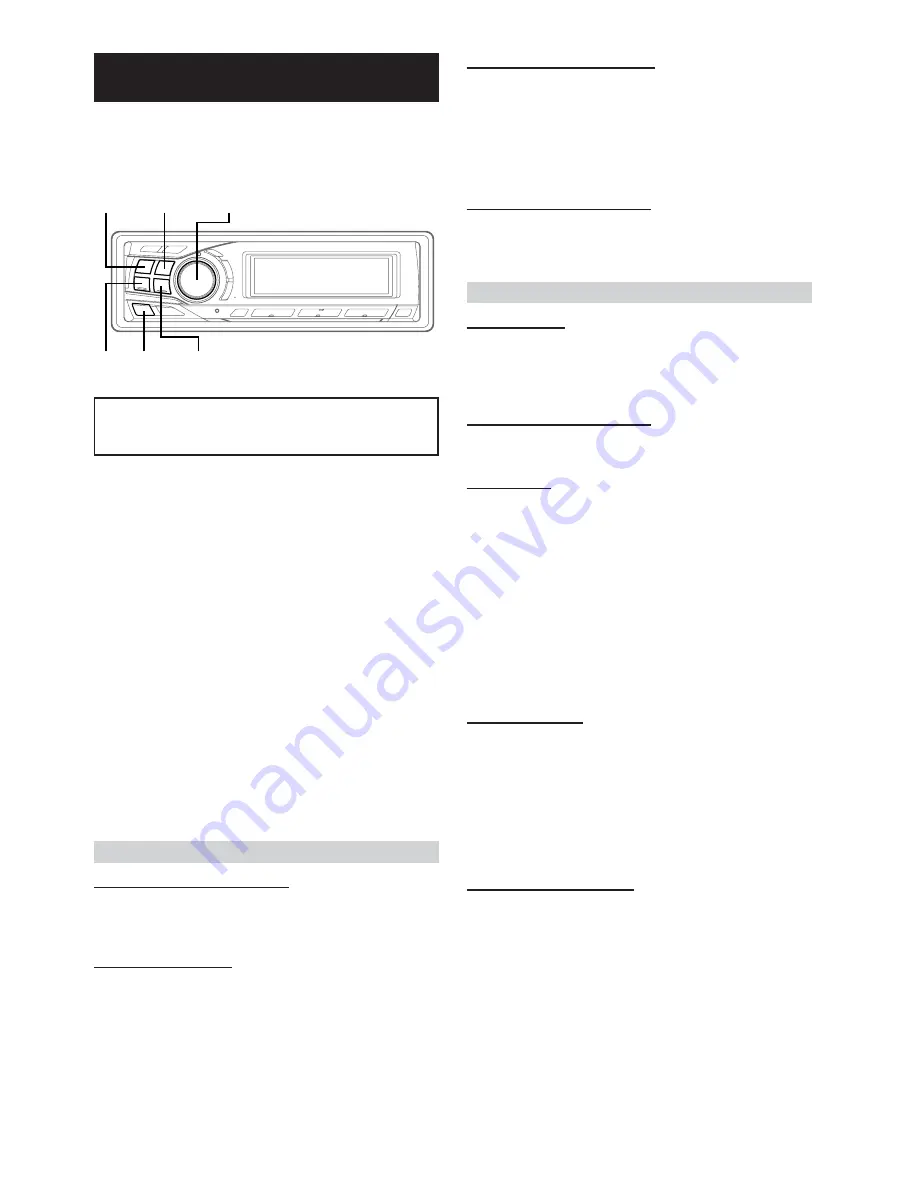
1
Press
MENU
to select the SETUP mode.
SETUP mode is activated.
2
Press
g
or
f
to select the desired SETUP
menu.
(e.g. Select BEEP)
FM-LV
↔
REG
*
1
↔
PISK
*
1
↔
AMBER
↔
DIMM
↔
SUBW
↔
(SUBW SYS)
*
2
↔
PLAY
↔
BEEP
↔
SCR TYPE
↔
SCR
↔
MUTE
↔
AUX IN
↔
(AUX NAME)
*
3
↔
D-AUX
↔
P-IC
↔
CONT
↔
AP
↔
DEMO
↔
FM-LV
*
1
Refer to the “RDS” section (page 9)
*
2
Displayed only when SUBW is ON.
*
3
Displayed only when AUX is ON.
3
Turn the
Rotary encoder
to change the setting.
(e.g. Select
BEEP ON
or
BEEP OFF
.)
4
Press and hold
MENU
for at least 2 seconds to
return to normal mode, or press
MENU
and select
RETURN to return to normal mode.
• If no operation is performed in 60 seconds, the unit returns to
normal mode.
Sound Customizing
Adjusting Source Signal Levels
FM-LV HIGH (Initial setting) / FM-LV LOW
If the difference in volume level between the CD player and FM radio
is too great, adjust the FM signal level.
Subwoofer On and Off
SUBW ON (Initial setting) / SUBW OFF
When the subwoofer is on, perform the steps below to adjust the
subwoofer output level.
1 Press the
Rotary encoder
repeatedly to select the
SUBW mode.
BASS
→
TREBLE
→
SUBW
→
BALANCE
→
FADER
→
DEFEAT
→
VOLUME
→
BASS
2 Adjust the level by turning the
Rotary encoder
.
f
g
BAND
MENU
Rotary encoder
SOURCE/
POWER
Setting the Subwoofer System
SUBW SYS1 (Initial setting) / SUBW SYS2
Select either SYS1 or SYS2 for the desired subwoofer effect.
SYS1
: Subwoofer level changes according the main
volume setting.
SYS2
: Subwoofer level change is different from the main
volume setting. For example, even at low volume
settings, the subwoofer is still audible.
Sound (Beep) Guide Function
BEEP ON (Initial setting) / BEEP OFF
This function will give audible feedback with varying tones
depending upon the button pressed.
Visual Customizing
Dimmer Control
DIMM AUTO (Initial setting) / DIMM MANUAL
Set the DIMMER control to AUTO to decrease the illumination
brightness of the unit with the head lights of the vehicle ON. This
mode is useful if you feel the unit's backlighting is too bright at night.
Changing the Lighting Colour
AMBER ON / AMBER OFF (Green) (Initial setting)
You can change the lighting colour of the unit.
Scroll Setting
SCR AUTO / SCR MANUAL (Initial setting)
This CD player can scroll the disc and track names recorded on CD-
TEXT discs, as well as the text information of MP3/WMA files,
folder names, and tags.
AUTO
: The CD text information, the text
information of folder and file names, and
the tags are scrolled automatically.
MANUAL
: The display is scrolled only when a disc is
loaded or when a track is changed, etc.
• The unit scrolls CD text names, folder names, file names or tag
display. The disc titles input manually (page 17) cannot be
scrolled.
Scroll Type Setting
SCR TYPE1 (Initial setting) / SCR TYPE2
Choose from two scrolling methods.
Select the the type you prefer.
TYPE1
: The characters scroll sequentially, appearing from
the right side of the display.
TYPE2
: The characters are displayed one by one, and
disappear one by one from the left side of the
display after the screen is filled up with the
characters.
Adjusting Display Contrast
CONT
You can adjust the display contrast for better visibility.
You can adjust in a range of - 5 and + 5.
• The initial setting at the factory is “0.”
Summary of Contents for CDA-9851R
Page 34: ......


