EN
DE
FR
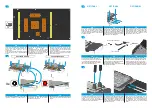
Two options are available to connect the unit
to the water circuit. Use either the two G1/4"
threads
or
the
5/3mm
connections
in
conjunction with the optionally available MCX
distributor with article number 13041.
Zur Anbindung in den Wasserkreislauf stehen
zwei Optionen zur Verfügung. Verwenden sie
entweder die beiden G1/4" Gewinde oder die
5/3mm Anschlüsse in Verbindung mit dem
optional erhältlichem MCX Verteiler mit der
Artikelnummer 13041.
Deux
options
sont
disponibles
pour
le
raccordement au circuit d'eau. Utilisez soit les
deux filetages G1/4", soit les raccords 5/3mm
en association avec le distributeur MCX
disponible en option sous la numèro d’article
13041.
4.
EN
DE
FR
To control the digital RGB lighting, connect the
3-pin female connector to the 3-pin male
connector of the graphics card LED. You can
connect additional digital RGB LEDs to the
remaining 3-pin male connector. As shown,
you have two installation options.
Um die Digital - RGB Beleuchtung zu steuern,
schließen Sie den 3-Pin female Stecker an
den 3-Pin male Stecker der Grafikkarten LED.
An den übrigen 3-Pin male Stecker können
Sie zusätzliche Digital - RGB LEDs
anschließen. Sie haben wie dargestellt, zwei
Verlegungsmöglickeiten.
Pour contrôler l'éclairage numérique RVB,
connectez le connecteur femelle à 3 broches
au connecteur mâle à 3 broches de la DEL de
la carte graphique. Vous pouvez connecter
des LED RGB numériques supplémentaires au
connecteur mâle à 3 broches restant. Comme
indiqué, vous avez deux options d'installation.
3.
5.
EN
DE
FR
Put the active backplate on and screw it
together with the 8 M2x11 screws as shown.
Legen Sie nun die aktive Backplate auf und
verschrauben Sie diese mit den 8 M2x11
Schrauben wie dargestellt.
Placez maintenant la plaque arrière active et
vissez-la en place avec les 8 vis M2x11 comme
indiqué.
2.
EN
DE
FR
Clean the contact surfaces on the bottom side
of the cooler with Isopropanol alcohol or
similar. The
surface
must
be
free
of
contaminants.
Remove the protective foils from the thermal
pads and place the pads on the backplate as
shown.
Reinigen Sie die Kontaktflächen auf der
Bodenseite
des
Kühlers
mit
Isopropanolalkohol oder ähnlichen Mitteln.
Die Fläche muss frei von Verunreinigungen
sein. Entfernen Sie die Schutzfolien der
Wärmeleitpads und platzieren Sie die Pads
wie dargestellt auf der Backplate.
Nettoyez les surfaces de contact (la face
inférieure du bloc de refroidissement) avec de
Alcool isopropanol. La surface doit être propre
sans aucune pollution.
Retirez les feuilles de protection des pads
thermiques et placez les pads sur le Plaque
arrière comme indiqué.
1.
Long PCB Version
Short PCB Version
1
3
4
5
5
2
2
Graphic cards LED
Add more Digital RGB LEDs
3 x
EN
DE
FR
You can also use the optional Alphacool Ice
Block GPU I/O Shield RTX 3090 Founders
Edition item no.: 13065. Screw the 3 M3x5
screws supplied in the I/O Shield into the front
side. Then fasten the 2 M2x11 screws from the
backplate as shown.
Sie können Optional auch den Alphacool
Eisblock GPU I/O Shield RTX 3090 Founders
Edition Art.Nr.: 13065 erwerben. Schrauben
Sie die im I/O Shield mitgelieferten 3 M3x5
Schrauben in die Stirnseite ein. Anschließend
befestigen Sie, wie dargestellt die 2 M2x11
Schrauben von der Backplate.
Vous pouvez également acheter le bloc de
glace Alphacool GPU I/O Shield RTX 3090
Founders Edition Art.Nr. : 13065. Vissez les 3
vis M3x5 fournies avec l'I/O Shield dans la face
avant. Ensuite, fixez les 2 vis M2x11 de la
plaque arrière comme indiqué.
OPTIONNEL
OPTIONAL
OPTIONAL


