background image

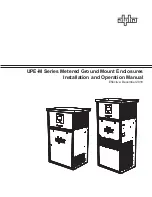
UPE-M Series Metered Ground Mount Enclosures 

Installation and Operation Manual

Effective: December 2018

Summary of Contents for UPE-M Series

Page 1: ...UPE M Series Metered Ground Mount Enclosures Installation and Operation Manual Effective December 2018...

Page 2: ...s specific regulatory code requirements that may affect the placement of equipment and or installation procedures ATTENTION NOTICE provides additional information to help complete a specific task or p...

Page 3: ...contact Alpha Technologies or your nearest Alpha representative Alpha shall not be held liable for any damage or injury involving its enclosures power supplies generators batteries or other hardware...

Page 4: ...2 2 Enclosure Pedestal Support 13 2 3 Pad Fabrication 14 2 4 Enclosure Grounding 15 3 0 Installation 16 3 1 Enclosure Installation 16 3 2 Utility Powering 17 3 3 Service Power Inserter 23 3 4 Battery...

Page 5: ...g Holes 16 Fig 3 2 65K AIR Enclosure Rear View 18 Fig 3 3 10K AIR Enclosure Rear View 18 Fig 3 4 Meter Base Configurations 19 Fig 3 5 Meter Base Configurations 20 Fig 3 6 Fuse Receptacle Configuration...

Page 6: ...y conductive and are corrosive Follow the Chemical Hazards notes if contact occurs All battery compartments must have adequate ventilation to prevent an accumulation of potentially dangerous gas Batte...

Page 7: ...age inspect batteries every 3 months CAUTION Prior to installation contact local utitlies building maintenance departments and cable piping locator services to ensure that installation does not interf...

Page 8: ...lead wire seal The CATV doors have flush mounted key locks installed The utility meter compartment contains a hinged lockable Lexan window for meter reading The utility meter can be accessed by lifti...

Page 9: ...9 031 145 C0 002 Rev C 12 2018 1 0 Pre Installation continued Fig 1 3 UPE M8 Dimensions 32 0 20 5 43 5 50 0 13 6 13 2 6 9 Meter Center line...

Page 10: ...10 031 145 C0 002 Rev C 12 2018 1 0 Pre Installation continued 50 8 8 5 15 08 12 1 57 38 19 7 26 0 Meter Center Line Fig 1 4 UPE M6 Dimensions...

Page 11: ...11 031 145 C0 002 Rev C 12 2018 1 0 Pre Installation continued 15 08 8 4 Meter Center Line 38 5 12 1 45 0 19 7 26 0 Fig 1 5 UPE M3 Dimensions...

Page 12: ...this manual contains the required mounting details including electrical service and cable plant entrances For ease of installation lightweight polymer high density polyethylene mounting supports Alph...

Page 13: ...stable foundation for UPE M series enclosure installations Fig 2 1 Pedestal Support PS 1 Dimensions Alpha P N 744 006 20 3 8 Bolt Lock Washer Flat Washer 24 13 3 00 27 25 18 00 Utility Entrance CATV...

Page 14: ...at Washer 24 14 12 Note UPE M3 6 and 8 have the same mounting stud arrangement Conduit should pass through concrete pad 6 inches to either side of the center line and in line with the rear mounting st...

Page 15: ...Corrosion proof connections 25 year life span and hardware suitable for direct burial MUST be used 6 bare copper wire from loop to the enclosure 1 2 3 4 Alpha Technologies recommends using the ground...

Page 16: ...hould initially extend at least six inches in all directions around the perimeter of the enclosure 1 Unwrap the enclosure and inspect the contents If items are missing or damaged contact Alpha Technol...

Page 17: ...lined in this document The following should be performed only by qualified service personnel and in compliance with local electrical codes Verify electrical codes prior to installation Codes may vary...

Page 18: ...ed D O N OFF OFF O N Fused Disconnect Box Fig 3 2 65K AIR Enclosure Rear View Line Line Neutral Utility Raceway CATV Raceway Line Line Neutral Load Load Neutral Wire Neutral Wire Fig 3 3 10K AIR Enclo...

Page 19: ...g 3 4 Meter Base Configurations 120VAC without Test Bypass Block 120VAC with Test Bypass Block 240 120VAC without Test Bypass Block 240VAC without Test Bypass Block From Utility To FBX BBX From Utilit...

Page 20: ...n continued Fig 3 5 Meter Base Configurations 240 120VAC with Test Bypass Block 240VAC with Test Bypass Block From Utility To FBX BBX From Utility To FBX BBX 208VAC with 5th Jaw and Test Bypass Blocks...

Page 21: ...ed Fig 3 6 Fuse Receptacle Configurations for 65K AIR Enclosures 120VAC 240VAC 120VAC Single Receptacle 120VAC Dual Receptacle Single Fuse 240VAC 120VAC Dual Receptacle Dual Fuse 120VAC Fuse Part Numb...

Page 22: ...e Receptacle Configurations for Standard Enclosures 120VAC 240VAC 120VAC Single Receptacle 120VAC Dual Receptacle Single Breaker 240VAC 120VAC 120VAC Dual Receptacle Dual Breaker From Meter Compartmen...

Page 23: ...ghten the coaxial termination 5 Tighten the seizure screw to 35 inch pounds 6 Replace the SPI cover and screws Ensure the switch on the top or the SPI is in the ON position the AUX position is used on...

Page 24: ...lly located on a sticker near the center of the battery or stamped in white ink near the POS terminal This date code must be recorded in the battery s maintenance log If batteries other than those mar...

Page 25: ...he diagrams for the location of the optional in line fuses For AlphaCell batteries torque terminal connections to approximately 65 in lbs 7 3 Nm at installation and re torque to 50 in lbs 5 6 Nm durin...

Page 26: ...ntinued Fig 3 12 UPE M6 Battery Pack 1A 2A 3A 1B 2B 3B RED BLACK Battery Cable Connector to XM3 Power Supply Fuse Fuse Remote Temperature Sensor RTS taped to side of battery Temperature Probe Connecte...

Page 27: ...3A 4A 1A 2A 3B 4B 1B 2B RED BLACK Battery Cable Connector to XM2 924 Power Supply Fuse Fuse Remote Temperature Sensor RTS taped to side of battery Temperature Probe Connected to XM2 924 Fig 3 13 UPE...

Page 28: ...Inserter SPI to the plug labeled Output 1A 3 on the front of the power supply If a second SPI is installed connect it to Output 2 4 Verify that the Input Breaker in the Service Entrance Panel is in th...

Page 29: ...connectors as shown above with the black housing on the black wire Insert the assembled connector into the LRI connection on the front of the power supply 3 6 Lightning Arrester LA P Option The Light...

Page 30: ...ur 8 32 Keps nuts included on existing threaded studs upper left corner for the UPE M8 and upper right corner for UPE M3 and UPE M6 Plug one end of the supplied Y cable into the output connection of t...

Page 31: ...r more information visit www alpha com 2018 Alpha Technologies Inc All Rights Reserved 031 145 C0 002 Rev C 12 2018 Worldwide Corporate Offices North America Tel 1 360 647 2360 Fax 1 360 671 4936 Euro...

Reviews: