Alpha Networks PT-3152 Quick Installation Manual Download Page 7


6

PT-3152(C)/PT-3153(C)

 Quick Installation Guide  


4.


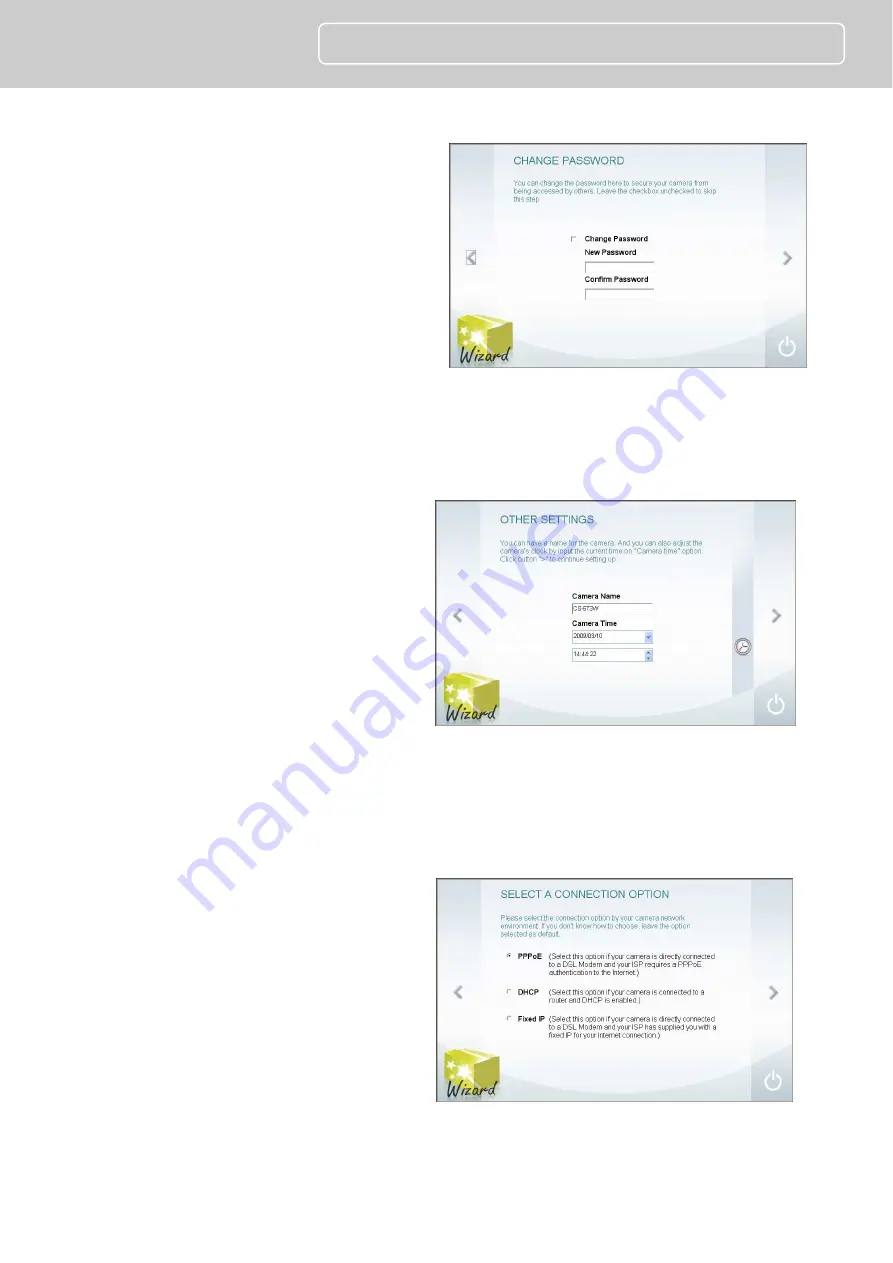
This screen allows you to change the 
administrator password. To change 
the password carry out the following: 


Tick the 

Change Password


checkbox 


Type a 

New Password


Type it again to 

Confirm 

Password

.  


Click the 

>

 symbol to proceed to 

the next IPCam Wizard menu 
screen.  


Leave the checkbox unchecked to skip this step. 


5.


This screen allows you to set a 

Camera Name

 and configure the 

date and time settings of the 
Camera: 


Type a name to identify your 
Camera in the 

Camera Name

 field. 


Use the drop-down menu to set 
the Camera’s date. 


Adjust the time of the camera, by 
using the adjacent up and down 
controls 


Click the 

Clock 

icon to copy the time and date settings from your computer. 


Click the 

>

 symbol to continue. 


6.


Choose how to configure the 
network settings.  The options are 
PPPoE, DHCP and Fixed IP 
(manually set IP). 


Click the 

symbol to proceed to 

the next IPCam Wizard menu 
screen. 
 
If you are choosing a PPPoE network connection, proceed to step 6a to configure 
PPPoE network settings.  
 

Summary of Contents for PT-3152

Page 1: ...PT 3152 PT 3152C PT 3153 PT 3153C Network Camera Quick Installation Guide...

Page 2: ...the following measures Reorient or relocate the receiving antenna Increase the separation between the equipment and receiver Connect the equipment into an outlet on a circuit different from that to wh...

Page 3: ...TO OPERATE THE EQUIPMENT CAUTION 1 To comply with FCC RF exposure compliance requirements a separation distance of at least 20 cm must be maintained between the antenna of this device and all persons...

Page 4: ...ove or AMD Athlon 64 3000 and above Memory 512 MB or above VGA resolution 1024 x 768 or above Package Contents One SOHO Internet Camera This Quick Installation Guide One or Two External Antenna Wirele...

Page 5: ...amera with the two screws provided 4 You can install the camera to the ceiling using two ceiling screws or install the camera to the wall using two wall screws Connect the Ethernet Cable Connect an Et...

Page 6: ...llowing window appears click the symbol to proceed to the next setup window 2 Choose the PT 3152 PT 3152C PT 3153 PT 3153C from the list If there is more than one camera operating on the network these...

Page 7: ...configure the date and time settings of the Camera Type a name to identify your Camera in the Camera Name field Use the drop down menu to set the Camera s date Adjust the time of the camera by using t...

Page 8: ...the symbol to proceed to the next IPCam Wizard menu screen b A Fixed IP connection requires the IP settings to be manually entered Enter a compatible IP Address Subnet Mask Primary DNS and Secondary D...

Page 9: ...k settings of your Camera When you have finished setting up the Camera click the symbol to apply the new settings 9 The following screen appears to indicate that the settings are being applied to the...

Page 10: ...manager and live video display click the address of the camera in the center of the menu 12 Type the administrator s User Name ID and Password to access the camera s user interface Default settings i...

Page 11: ...ure or snapshot to appear on the desktop in a new browser window Use the Record REC icon to begin recording to the local hard disk In order to do either of these however first click on the file folder...

Reviews: