AT-x950-28XSQ Switch and VCStack Installation Guide
113
The sides of the switch have two sets of holes. One set is for installing
the switch on a wall with the brackets and the other is for the AT-
RKMT-SL01 Rack Mounting Kit. For this procedure, you need to use
the bracket holes, identified in Figure 60 on page 96.
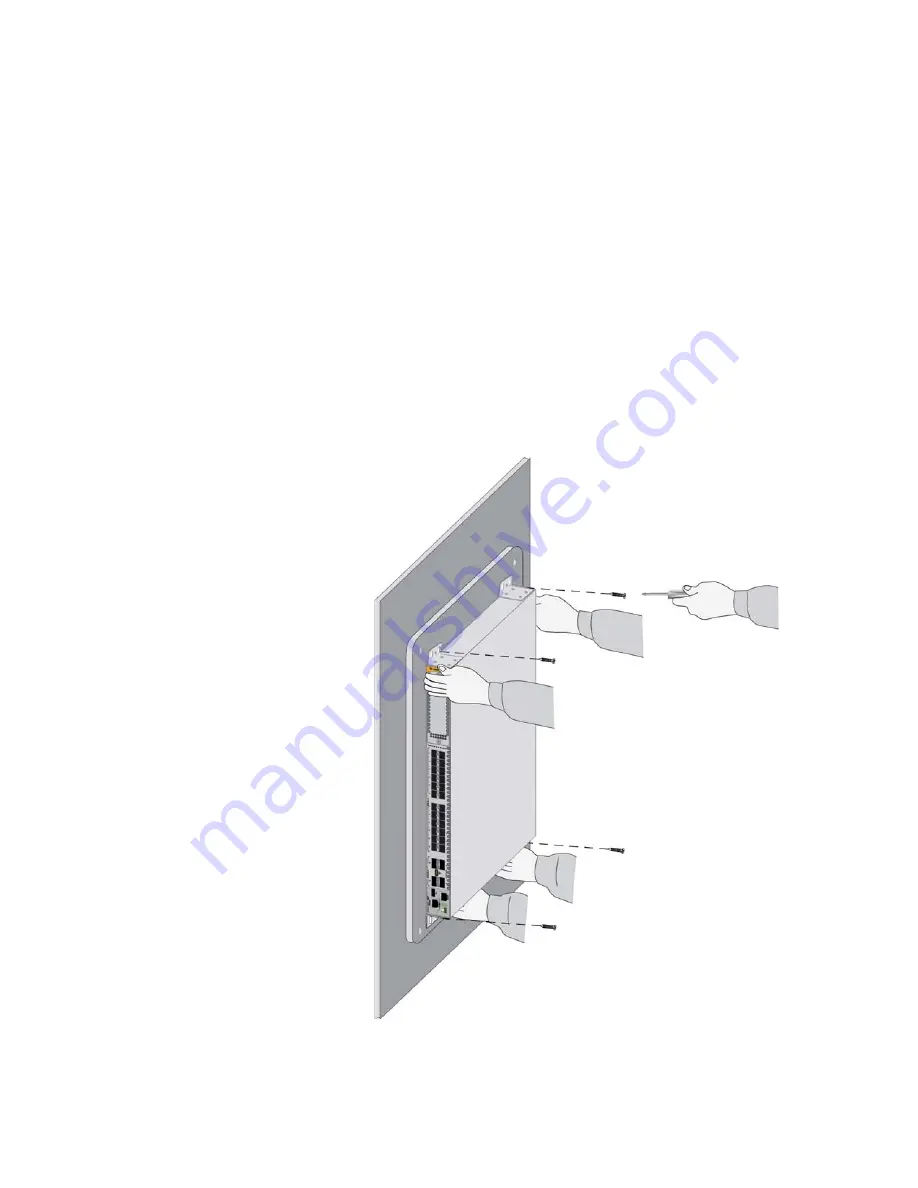
3. After attaching the brackets to the side of the switch, have two people
hold the switch on the plywood base on the wall while you secure it
with the four provided screws. Refer to Figure 71.
Please follow these guidelines as you position the switch on the wall:
Position the switch so that the front panel is either on the left or the
right. Refer to Figure 65 on page 104. You may not install the
switch with the front panel facing up or down.
Leave sufficient space from other devices or walls so that you can
access the front and back panels. Refer to “Recommended
Minimum Wall Area Dimensions” on page 105.
Figure 71. Attaching the Switch to the Plywood Base
Summary of Contents for AT-x950-28XSQ
Page 8: ...Contents 8 ...
Page 12: ...Tables 12 ...
Page 16: ...Preface 16 ...
Page 62: ...Chapter 2 Virtual Chassis Stacking 62 ...
Page 80: ...Chapter 3 Beginning the Installation 80 ...
Page 90: ...Chapter 4 Installing Power Supplies and Optional XEM2 Line Card 90 ...
Page 102: ...Chapter 6 Installing the Switch in an Equipment Rack 102 ...
Page 118: ...Chapter 7 Installing the Switch on a Wall 118 ...
Page 146: ...Chapter 8 Configuring Switches for Stacking 146 ...
Page 158: ...Chapter 9 Cabling the Networking Ports 158 ...
Page 180: ...Chapter 11 Troubleshooting 180 ...


