Chapter 2: Installation
23
Installing the Power Supply Unit into the Chassis
To install the power supply unit into the chassis, perform the following
procedure:
Note
You must provide a Phillips-head screwdriver.
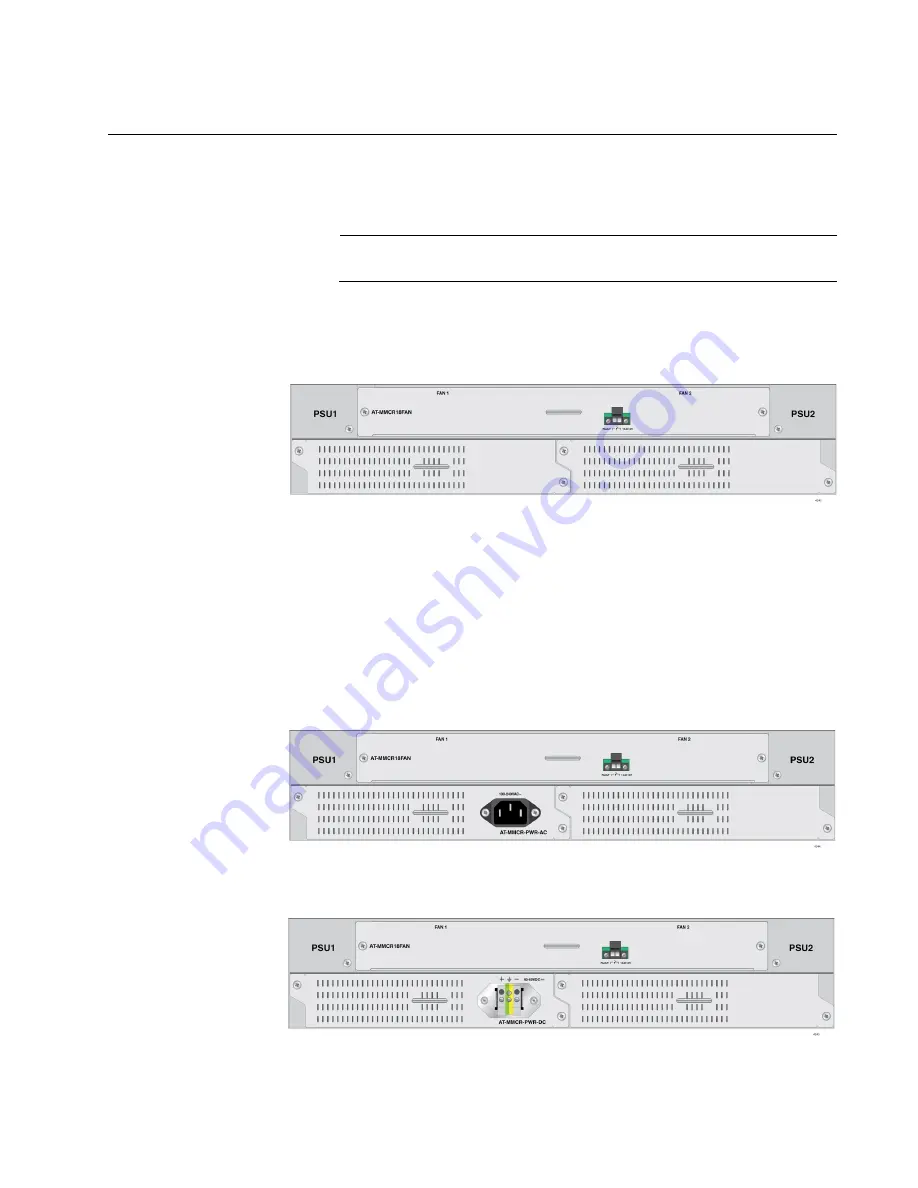
1. Face the back panel of the chassis as shown in “Back Panel” on
page 23
Figure 7. Back Panel
2. Untighten the screws on the blank panel in Slot A using a Phillips-head
screw driver and remove the blank panel.
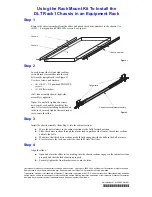
3. Insert the power supply unit into the power supply slot A. See Figure 8
for the AC power supply unit and Figure 9 on page 23 for the DC
power supply unit.
Figure 8. Inserting the AC Power Supply Unit into Slot A
Figure 9. Inserting the DC Power Supply Unit into Slot A
Power Supply Slot B
Power Supply Slot A
Summary of Contents for AT-MMCR18
Page 1: ...613 002372 Rev A AT MMCR18 Media Converter Rack mount Chassis Installation Guide ...
Page 6: ...Contents 2 ...
Page 10: ...AT MMCR18 Media Converter Chassis Installation Guide 6 ...
Page 40: ...AT MMCR18 Media Converter Chassis Installation Guide 36 ...
Page 42: ...AT MMCR18 Media Converter Chassis Installation Guide 38 ...
Page 44: ...AT MMCR18 Media Converter Chassis Installation Guide 40 ...


