GS920 Series Gigabit Ehternet Switch Installation and User’s Guide
78
Loop Prevention
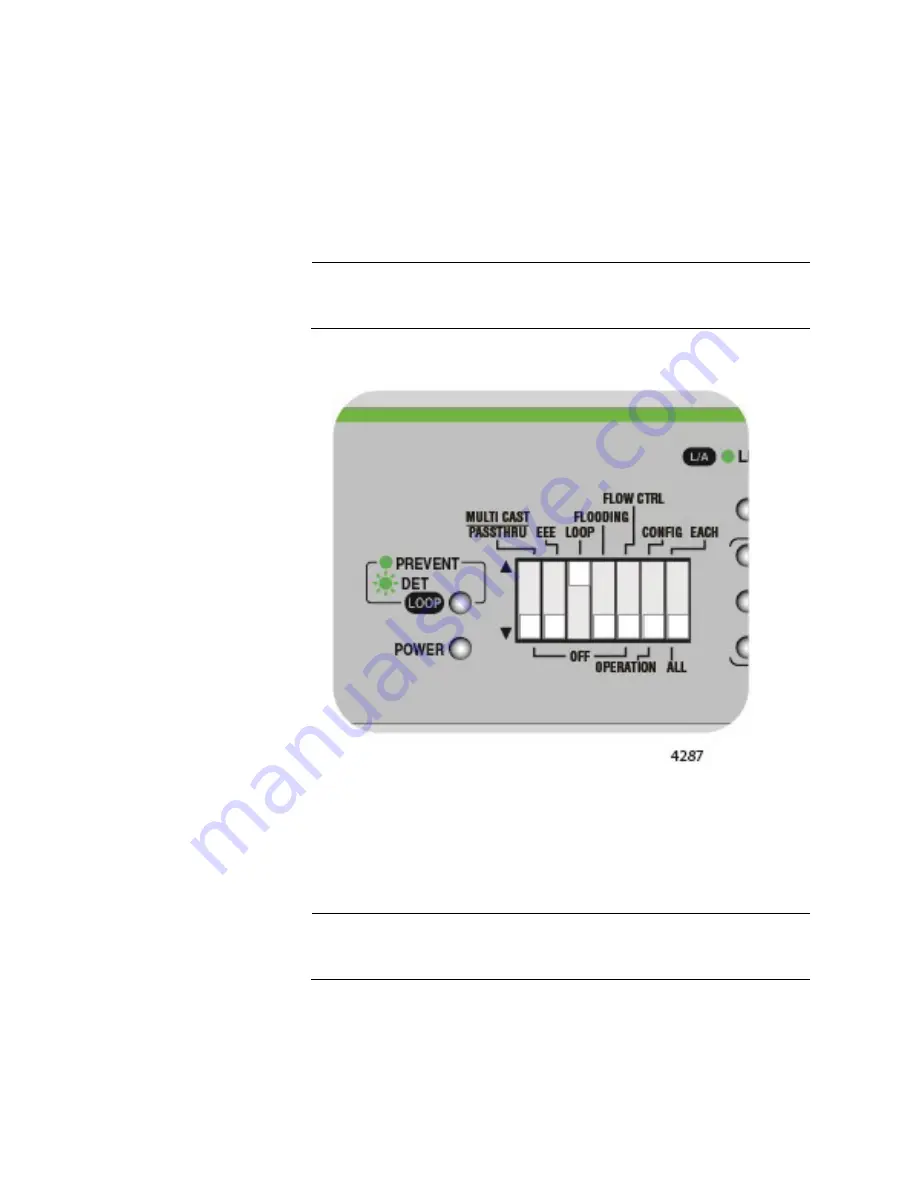
DIP switch # 3 enables or disables the Loop Prevention feature. See
Figure 42, “Front Panel Configuration Switches and LEDs” on page 72 for
the DIP switch location on the front panel.
Enabling Loop Prevention
Perform the following procedure to enable the Loop Prevention feature:
Note
Flow Control must be disabled by when the Loop Prevention feature
is enabled. See “Disabling Flow Control” on page 83
1. Set DIP switch # 3 to the UP position to enable Loop Prevention. See
Figure 47. DIP Switch Settings for Enabling Loop Prevention
2. Turn the power OFF by unplugging the AC power cord and then back
ON again by reconnecting it to the AC outlet on the switch. The new
switch setting is now implemented and effective and the Loop
Prevention feature is enabled for all the Ethernet ports.
Note
A recently changed DIP switch setting becomes effective ONLY
after you turn the switch’s AC power OFF and then back ON.
The Loop Prevention LED should be a Solid Green or Blinking Green
indicating that the feature is enabled.
Summary of Contents for AT-GS920/16
Page 8: ...Contents 8 ...
Page 12: ...GS920 Series Gigabit Ehternet Switch Installation and User s Guide 12 ...
Page 92: ...GS920 Series Gigabit Ehternet Switch Installation and User s Guide 92 ...
Page 94: ...GS920 Series Gigabit Ehternet Switch Installation and User s Guide 94 ...
Page 108: ...GS920 Series Gigabit Ehternet Switch Installation and User s Guide 108 ...
Page 118: ...GS920 Series Gigabit Ehternet Switch Installation and User s Guide 118 ...


