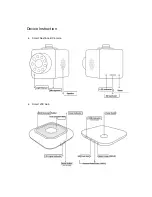
Installation Instructions
●
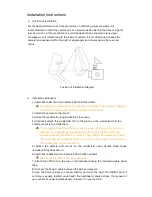
Position of Installation
For the best performance and the prevention of interfering visual coverage, it is
recommended to install the camera unit at a proper position behind the driver’s sight of
rear view mirror. At the meantime, to avoid the obstruction of camera’s lens visual
coverage when it rotates toward the inside of vehicle, it is recommended to keep the
camera lens exposed within the sight of passengers and drivers below the rear view
mirror.
Position of Installation Diagram
●
Installation procedure
1) Insert Micro SD card into Camera’s Micro SD card Slot
;
Pay attention to Micro SD card’s direction of insertion. The maximum capacity
of the SD card supported is 64G with Class 10 and above.
2) Install the camera to the mount
;
3) Clean the windshield using windshield clean wipe
;
4) (Optional) attach the windshield film to the place on the windshield that the
camera mount is to be attached
;
The purpose of windshield film is to ease the need of taking down the mount
with less force applied, as double sided tapes or sticky pads are strongly
adhesive and may be difficult to remove. The suitable circumstances of using
the windshield films are when there is a need of frequent attach or removal of
the camera, such as for a rental car.
5) Attach the camera and mount on the windshield using double sided tapes
(included) firmly attached on.
6) Insert Micro SIM card into Camera’s Micro SIM card Slot.
Pay attention to micro SIM card’s direction.
7) Attach the LTE Hub on the top on the dashboard using the included double sided
tape.
8) Connect the Type-C cable between the Hub and camera.
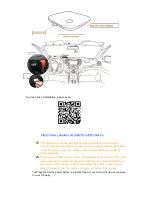
9) Use the Power Cable to connect OBD-II port with the Hub. The OBD-II port of
vehicles is usually located underneath the dashboard, please check the manual of
your vehicle or consult professionals to locate it in your vehicle.


