6
ASSEMBLY INSTRUCTIONS
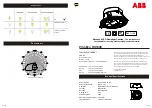
Adjust screws (D) to proper length by
screwing them completely into mounting strap
(B). Temporarily place fixture (A) over
mounting strap (B) to determine amount of
adjustment necessary for screws (D); screws
(D) should come through holes in fixture (A)
just enough so decorative nuts (C) will fit flush
against fixture (A) when mounted.
Once screws (D) are adjusted, use pliers (not
included) to tighten nuts (F) on screws (D)
until nuts (F) touch mounting strap (B).
5.
4.
Hardware Used
x 2
Machine Screw
BB
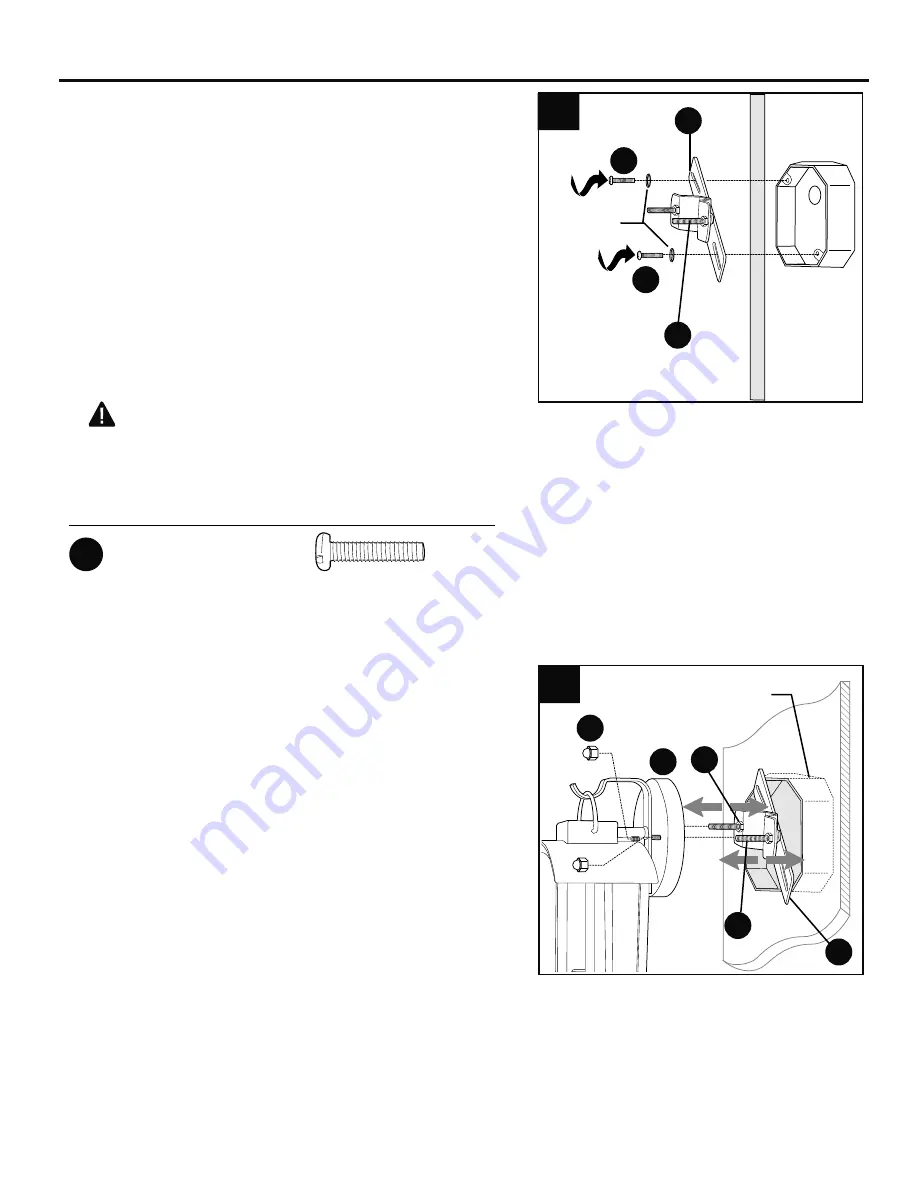
Attach mounting strap (B) to outlet box (not
included) using the existing washers and outlet
box screws or the machine screws (BB).
NOTE:
If the outlet box screws required for your
outlet box are of a different size than the machine
screws (BB), consult with a licensed electrician
before proceeding.
Use a level (not included) to make sure screws
(D) are level horizontally. This will help ensure the
fixture (A) is level when attached.
Tighten machine screws (BB) completely to
secure mounting strap (B) to outlet box.
CAUTION:
The fixture must be mounted to
an outlet box that is supported by the building
structure. Plastic outlet boxes are not
recommended.
5
Outlet Box
B
A
C
D
Outlet Box
Washers
4
D
B
BB
BB
F


