


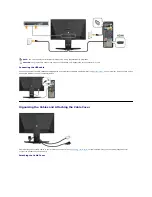


Attach the cable cover to the monitor after making the required cable connections to the monitor.
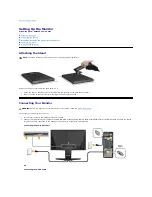
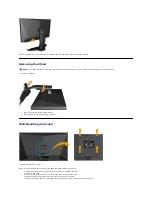
Removing the Stand
To remove the stand:
1.
Press and hold the stand release button.
2.
Lift the stand up and away from the monitor .
Wall Mounting (Optional)
(Screw dimension: M4 x 10mm).
Refer to the instructions that came with the VESA compatible base mounting kit.
1.
Place the monitor panel on a soft cloth or cushion on a stable flat table.
2.
Remove the stand
3.
Use a screwdriver to remove the four screws securing the plastic cover.
4.
Attach the mounting bracket from the wall mounting kit to the LCD.
5.
Mount the LCD on the wall by following the instructions that came with the base mounting kit.
NOTE:
To prevent scratches on the LCD screen while removing the stand,
ensure that the monitor is placed on a clean surface.
Summary of Contents for OptX AW2210
Page 10: ...DVI Connector Pin Number 24 pin Side of the Connected Signal Cable 1 TMDS RX2 ...
Page 23: ......
Page 32: ......