Modules
7 - 26 RAID Setup
7
16. If you have chosen the
Auto Setup For Performance
option you will be
asked to press Y to confirm the array creation.
If you have chosen an option from the
Array Mode RAID...
menu, select
Start Create Process,
and press Enter and
Y
to create the array (make
sure you have selected the disk drives).
17. The
Create New Raid Success!!
message will appear on screen.
18. Press
ESC
twice, and then press
Y
to exit the utility.
19. Insert the
Microsoft Windows OS CD
into the CD/DVD drive, and connect
the external USB floppy disk drive to the notebook computer
20. Press a key when you see the message "
Press any key to start up from
the CD/Press any key to boot from CD
".
21. Press the
F6
key when you see the message “
Press F6 if you need to
install third party SCSI or RAID driver
”.
22. When the
Windows
Setup menu appears, press the <
S
> key to "
Specify
Additional Device
".
23. Insert the
RAID Driver Diskette
into the external USB Floppy drive.
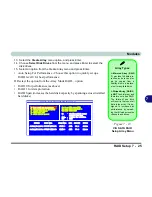
24. Press Enter to select the controller for your
Windows XP
operating system
(see below).
25. The system will now read from the floppy disk drive and then return to the
Windows
Setup menu.
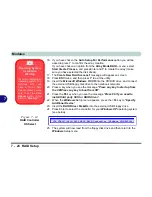
Figure 7 - 14
RAID Controller
OS Select
Operating System
Installation
Warning
If you are installing an
operating system (e.g.
Windows XP
), and
have a 10-in-1 Card
Reader present, make
sure to set the
Card
Reader
option in the
BIOS to “
Disabled
”.
VIA VT8237/6421/6410 SATA RAID Controller (Windows XP/SRV2003)
Summary of Contents for MJ-12 m7700a
Page 1: ......
Page 2: ......
Page 20: ...XVIII Preface...
Page 76: ...Drivers Utilities 4 14 4...
Page 92: ...BIOS Utilities 5 16 5...
Page 106: ...Modules 7 6 Mini PCI Wireless LAN Module 7 Help Menu Figure 7 2 Ralink WLAN Utility...
Page 110: ...Modules 7 10 Bluetooth WLAN Combo Module 7 Figure 7 3 Switching WLAN Controls...
Page 118: ...Modules 7 18 PC Camera 7 Figure 7 6 Audio Setup...
Page 128: ...Modules 7 28 7...
Page 140: ...Troubleshooting 8 12 8...


