ALIBI ALI-NVR5100P Series Quick Setup Manual Download Page 6

6

www.Observint.com

© 2015 Observint Technologies. All rights reserved.

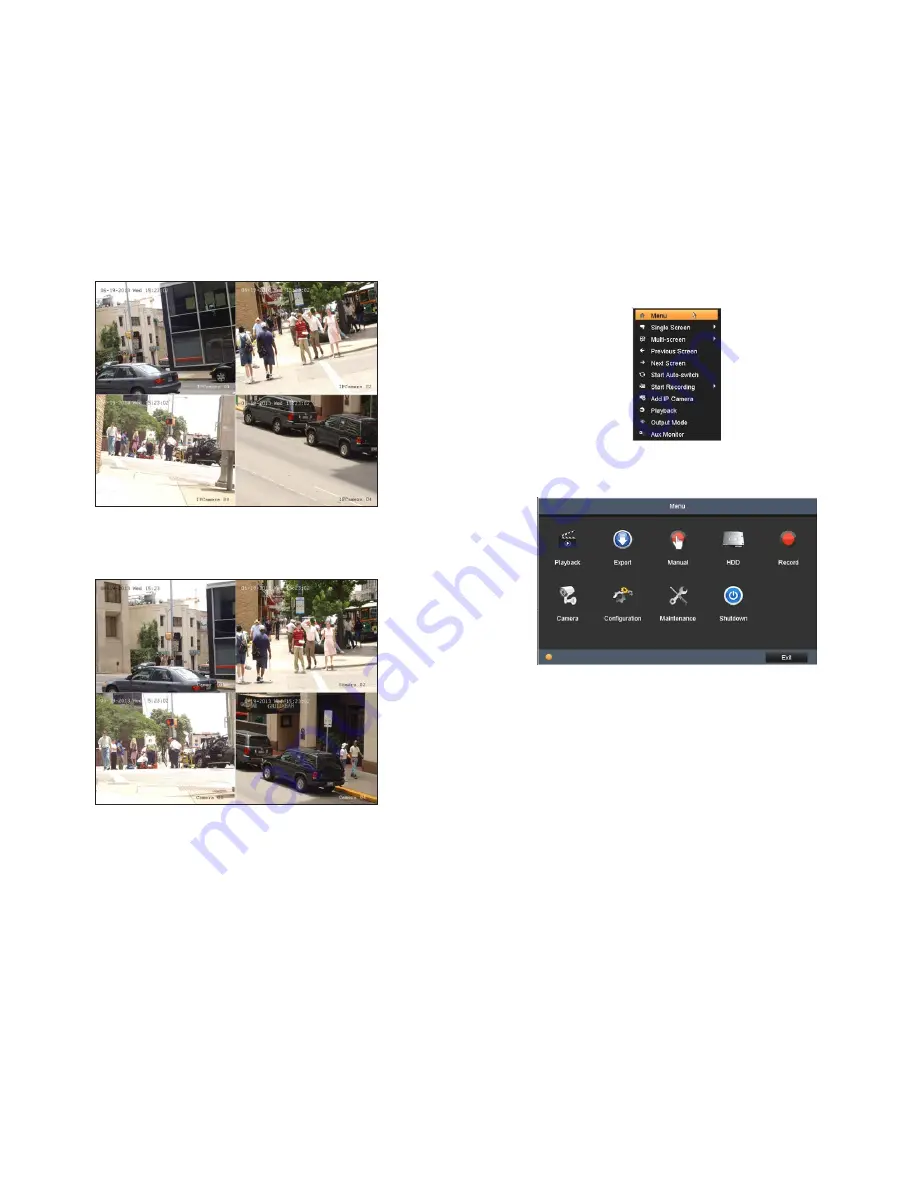
To open the Menu system from the Live View screen, right click anywhere in the screen, then select 

Menu

If ID Authentication is not disabled (see the 

Menu | Configuration | General

 settings), a login window will open. In the Login window, 

select a User Name with administrative privileges, enter its password, then click 

OK

NOTE

: A window of Menu icons will open. The default 

user “

admin”

 has the default password of “

1111”

For additional information about using your system, refer to the 

ALI-NVR5100P Series Embedded Network Video Recorder User Manual  

provided electronically with your system.  

Live View display

10.  While viewing video from each cameras in the 

Live View

 display, adjust the direction of each camera to aim it at its surveillance 

target. Follow the manufacturer’s recommended procedures for aiming the cameras. 

Live View display after camera adjustments

Step 4.  Access the Menu system

After the initial setup of your DVR using the Wizard, the Menus interface enables you to refine your configuration settings and expand the 
functionality of the system. To use most menus, the user must log into the DVR system, either locally or remotely, with administrative 
privileges.

Summary of Contents for ALI-NVR5100P Series

Page 1: ...d If the mouse is not detected the mouse may not be compatible with the NVR Please refer to the recommended device list from your provider This quick setup guide provides instructions to initially setup and use the ALI NVR5116P and ALI NVR5132P network video recorders NVRs For additional information on the extensive capabilities of your NVR refer to the ALI NVR5100PSeriesEmbeddedNetworkVideo Recor...

Page 2: ...l cabling from the NVR 2 Remove the NVR top cover Remove the two cover screws on the back of the chassis the slide the cover toward the back until it is free The operation of the mouse Action Effect Right click Live view Show menu Menu Exit current menu to upper level menu Left click Single click Live view Select channel and show the quick set menu Menu Select and enter Double click Live view Swit...

Page 3: ...prefer then click OK 2 The Setup Wizard can assist you in making important configuration settings in DVR Click Next button on the Wizard window to open the Login window NOTE Theconfigurationsettingspresentedin thesetupWizardcan also be madeandchanged using theMenu system Referto the ALI NVR5100P SeriesEmbeddedNetworkVideoRecorderUserManualprovidedelectronicallywithyoursystem 3 Locate the jumper as...

Page 4: ...preferable to setup the DVR with a fixed network settings if possible to assure the DVR has an unchanging IP address for remote login To enable fixed network settings un check the Enable DHCP box then edit the appropriate fields to change the settings Consult with your network administrator to determine the best network settings for your DVR When finished click Next 3 Enter the admin password in t...

Page 5: ... after you configured the network parameters The HDD management Wizard window will open If a new DVR is shipped with a pre configured HDD nothing needs to be done in this window If you installed an HDD or replaced the HDD select check the box for the HDD then click Init to setup the disk for the DVR NOTE Init will erase all data from the disk When the initialization is complete click Next to conti...

Page 6: ...t using your system refer to the ALI NVR5100PSeriesEmbeddedNetworkVideoRecorderUserManual provided electronically with your system LiveViewdisplay 10 While viewing video from each cameras in the Live View display adjust the direction of each camera to aim it at its surveillance target Follow the manufacturer s recommended procedures for aiming the cameras LiveViewdisplayaftercameraadjustments Step...

Page 7: ...nput 1 ch BNC 2 0 Vp p 1 kΩ Audio Output 2 ch BNC Linear 600 Ω Export Formats MP4 Ethernet 1x Gigabit RJ 45 self adaptive Ethernet interface 16 independent 10 100 Mbps PoE Ethernet interfaces 200 W max output USB 3x USB 2 0 Hard Drive Interface 4x SATA Hard Drive Capacity 4x HDDs max up to 4TB capacity per HDD eSATA 1x eSATA interface Serial Interface 1x RS 232 1x RS 485 Alarm Input 16 Alarm Outpu...

Reviews: