1
www.observint.com
ALI-NS2128R 8MP Vari-focal IP Turret Camera Quick Installation Guide
ALI-NS2128R_CQ
180904
The camera includes connectors for the following:
•
Ethernet
(required): The Ethernet drop cable can connect to a LAN extension cable from a
switch or Network Video Recorder. The camera can be powered across the LAN using power over
Ethernet (PoE) injection. See the
Specifications
section at the end of this document for power
requirements.
•
12 Vdc power input
(optional if PoE powered, required if not): If powering the camera
with a long power extension cable, refer to the tables at the end of this guide for wire gauge
requirements. Voltage input at the camera can be within the range 12 Vdc ± 25%.
•
Alarm IN/OUT, Audio IN/OUT
(optional): Connect these leads to auxiliary devices as needed.
The camera supports one alarm input, one alarm output, one audio input and one audio output.
Audio IN and OUT terminations require 3.5 mm standard mono audio plugs.
•
Ground
: A ground terminal is provided on the junction box for attaching an earth ground to the
camera. Follow local electrical codes for grounding procedures.
1.
Route a LAN extension cable from a network switch or Network Video Recorder to where the
camera will be installed.
2.
If the camera is not powered using PoE, route 12 Vdc power cables from an adequate power
source to the location where the camera will be installed. For long line power leads, refer to the
Wire Gauge Standards
and
12 Vdc Wire Gauge and Transmission Distance
tables at the end of this
document. Voltage input at the camera can be within the range 12 Vdc ± 25%.
3.
Install alarm input and out devices as needed, and then route wires from them to where the
camera will be installed. Alarm terminations for one input (NO or NC) and one output alarm
device (DC or AC) are screw-down connectors that accommodate bare wires.
4.
Install audio input and out devices as needed, and then route cables from them to where the
camera will be installed. Audio terminations in the camera are 3.5 mm standard mono plugs.
Step 2. Install the camera
Install microSD card
Install a microSD card in the camera to locally save alarm and status information, and locally record
video and video captures. Refer to the
Specifications
section for storage card requirements. To install the
card:
1.
Un-package the camera and lay it upside down on a clean, soft surface.
2.
Rotate the decorative ring to the left as shown in the drawing below, and then remove it from
the camera assembly.
Adjustment screw
Decorative ring
Adapter plate screw
3.
Loosen the adjustment screw shown above.
4.
Adjust the turret to access the maintenance panel cover.
Turret
Turret orientation
microSD card
5.
Use the L-wrench provided to remove the small maintenance panel cover. The cover conceals the
microSD card slot, RESET button and connector for BNC video test cable.
This document guides you through the basic steps to install and configure the ALI-NS2128R network
vari-focal turret camera. This camera features:
•
1/2.5" 3840 × 2160 pixel Progressive Scan CMOS
•
2.8 ~ 12 mm motorized vari-focal lens
•
H.265, H.265+, H.264+, H.264 video compression
•
120 dB Wide Dynamic Range
•
Back light compensation (BLC) / 3D dynamic noise reduction (DNR) / region of interest (ROI)
•
IP67, IK10 vandal proof rated, TVS 2000V Lightning Protection
•
Compatible with the ALI-AF12 Flange Adapter
•
4 behavior analyses and face detection
For more information, refer to these documents - available from your equipment vendor:
•
ALIBI™ Tools Utility Installation and User Manual
•
ALIBI™ Witness 2.0 r3 App for Android or iOS Quick Start Guide
•
ALIBI™ IP Camera Firmware Version 5.4 User Manual
(or later) provided at:
AlibiSecurity.com/resources
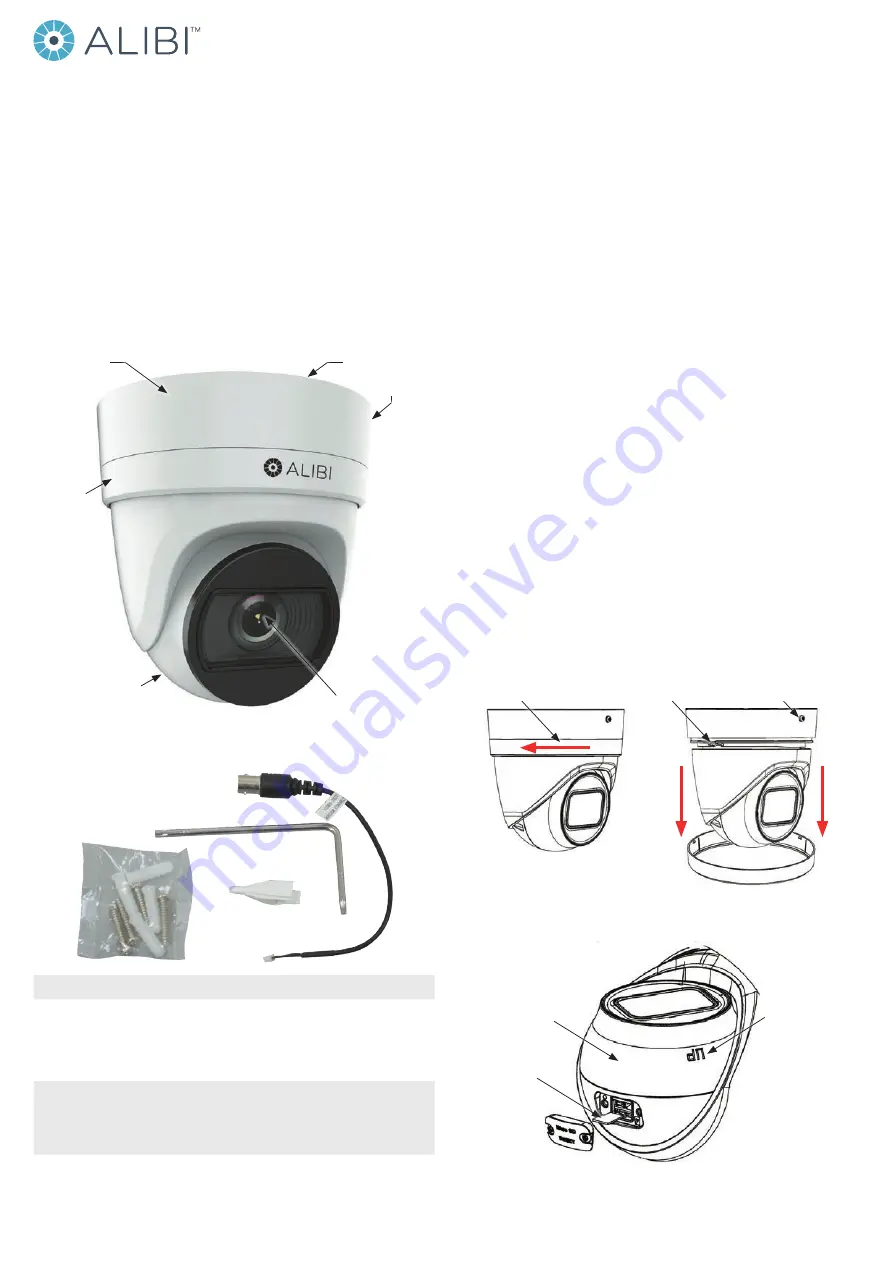
Decorative
ring
Lens
Turret
Adapter plate and
cable connectors
Camera base
assembly
Side inlet
What’s in the box
Your camera includes the items shown below.
Mounting
hardware
Insertion tool
Security L-wrench
BNC video
test cable
NOTE
Cleaning
: If needed, clean the camera lens with a soft cloth and isopropyl alcohol.
Step 1. Route wiring to the camera
Interface cables can be routed into the camera either through the adapter plate (through the mounting
surface) or through the side inlet of the camera.
NOTE
When selecting a mounting location for the camera
• Make sure that there are no reflective surfaces near to the camera lens. IR light from the camera may
bounce back onto the lens causing reflections.
• Determine how interface wiring are routed into the camera. The adapter plate can attached to a
surface, or attached to a single-or double-gang electrical box.


