background image


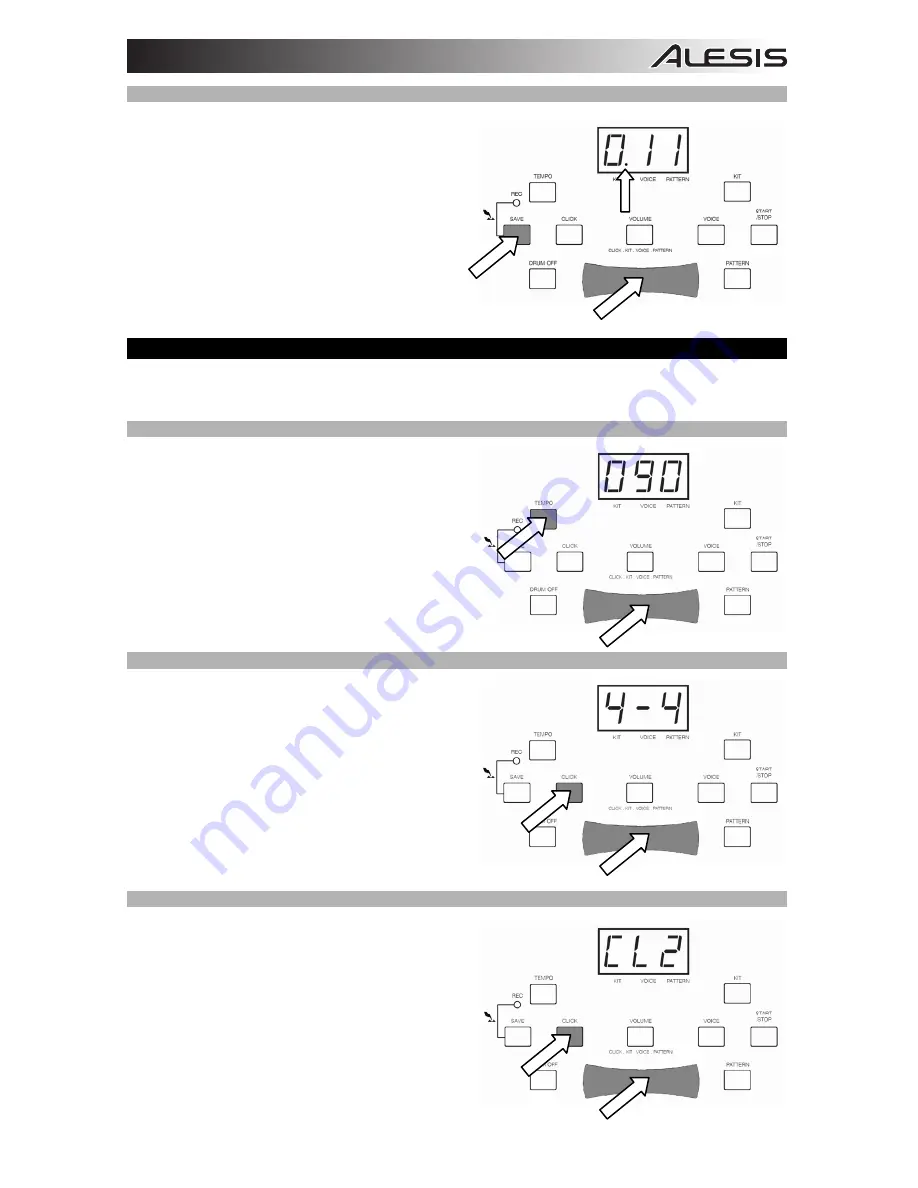
 SAVING KITS 

 
You can save a Kit to any of the five User Kits (11 – 
15).  To save a Kit: 
 
1.


Press SAVE to enter Kit Save Mode.  The LCD 
will display the current Kit number and the Kit 
Indicator will light up. 

2.


Use VALUE +/- to select a User Kit (11 – 15).  
User Kit numbers will flash on the LCD. 

3.


Press SAVE to save the Kit to that User Kit 
number.  (This includes all trigger voices and 
volumes.) 


 METRONOME 

 
The DM6 module has a built-in metronome feature, for which you can adjust the tempo, time signature, 
volume, and "click" sound. 
 

 ADJUSTING THE TEMPO 

 
To adjust the tempo of a pattern: 

1.


Select a Pattern (see PATTERNS section).  

2.


Press TEMPO to enter Tempo Adjustment Mode.  
The LCD will display the current tempo value for 
that Pattern.  The metronome's range is 30 – 280 
BPM ("beats per minute"). 

3.


Use VALUE +/- to adjust the tempo of that 
Pattern.  You can press + and – simultaneously 
to return to the Pattern's default tempo. 


 SELECTING THE TIME SIGNATURE & ADJUSTING THE VOLUME 

 
To select the time signature the metronome will follow: 

1.


Press CLICK to activate the metronome.  The 
LCD will display the current time signature. 


There are nine different time signatures to 
choose from: 1/4, 2/4, 3/4, 4/4, 5/4, 6/4, 7/4, 3/8, 
and 6/8. 

2.


Use VALUE +/- to select a time signature. 

 
The Click Indicator will flash in time with the beat of 
your selected Pattern, whether or not the metronome 
is activated (i.e., audible). 


 SELECTING A METRONOME SOUND 

 
To select the "click" sound the metronome will make: 

1.


Press and hold CLICK.  The LCD will display 
"CL1," "CL2," "CL3," or "CL4." 

2.


Use VALUE +/- to select a click sound.  You can 
choose from a standard metronome "click" (the 
default), a "beep," a cowbell, or a voice. 

Summary of Contents for DM6 SESSION KIT

Page 1: ...DM6 DRUM MODULE MODULE OVERVIEW ENGLISH 1 5 VISTA DEL MÓDULO ESPAÑOL 6 CARACTERISTIQUES DU MODULE FRANÇAIS 7 OBERSEITE DER MODUL DEUTSCH 8 PANORAMICA DI MODULO ITALIANO 9 ...

Page 2: ......

Page 3: ... Kit to a User Kit Press and hold to enter Record Mode REAR PANEL FEATURES 1 POWER IN Connect the power adapter here then connect the adapter to wall power 2 POWER SWITCH Turns the module on or off 3 HEADPHONES You can connect a set of 1 8 headphones to this output 4 STEREO OUTPUT You can connect an optional speaker system recording input etc to this 1 8 output 5 MIX INPUT Connect the output of an...

Page 4: ...put format 1 Press PATTERN to enter Pattern Select Mode 2 Press VALUE to select P N internal format the default setting or N GM format KITS SELECTING A KIT The DM6 module comes with 10 Preset Kits 001 010 and 5 User Kits 011 015 To select a kit 1 Press KIT to enter Kit Select Mode The LCD will display the current Kit number and the Kit Indicator will light up 2 Use VALUE to select a Kit 3 To adjus...

Page 5: ...ern The metronome s range is 30 280 BPM beats per minute 3 Use VALUE to adjust the tempo of that Pattern You can press and simultaneously to return to the Pattern s default tempo SELECTING THE TIME SIGNATURE ADJUSTING THE VOLUME To select the time signature the metronome will follow 1 Press CLICK to activate the metronome The LCD will display the current time signature There are nine different tim...

Page 6: ...l light up and the LCD will display the current volume value for that pattern Use VALUE to adjust the volume of that Pattern 5 To adjust the Pattern s tempo press TEMPO to enter Tempo Adjustment Mode The LCD will display the current tempo value for that Pattern 30 280 BPM or beats per minute Use VALUE to adjust the tempo of that Pattern Press and simultaneously to return to the Pattern s default t...

Page 7: ... To stop the recording and return to Pattern Select Mode press START STOP DRUM OFF You can press DRUM OFF to mute the drum sounds of the accompanying Pattern This can be a useful practice tool when playing along with Patterns The Drum Off Indicator will light up and you will still be able to trigger all pads cymbals and pedals in this mode To unmute the Pattern simply press DRUM OFF again and the ...

Page 8: ...ario Pulse y retenga este botón para entrar al modo de grabación CARACTERÍSTICAS DEL PANEL TRASERO 1 ENTRADA DE ALIMENTACIÓN Conecte aquí el adaptador de alimentación y luego el adaptador al tomacorriente de pared 2 INTERRUPTOR DE ENCENDIDO Enciende y apaga el módulo 3 AURICULARES Puede conectar a esta salida un juego de auriculares de 1 8 4 SALIDA ESTÉREO Es posible conectar a esta entrada de 1 8...

Page 9: ...ome 13 SAVE REC Lorsqu enfoncée une fois cette touche permet de sauvegarder le jeu de batterie en cours comme jeux de batterie utilisateur User Kit Lorsque maintenue enfoncée cette touche permet de passer au mode d enregistrement CARACTÉRISTIQUES DU PANNEAU ARRIÈRE 1 PRISE D ALIMENTATION Branchez le câble d alimentation avant de le brancher à une prise de courant 2 INTERRUPTEUR D ALIMENTATION Touc...

Page 10: ...rückt um den Aufnahmemodus zu aktivieren FEATURES AUF DER RÜCKSEITE 1 POWER IN Schließen Sie den Stromadapter hier an und verbinden ihn dann mit dem Netzstrom 2 POWER SWITCH Schaltet das Modul ein oder aus 3 HEADPHONES Schließen Sie hier Ihre 3 5 mm Kopfhörer an 4 STEREO OUTPUT Sie können an diesen 3 5 mm Ausgang ein optionales Lautsprechersystem eine Aufnahmequelle etc anschließen 5 MIX INPUT Ver...

Page 11: ...e su questo comando per entrare in modalità di registrazione CARATTERISTICHE PANNELLO POSTERIORE 1 INGRESSO POWER IN Collegare l adattatore di alimentazione a questo livello quindi collegarlo ad una presa elettrica a parete 2 INTERRUTTORE DI ALIMENTAZIONE POWER Accende e spegne il modulo 3 CUFFIE Collegare a questa uscita cuffie da 1 8 4 USCITA STEREO A questa uscita da 1 8 è possibile collegare u...

Page 12: ... tom pads Voices 108 voices Drum Kits 10 preset kits 5 user kits Patterns 40 preset patterns 1 user pattern Display LCD Connections Headphones USB Stereo Output Mix Input Power Trigger Input connection for cable snake 25 pin D sub to 8 TS 1 4 and 1 TRS 1 4 cable Power Supply AC adapter 9V included www alesis com 7 51 0281 B ...

Reviews: