background image

www.aleratec.com

9

Using the 1:1 HDD Cruiser 

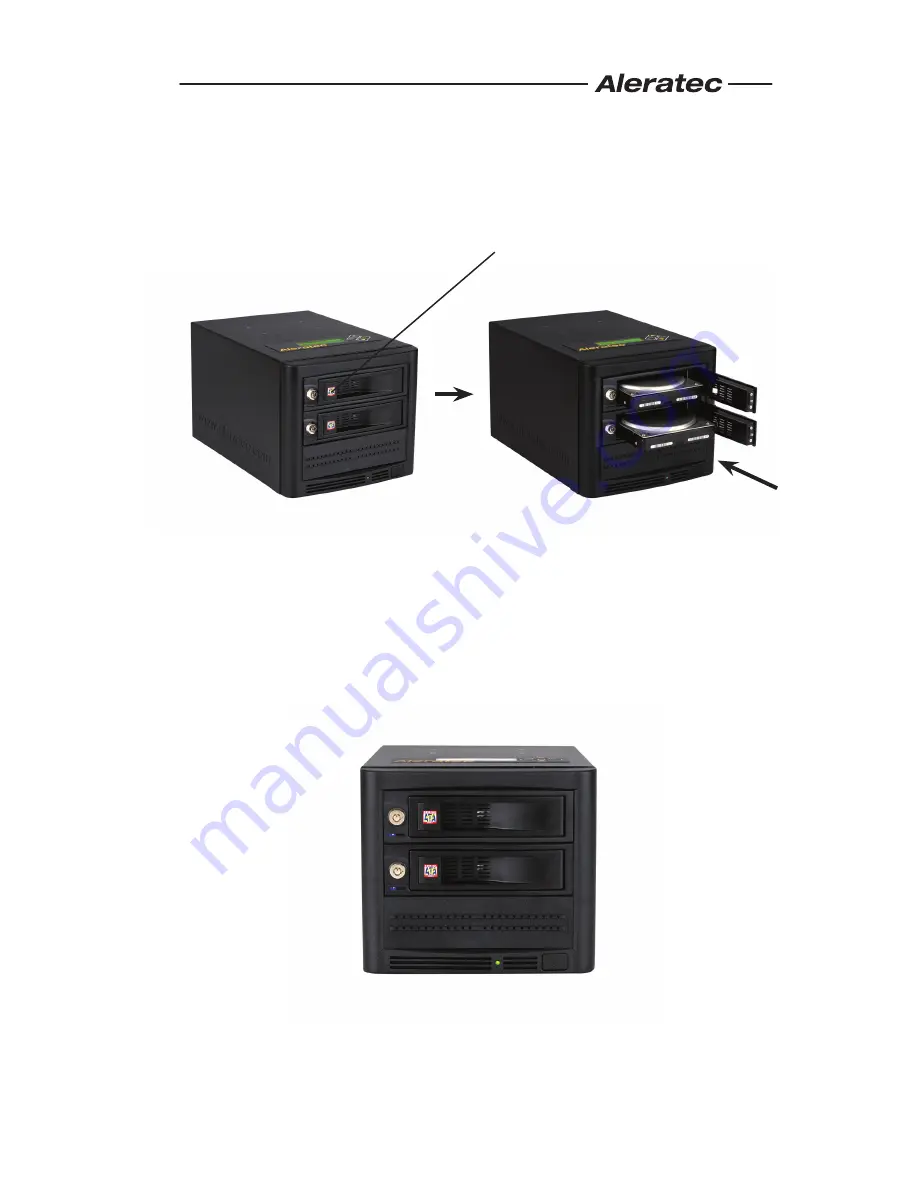
Loading the Hard Drives

1.  Open the drive tray doors by lifting the tab on the left side of each drive bay 

you wish to use.  

2.  Take the Hard Disc Drive (HDD) and align the drive’s SATA plug to the lower 

right hand side of the drive bay. 

3.  Slide the HDD into the drive bay until it stops. The drive will still be about 1 

inch outside of the bay. When the door is closed it will push and plug the HDD 

into the duplicator. 

4.  Swing the drive bay door closed and press the left side of the door until the tab 

latches. When it latches, a click can be felt and heard. 

Note: If you are duplicating, the source hard disc drive goes in the top bay.

Summary of Contents for 1:1 HDD Cruiser

Page 1: ...QUICK START GUIDE Aleratec 1 1 HDD Cruiser Part No 350103...

Page 2: ...the User Guide on the CD included This Quick Start Guide will lead you step by step through the basic operation procedures of your 1 1 HDD Cruiser We at Aleratec appreciate your selection of our prod...

Page 3: ...l 2 5 SATA HDD Adapter 2 pack available Aleratec Part Number 350106 Key Items on the 1 1 HDD Cruiser Note Choose a Good Location 1 Allow adequate clearance for moving parts 2 Do not place near heat so...

Page 4: ...y handle tab is used to open the individual drive bays 3 Drive LEDs Each HDD bay has a blue power light that will be on when there is an HDD properly inserted in the drive bay Each HDD bay has an oran...

Page 5: ...D display shows all functions and messages 2 ENT button is used to execute a selected function or enter a menu 3 ESC button is used to cancel a selected function or exit a menu 4 UP arrow is used to s...

Page 6: ...wing Installation Avoid placing the 1 1 HDD Cruiser in a location subject to High humidity High temperature Excessive dust Mechanical vibration Direct sunlight Electromagnetic radiation Transportation...

Page 7: ...Figure 1 shows the firmware version Figure 2 shows the memory initialization Figure 3 shows the scanning of the drives Figure 4 shows the number of drives loaded Figure 5 shows the first function ENT...

Page 8: ...Setup function is a hidden menu To access this menu press ESC for 3 seconds After you have completed any desired adjustments press ESC to exit Advanced Setup ENT 1 Copy HDD ESC ENT ESC 2 Compare HDD E...

Page 9: ...ubfunctions The Setup menu has nine 9 subfunctions These are 8 03 Startup Menu 8 04 Auto Compare 8 05 Copy with Size 8 06 Button Sound 8 07 Device Info 8 08 System Info 8 09 Fast Copy ENT ESC 8 Setup...

Page 10: ...subfunctions These are 10 01 Detect HDD Delay 10 02 Read Error Skip 10 03 Update Firmware 10 04 Compare Firmware 10 05 Quick Erase HDD 10 06 H W Diagnostic 10 07 Load Default 10 08 Link Option 10 09...

Page 11: ...he lower right hand side of the drive bay 3 Slide the HDD into the drive bay until it stops The drive will still be about 1 inch outside of the bay When the door is closed it will push and plug the HD...

Page 12: ...rive tray doors by pulling the handle tab on the left side of each drive tray door Note Do not attempt to remove the hard drive if the drive activity LED is on 2 To disengage the HDD swing the drive t...

Page 13: ...ne 1 818 678 0484 Technical Support Group can be reached 8 00 AM to 5 00 PM Pacific Time Monday through Friday excluding U S holidays Please try to call from a phone near your computer system Access i...

Page 14: ...Notes www aleratec com...

Page 15: ...Notes www aleratec com...

Page 16: ...Document Number 9299060_ENG_Rev J Copyright 2010 Specifications subject to change without notice Aleratec Inc 9851 Owensmouth Avenue Chatsworth CA 91311 U S A www aleratec com...

Reviews: