21
Installation Guide: 601, 602, and 604 Routers
Installing the OmniAccess 601, OmniAccess 602, and OmniAccess 604 Router
The OmniAccess 601, OmniAccess 602, and OmniAccess 604 router can be installed on a table
top, in a Telco equipment rack (using the optional rack-mounting tray), or on a vertical surface
(using the optional wall-mounting assembly). The router ships with a Console cable. You will
need to obtain additional cables for your specific application. Refer to Figure 8 and Figure 9.
The illustrations in this section use a Model OmniAccess 602 to show how the router is
connected. The backplanes for the Model OmniAccess 601 and Model OmniAccess 604 are
slightly different but use the same port labeling conventions. If you don’t see the port
identified in an illustration below, refer to the backplane illustration for your router model in
Product Introduction.
CAUTION:
Do not block the cooling vents on the top of the unit.
NOTE:
For problem-free operation, the router should be located in an area with adequate ventilation.
Table Top Installation
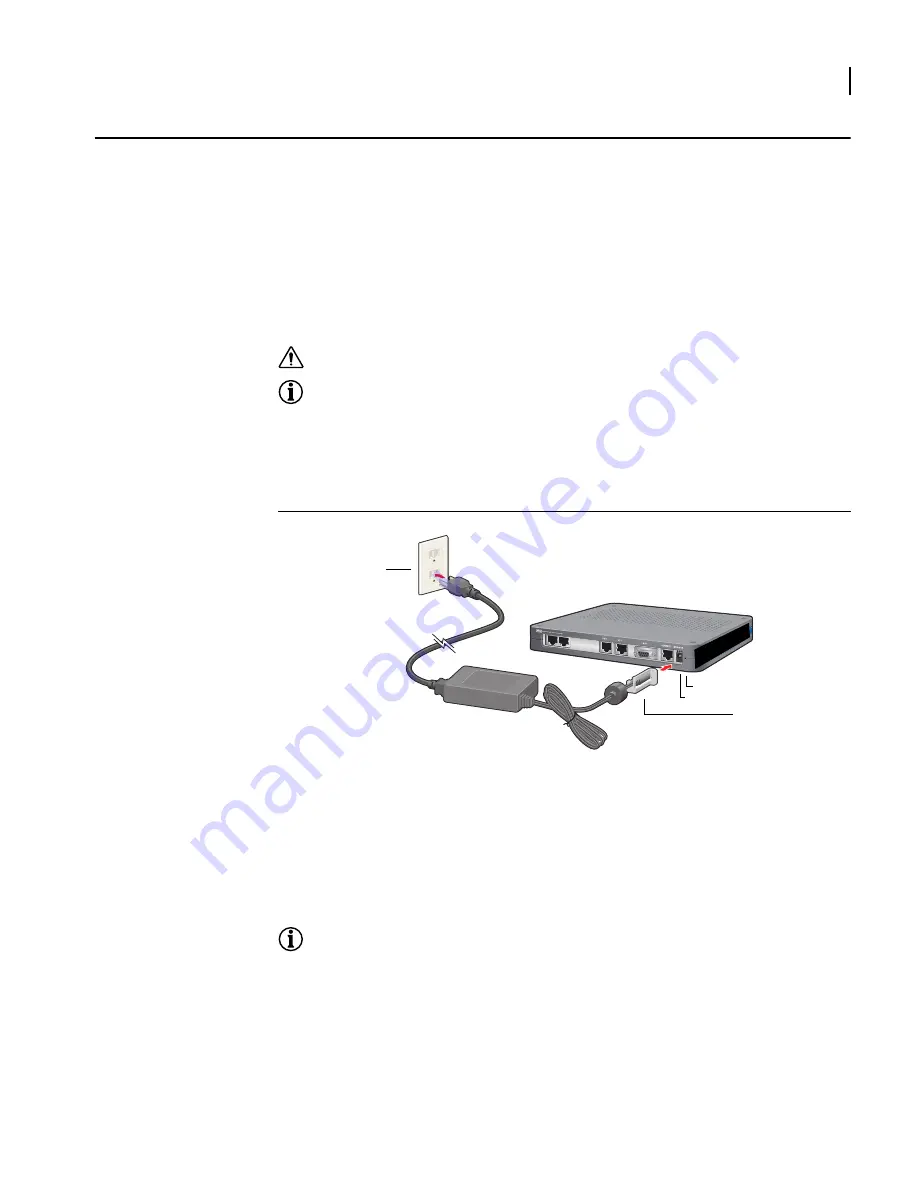
To install the OmniAccess 601, OmniAccess 602, and OmniAccess 604 for operation on a table
top, follow this procedure. Refer to Figure 14 (which shows a Model OmniAccess 602).
Figure 14 Table Top Installation
1
Place the unit on the table surface.
2
Insert the DC power cable into the DC input jack on the front of the unit.
3
Attach the cable retainer bracket behind the molded strain relief on the power supply
cable near the DC input jack.
4
Engage and secure the captive screw on the retainer in the threaded hole adjacent to the
input jack on the router.
5
Connect the appropriate ends of the AC power cord to the power supply and a
110/120 VAC outlet.
NOTE:
Ensure that the cables are router out of the way of foot traffic.
110/120 VAC Outlet
Cable Retainer
Threaded Hole
12 VDC Port


